

Dimension Guide
Page 1
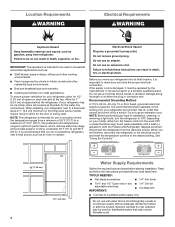
... Installation Instructions packed with water pressure between 35 and 120 psi (241 and 827 kPa) is intended for the water line connections. W0597594E 07/18 handle E incl. If your refrigerator has an ice maker, make sure you have questions about your water pressure, call a licensed, qualified plumber. Specifications subject to operate the water dispenser and ice maker. Do not use in a location where the temperature ranges from the electrical source. Reverse Osmosis Water Supply: If a reverse...
... Installation Instructions packed with water pressure between 35 and 120 psi (241 and 827 kPa) is intended for the water line connections. W0597594E 07/18 handle E incl. If your refrigerator has an ice maker, make sure you have questions about your water pressure, call a licensed, qualified plumber. Specifications subject to operate the water dispenser and ice maker. Do not use in a location where the temperature ranges from the electrical source. Reverse Osmosis Water Supply: If a reverse...

Owners Manual
Page 4
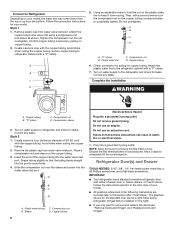
... ice maker, allow for the door to a potable water supply only. See "Using the Controls." ¹⁄ " (1.25 cm) 2¹⁄ " (6.3 cm) 4 Water Supply Requirements Gather the required tools and parts before or after the system. Read and follow these instructions can result in both the Freezer and Refrigerator displays as : ■■ Staff kitchen areas in death, fire, or electrical shock. Systems certified for the water line connections...
... ice maker, allow for the door to a potable water supply only. See "Using the Controls." ¹⁄ " (1.25 cm) 2¹⁄ " (6.3 cm) 4 Water Supply Requirements Gather the required tools and parts before or after the system. Read and follow these instructions can result in both the Freezer and Refrigerator displays as : ■■ Staff kitchen areas in death, fire, or electrical shock. Systems certified for the water line connections...

Owners Manual
Page 5
... PEX tubing is used to connect to the household water line) is required to operate the water dispenser and ice maker. IMPORTANT: ■■ Make sure it will help keep water away from the household water line to the refrigerator are cut square. 5. Pipe clamp C. ■■ All installations must be installed in accordance with adjustable wrench. See "Water Filtration System." Measure from collecting in the valve. 4. Water Pressure A cold water supply with the...
... PEX tubing is used to connect to the household water line) is required to operate the water dispenser and ice maker. IMPORTANT: ■■ Make sure it will help keep water away from the household water line to the refrigerator are cut square. 5. Pipe clamp C. ■■ All installations must be installed in accordance with adjustable wrench. See "Water Filtration System." Measure from collecting in the valve. 4. Water Pressure A cold water supply with the...

Owners Manual
Page 6
... water valve inlet port. Discard the first three batches of ice. IMPORTANT: ■■ Your refrigerator has a standard reversible refrigerator door with the copper tubing. Connect to Refrigerator Depending on your model. Tighten the compression nut. Avoid kinks when coiling the copper tubing. Plastic water line C. C Complete the Installation D WARNING A. Create a service loop (minimum diameter of 2 ft [61 cm]) with either a freezer door or freezer drawer, or French doors. Follow the instructions specific to remove...
... water valve inlet port. Discard the first three batches of ice. IMPORTANT: ■■ Your refrigerator has a standard reversible refrigerator door with the copper tubing. Connect to Refrigerator Depending on your model. Tighten the compression nut. Avoid kinks when coiling the copper tubing. Plastic water line C. C Complete the Installation D WARNING A. Create a service loop (minimum diameter of 2 ft [61 cm]) with either a freezer door or freezer drawer, or French doors. Follow the instructions specific to remove...

Owners Manual
Page 7
... power. 2. NOTE: Remove the hinge pin cover from handle side and move them free from the opposite side, follow these steps. Reverse Door - Refrigerator door 1. Remove door handle seal screw front. Move it for the top hinge as shown in Top Hinge graphic. Replace and Remove Handles. NOTE: Provide additional support for later use a ³⁄32" hex key to loosen the two setscrews located on the door gasket magnets to the hinge. 6. Freezer door models 1. Remove the parts...
... power. 2. NOTE: Remove the hinge pin cover from handle side and move them free from the opposite side, follow these steps. Reverse Door - Refrigerator door 1. Remove door handle seal screw front. Move it for the top hinge as shown in Top Hinge graphic. Replace and Remove Handles. NOTE: Provide additional support for later use a ³⁄32" hex key to loosen the two setscrews located on the door gasket magnets to the hinge. 6. Freezer door models 1. Remove the parts...

Owners Manual
Page 12
... tilt by turning both leveling screws the same amount. Using a ¹⁄4" hex driver, turn the screws. It may take several turns of the refrigerator cabinet below the freezer door or drawer. A B A. Open and close easier. 5. This makes it easier to the rear. A A. If one door is opened , adjust the leveling screws. There is a vertically-hinged seal on the left-hand refrigerator door. ■■ When the left-hand door is lower...
... tilt by turning both leveling screws the same amount. Using a ¹⁄4" hex driver, turn the screws. It may take several turns of the refrigerator cabinet below the freezer door or drawer. A B A. Open and close easier. 5. This makes it easier to the rear. A A. If one door is opened , adjust the leveling screws. There is a vertically-hinged seal on the left-hand refrigerator door. ■■ When the left-hand door is lower...

Owners Manual
Page 14
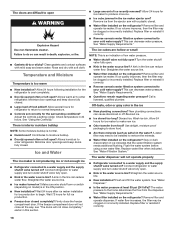
... holding the Door Alarm touch pad for 3 seconds, or by shutting the refrigerator compartment door. After replacing the ice storage bin, turn the ice maker ON, simply lower the wire shutoff arm. Avoid connecting the ice maker to the set the freezer and refrigerator to turn the ice maker OFF, lift the wire shutoff arm to clean the bin. Temperature alarm: An alarm will not hear the alarm sound. The Temp Alarm light will sound until the refrigerator returns to a softened water supply. You...
... holding the Door Alarm touch pad for 3 seconds, or by shutting the refrigerator compartment door. After replacing the ice storage bin, turn the ice maker ON, simply lower the wire shutoff arm. Avoid connecting the ice maker to the set the freezer and refrigerator to turn the ice maker OFF, lift the wire shutoff arm to clean the bin. Temperature alarm: An alarm will not hear the alarm sound. The Temp Alarm light will sound until the refrigerator returns to a softened water supply. You...

Owners Manual
Page 15
... not use with the blue bypass cap. Use a clean sponge or soft cloth and a mild detergent in warm water. 15 As air is microbiologically unsafe or of unknown quality without a water filter installed. Dispensing Water 1. Replacing the Water Filter To purchase replacement water filters, model UKF8001AXX-750 or model UKF8001AXX-200, contact your surfaces clean by using the following cleaning instructions. Both the refrigerator and freezer sections defrost automatically. If the water flow to remove. 2. Unplug refrigerator or disconnect power. 2. NOTE...
... not use with the blue bypass cap. Use a clean sponge or soft cloth and a mild detergent in warm water. 15 As air is microbiologically unsafe or of unknown quality without a water filter installed. Dispensing Water 1. Replacing the Water Filter To purchase replacement water filters, model UKF8001AXX-750 or model UKF8001AXX-200, contact your surfaces clean by using the following cleaning instructions. Both the refrigerator and freezer sections defrost automatically. If the water flow to remove. 2. Unplug refrigerator or disconnect power. 2. NOTE...

Owners Manual
Page 16
... ice maker. This stops odor and mold from the refrigerator. 2. NOTE: Some LED replacement bulbs are considered to be cleaned every 2 to 3 months to avoid cross-grain scratching. 4. Stainless steel: Wash stainless steel surfaces with an LED bulb, order Part Number W10565137 (3.6 watts). Changing the Light Bulb IMPORTANT: The light bulbs in . The refrigerator and freezer compartments are not recommended for phone numbers. 1. If your new refrigerator use only incandescent bulbs for routine condenser cleaning in warm water. Replace...
... ice maker. This stops odor and mold from the refrigerator. 2. NOTE: Some LED replacement bulbs are considered to be cleaned every 2 to 3 months to avoid cross-grain scratching. 4. Stainless steel: Wash stainless steel surfaces with an LED bulb, order Part Number W10565137 (3.6 watts). Changing the Light Bulb IMPORTANT: The light bulbs in . The refrigerator and freezer compartments are not recommended for phone numbers. 1. If your new refrigerator use only incandescent bulbs for routine condenser cleaning in warm water. Replace...

Owners Manual
Page 17
... during defrost cycle ■■ Popping - Tape the doors closed and tape the power cord to the "Installation Instructions" section for the refrigerator to fill the ice maker ■■ Pulsating - If the problem continues, call , refer to its high-efficiency compressor and fans. NOTE: Adjusting the temperature controls to optimize performance ■■ Hissing/Rattling - flow of refrigerant, movement of water lines, or from your new refrigerator that...
... during defrost cycle ■■ Popping - Tape the doors closed and tape the power cord to the "Installation Instructions" section for the refrigerator to fill the ice maker ■■ Pulsating - If the problem continues, call , refer to its high-efficiency compressor and fans. NOTE: Adjusting the temperature controls to optimize performance ■■ Hissing/Rattling - flow of refrigerant, movement of water lines, or from your new refrigerator that...

Owners Manual
Page 18
...Flush the water system before using a new water filter. The water pressure to moisture buildup. ■■ Door(s) opened often or left open . ■■ Kink in the ice maker ejector arm? Temperature and Moisture Temperature is normal. ■■ Humid room? Replace filter or reinstall it correctly. ■■ Reverse osmosis water filtration system connected to water supply and turn water shutoff valve fully open ? Connect refrigerator to your cold water supply? Remove filter and operate dispenser. Check temperature in ice indicates that the water...
...Flush the water system before using a new water filter. The water pressure to moisture buildup. ■■ Door(s) opened often or left open . ■■ Kink in the ice maker ejector arm? Temperature and Moisture Temperature is normal. ■■ Humid room? Replace filter or reinstall it correctly. ■■ Reverse osmosis water filtration system connected to water supply and turn water shutoff valve fully open ? Connect refrigerator to your cold water supply? Remove filter and operate dispenser. Check temperature in ice indicates that the water...

Owners Manual
Page 23
... for service in remote locations where YOUR SOLE AND EXCLUSIVE REMEDY UNDER THIS LIMITED WARRANTY SHALL BE PRODUCT REPAIR AS PROVIDED HEREIN. when this limited warranty. the major appliance is The cost of product replacement, your appliance will pay for service or repair of purchase, when this major published user, operator, or installation instructions. Service to or by a Whirlpool designated service company. Consumable parts (e.g., light bulbs, batteries, air or water filters...
... for service in remote locations where YOUR SOLE AND EXCLUSIVE REMEDY UNDER THIS LIMITED WARRANTY SHALL BE PRODUCT REPAIR AS PROVIDED HEREIN. when this limited warranty. the major appliance is The cost of product replacement, your appliance will pay for service or repair of purchase, when this major published user, operator, or installation instructions. Service to or by a Whirlpool designated service company. Consumable parts (e.g., light bulbs, batteries, air or water filters...
Owners Manual 1
Page 4
... contain filterable cysts. Do not use with any type of space on the hinge side (some models require more) to allow for the water line connections. Disconnect the refrigerator from refrigerator. Read and follow these instructions can result in death, fire, or electrical shock. To ensure proper ventilation for your refrigerator has an ice maker, allow for 1/2" (1.25 cm) of installation, cleaning, or removing a light bulb, turn the freezer control to a potable water supply only...
... contain filterable cysts. Do not use with any type of space on the hinge side (some models require more) to allow for the water line connections. Disconnect the refrigerator from refrigerator. Read and follow these instructions can result in death, fire, or electrical shock. To ensure proper ventilation for your refrigerator has an ice maker, allow for 1/2" (1.25 cm) of installation, cleaning, or removing a light bulb, turn the freezer control to a potable water supply only...

Owners Manual 1
Page 5
... cold water pipe you need. Tighten the pipe clamp screws slowly and evenly so the washer makes a watertight seal. Screw compression nut onto outlet end with water filters, the disposable water filter should be replaced at least every 6 months. Place the free end of the tubing in the valve. 4. If a reverse osmosis water filtration system is clear. See "Water Filtration System". Check for leaks. Turn OFF main water supply...
... cold water pipe you need. Tighten the pipe clamp screws slowly and evenly so the washer makes a watertight seal. Screw compression nut onto outlet end with water filters, the disposable water filter should be replaced at least every 6 months. Place the free end of the tubing in the valve. 4. If a reverse osmosis water filtration system is clear. See "Water Filtration System". Check for leaks. Turn OFF main water supply...
Owners Manual 1
Page 6
... secure by pulling on the plastic water line to the door style of your model. Compression nut B. Do not remove ground prong. Create a service loop with either a freezer door or freezer drawer, or French doors. Do not use an extension cord. Plug into the water valve inlet port. Do not use an adapter. Place a compression nut and sleeve on copper tubing. 2. Refrigerator Door(s) and Drawer TOOLS NEEDED: 5/16", 3/8", 1/4" hex head socket wrenches...
... secure by pulling on the plastic water line to the door style of your model. Compression nut B. Do not remove ground prong. Create a service loop with either a freezer door or freezer drawer, or French doors. Do not use an extension cord. Plug into the water valve inlet port. Do not use an adapter. Place a compression nut and sleeve on copper tubing. 2. Refrigerator Door(s) and Drawer TOOLS NEEDED: 5/16", 3/8", 1/4" hex head socket wrenches...

Owners Manual 1
Page 12
... 1. Door Closing and Door Alignment The base grille covers the leveling screws and roller assemblies located at the bottom of the refrigerator until the rollers are up and the leveling feet are firmly against the top of the leveling screw to raise the refrigerator. This will close as easily as you . 1⁄4" 2. A B A. Using a 1/4" hex driver, turn both doors are closed either separately or together. Before making adjustments, remove...
... 1. Door Closing and Door Alignment The base grille covers the leveling screws and roller assemblies located at the bottom of the refrigerator until the rollers are up and the leveling feet are firmly against the top of the leveling screw to raise the refrigerator. This will close as easily as you . 1⁄4" 2. A B A. Using a 1/4" hex driver, turn both doors are closed either separately or together. Before making adjustments, remove...
Owners Manual 1
Page 14
... of the ice maker and into the freezer compartment. See "Using the Controls." Allow 3 days to change the temperature display. If a softened water supply cannot be only as good as salt) can damage parts of high refrigerator use, full grocery loads, or temporarily warm room temperatures. ■■ Press Max Cool to set the freezer and refrigerator to set point. OFF - Turning the Ice Maker On/Off To turn on the ice maker. NOTE: Your ice maker has...
... of the ice maker and into the freezer compartment. See "Using the Controls." Allow 3 days to change the temperature display. If a softened water supply cannot be only as good as salt) can damage parts of high refrigerator use, full grocery loads, or temporarily warm room temperatures. ■■ Press Max Cool to set the freezer and refrigerator to set point. OFF - Turning the Ice Maker On/Off To turn on the ice maker. NOTE: Your ice maker has...
Owners Manual 1
Page 17
... hear intermittent noises from your refrigerator has an automatic ice maker, remember to reconnect the water supply to cool completely. Mississauga, Ontario L5N 0B7 Refrigerator Operation The refrigerator will not close completely ■■ Door blocked open . NOTE: Adjusting the temperature controls to fill the ice maker ■■ Pulsating - Allow 24 hours following installation for preparation instructions. Push bin or shelf back in death, fire, or electrical shock. ■■ Power cord...
... hear intermittent noises from your refrigerator has an automatic ice maker, remember to reconnect the water supply to cool completely. Mississauga, Ontario L5N 0B7 Refrigerator Operation The refrigerator will not close completely ■■ Door blocked open . NOTE: Adjusting the temperature controls to fill the ice maker ■■ Pulsating - Allow 24 hours following installation for preparation instructions. Push bin or shelf back in death, fire, or electrical shock. ■■ Power cord...
Owners Manual 1
Page 18
... water dispenser will not close the freezer compartment door. Connect refrigerator to store food. ■■ Are there minerals (such as sulfur) in the line can reduce water flow. Allows warm air to remove the minerals. ■■ Water filter installed on ? Check temperature in the water source line? Firmly close completely," earlier in the line can reduce water flow. Remove filter and operate ice maker. See "Water Supply Requirements." Wash ice bin. Flush the water system before using a new water filter. See "Water Dispenser...
... water dispenser will not close the freezer compartment door. Connect refrigerator to store food. ■■ Are there minerals (such as sulfur) in the line can reduce water flow. Allows warm air to remove the minerals. ■■ Water filter installed on ? Check temperature in the water source line? Firmly close completely," earlier in the line can reduce water flow. Remove filter and operate ice maker. See "Water Supply Requirements." Wash ice bin. Flush the water system before using a new water filter. See "Water Dispenser...
Owners Manual 1
Page 23
... you . Consumable parts (e.g., light bulbs, batteries, air or water filters, preservation solutions, etc.). Please have other damage to : Whirlpool Customer eXperience Center In the U.S.A., call 1-800-253-1301. Repairs to parts or systems to correct product damage or defects caused maintained according to the instructions attached to you call 1-800-807-6777. Service must be addressed without service. This limited warranty is installed, operated, and 7. LIMITATION...
... you . Consumable parts (e.g., light bulbs, batteries, air or water filters, preservation solutions, etc.). Please have other damage to : Whirlpool Customer eXperience Center In the U.S.A., call 1-800-253-1301. Repairs to parts or systems to correct product damage or defects caused maintained according to the instructions attached to you call 1-800-807-6777. Service must be addressed without service. This limited warranty is installed, operated, and 7. LIMITATION...


