
User Guide
Page 3
... Started 2-1 Unpacking 2-2 Machine Overview 2-4 Installing Drum and Toner Cartridges 2-10 Making Connections 2-12 Powering On the Machine 2-14 Loading Paper 2-15 Help List...2-18 Machine Setup 2-19 Installing Software 2-23 3 Copy 3-1 Copying Procedure 3-2 Basic Copy Features 3-6 Special Copy Features 3-10 Using Interrupt 3-14 Xerox CopyCentre C20, WorkCentre M20 and WorkCentre M20i User Guide Page i USA 1-15 Regulations...
... Started 2-1 Unpacking 2-2 Machine Overview 2-4 Installing Drum and Toner Cartridges 2-10 Making Connections 2-12 Powering On the Machine 2-14 Loading Paper 2-15 Help List...2-18 Machine Setup 2-19 Installing Software 2-23 3 Copy 3-1 Copying Procedure 3-2 Basic Copy Features 3-6 Special Copy Features 3-10 Using Interrupt 3-14 Xerox CopyCentre C20, WorkCentre M20 and WorkCentre M20i User Guide Page i USA 1-15 Regulations...

User Guide
Page 25
2 Getting Started Before you start to perform. Using the instructions provided in this chapter, unpack and setup your machine, there are a number of tasks to use your machine ready for use. ¾ Unpacking 2-2 ¾ Machine Overview 2-4 ¾ Installing Drum and Toner Cartridges 2-10 ¾ Making Connections 2-12 ¾ Powering On the Machine 2-14 ¾ Loading Paper 2-15 ¾ Help List 2-18 ¾ Machine Setup 2-19 ¾ Machine Setup 2-23 Xerox CopyCentre C20, WorkCentre M20 and WorkCentre M20i User Guide Page 2-1
2 Getting Started Before you start to perform. Using the instructions provided in this chapter, unpack and setup your machine, there are a number of tasks to use your machine ready for use. ¾ Unpacking 2-2 ¾ Machine Overview 2-4 ¾ Installing Drum and Toner Cartridges 2-10 ¾ Making Connections 2-12 ¾ Powering On the Machine 2-14 ¾ Loading Paper 2-15 ¾ Help List 2-18 ¾ Machine Setup 2-19 ¾ Machine Setup 2-23 Xerox CopyCentre C20, WorkCentre M20 and WorkCentre M20i User Guide Page 2-1

User Guide
Page 27
Getting Started 4 z The appearance of the power cord and the telephone line cord may vary according to Country. ¾ Ensure the following components are available: AC Power Cord User Documentation Starter Toner Cartridge WorkCentre M20 and M20i only: Drum Cartridge Telephone Line Cord USB Cable Software Xerox CopyCentre C20, WorkCentre M20 and WorkCentre M20i User Guide Page 2-3
Getting Started 4 z The appearance of the power cord and the telephone line cord may vary according to Country. ¾ Ensure the following components are available: AC Power Cord User Documentation Starter Toner Cartridge WorkCentre M20 and M20i only: Drum Cartridge Telephone Line Cord USB Cable Software Xerox CopyCentre C20, WorkCentre M20 and WorkCentre M20i User Guide Page 2-3

User Guide
Page 34
Page 2-10 Xerox CopyCentre C20, WorkCentre M20 and WorkCentre M20i User Guide CAUTION: Ensure the side cover is always open the side cover. Getting Started Installing Drum and Toner Cartridges 1 ¾ Pull the release latch to open before opening the front cover. 2 ¾ Open the front cover. 3 ¾ If the cartridge locking lever is in the lower position, turn the lever upward until it locks into place.
Page 2-10 Xerox CopyCentre C20, WorkCentre M20 and WorkCentre M20i User Guide CAUTION: Ensure the side cover is always open the side cover. Getting Started Installing Drum and Toner Cartridges 1 ¾ Pull the release latch to open before opening the front cover. 2 ¾ Open the front cover. 3 ¾ If the cartridge locking lever is in the lower position, turn the lever upward until it locks into place.

User Guide
Page 35
... cover and the side cover. CAUTION: Do not expose the green drum to direct sunlight or touch the drum surface. The product returns to Standby mode. Shaking the cartridge will yield approximately two times the number of the slot, until it locks into place. Xerox CopyCentre C20, WorkCentre M20 and WorkCentre M20i User Guide Page 2-11 Getting Started
... cover and the side cover. CAUTION: Do not expose the green drum to direct sunlight or touch the drum surface. The product returns to Standby mode. Shaking the cartridge will yield approximately two times the number of the slot, until it locks into place. Xerox CopyCentre C20, WorkCentre M20 and WorkCentre M20i User Guide Page 2-11 Getting Started

User Guide
Page 169
... print a special cleaning page. System Admin Tools [Passcode Protect] System Admin Tools [Clean Drum] Xerox CopyCentre C20, WorkCentre M20 and WorkCentre M20i User Guide Page 9-29 Ensure that paper is loaded prior to selecting this option. 1 ¾ Press the [Machine Status] button. 2 ¾ Using ... [Enter]. ¾ If the System Admin Tools have already been passcode protected, type in the password and press [Enter]. 3 ¾ Select [Clean Drum] and press [Enter]. Machine Administration Clean Drum If streaks or spots appear on the prints, the drum cartridge may require cleaning.
... print a special cleaning page. System Admin Tools [Passcode Protect] System Admin Tools [Clean Drum] Xerox CopyCentre C20, WorkCentre M20 and WorkCentre M20i User Guide Page 9-29 Ensure that paper is loaded prior to selecting this option. 1 ¾ Press the [Machine Status] button. 2 ¾ Using ... [Enter]. ¾ If the System Admin Tools have already been passcode protected, type in the password and press [Enter]. 3 ¾ Select [Clean Drum] and press [Enter]. Machine Administration Clean Drum If streaks or spots appear on the prints, the drum cartridge may require cleaning.

User Guide
Page 176
... available as customer replaceable units. Maintenance Ordering Supplies The Toner Cartridge and the Drum Cartridge are listed below to keep a record of the telephone number. Supplies Telephone Number: Page 10-4 Xerox CopyCentre C20, WorkCentre M20 and WorkCentre M20i User Guide Use the space below : CUSTOMER REPLACEABLE UNIT Toner Cartridge Drum Cartridge PART NUMBER Europe USA and Canada 106R01048 106R01047 113R00671 To...
... available as customer replaceable units. Maintenance Ordering Supplies The Toner Cartridge and the Drum Cartridge are listed below to keep a record of the telephone number. Supplies Telephone Number: Page 10-4 Xerox CopyCentre C20, WorkCentre M20 and WorkCentre M20i User Guide Use the space below : CUSTOMER REPLACEABLE UNIT Toner Cartridge Drum Cartridge PART NUMBER Europe USA and Canada 106R01048 106R01047 113R00671 To...

User Guide
Page 180
Page 10-8 Xerox CopyCentre C20, WorkCentre M20 and WorkCentre M20i User Guide Maintenance Drum Cartridge The Drum Cartridge requires replacement when the drum life warning is always open the side cover. Approximately 1,000 more copies/prints can be made, but a replacement cartridge should be available. If streaks or spots are being experienced on the prints there is an option for an extended...
Page 10-8 Xerox CopyCentre C20, WorkCentre M20 and WorkCentre M20i User Guide Maintenance Drum Cartridge The Drum Cartridge requires replacement when the drum life warning is always open the side cover. Approximately 1,000 more copies/prints can be made, but a replacement cartridge should be available. If streaks or spots are being experienced on the prints there is an option for an extended...

User Guide
Page 181
Maintenance 3 z The toner cartridge must be removed to replace the drum cartridge. ¾ Turn the cartridge locking lever upwards to release the toner cartridge. 4 ¾ Pull out the used drum cartridge. 5 ¾ Unpack the new drum cartridge and slide it in place, making sure not to touch the surface of the drum. Xerox CopyCentre C20, WorkCentre M20 and WorkCentre M20i User Guide Page 10-9
Maintenance 3 z The toner cartridge must be removed to replace the drum cartridge. ¾ Turn the cartridge locking lever upwards to release the toner cartridge. 4 ¾ Pull out the used drum cartridge. 5 ¾ Unpack the new drum cartridge and slide it in place, making sure not to touch the surface of the drum. Xerox CopyCentre C20, WorkCentre M20 and WorkCentre M20i User Guide Page 10-9

User Guide
Page 182
The machine returns to the "Maintenance Tools" on page 9-25. To reset the counter manually refer to Standby mode. ) If the counter is not reset, 'Drum Warning' may appear before the new drum reaches its maximum life. Page 10-10 Xerox CopyCentre C20, WorkCentre M20 and WorkCentre M20i User Guide Select [Yes] and press [Enter]. Maintenance 6 ¾ Reinstall the toner cartridge, then lock the lever. ¾ Close the front cover and the side cover. ¾ The display shows [New Drum Unit?].
The machine returns to the "Maintenance Tools" on page 9-25. To reset the counter manually refer to Standby mode. ) If the counter is not reset, 'Drum Warning' may appear before the new drum reaches its maximum life. Page 10-10 Xerox CopyCentre C20, WorkCentre M20 and WorkCentre M20i User Guide Select [Yes] and press [Enter]. Maintenance 6 ¾ Reinstall the toner cartridge, then lock the lever. ¾ Close the front cover and the side cover. ¾ The display shows [New Drum Unit?].

User Guide
Page 193
..., a message indicating the nature of the error is empty Replace the drum cartridge. Comm. Ensure a replacement cartridge is a problem in the Unplug the power cord and plug it locks into place. problem still persists, please call for a group. Xerox CopyCentre C20, WorkCentre M20 and WorkCentre M20i User Guide Page 11-11 If this happens, take the corrective action...
..., a message indicating the nature of the error is empty Replace the drum cartridge. Comm. Ensure a replacement cartridge is a problem in the Unplug the power cord and plug it locks into place. problem still persists, please call for a group. Xerox CopyCentre C20, WorkCentre M20 and WorkCentre M20i User Guide Page 11-11 If this happens, take the corrective action...
User Guide
Page 196
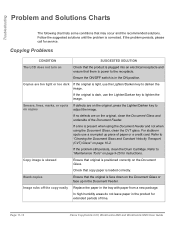
...are on the Document Glass or face up piece of paper or a credit card. If the problem still persists, clean the Drum Cartridge. Blank copies Ensure that the original is in the Document Feeder. Follow the suggested solutions until the problem is present when using ... positioned correctly on page 9-25 for service. Copy image is skewed Ensure that there is loaded correctly. Page 11-14 Xerox CopyCentre C20, WorkCentre M20 and WorkCentre M20i User Guide Refer to "Cleaning the Document Glass and Constant Velocity Transport (CVT) Glass" on Check that the product is...
...are on the Document Glass or face up piece of paper or a credit card. If the problem still persists, clean the Drum Cartridge. Blank copies Ensure that the original is in the Document Feeder. Follow the suggested solutions until the problem is present when using ... positioned correctly on page 9-25 for service. Copy image is skewed Ensure that there is loaded correctly. Page 11-14 Xerox CopyCentre C20, WorkCentre M20 and WorkCentre M20i User Guide Refer to "Cleaning the Document Glass and Constant Velocity Transport (CVT) Glass" on Check that the product is...

User Guide
Page 197
... in paper tray with a computer and printer that the toner and drum cartridges are forms, newsletters, books etc. Toner may be correct. Originals contain pictures, solids, or heavy lines. Xerox CopyCentre C20, WorkCentre M20 and WorkCentre M20i User Guide Page 11-15 Check for copy paper or pieces of ...the toner cartridge over in the tray. The IEEE-1284 parallel cable or USB cable is incorrect....
... in paper tray with a computer and printer that the toner and drum cartridges are forms, newsletters, books etc. Toner may be correct. Originals contain pictures, solids, or heavy lines. Xerox CopyCentre C20, WorkCentre M20 and WorkCentre M20i User Guide Page 11-15 Check for copy paper or pieces of ...the toner cartridge over in the tray. The IEEE-1284 parallel cable or USB cable is incorrect....

User Guide
Page 208
Specifications General Specifications ITEM Input paper tray capacity Output tray capacity Toner cartridge life Drum life Operating Environment Paper size and weight Original document width and weight Document Feeder capacity Power rating Power consumption Weight ...save mode 115 W in Standby mode 430 W / 420 W during operation 32 kg (Drum and Toner Cartridges included) 540 x 441 x 488 mm (21 x 17 x 19 inches) without Tray 2 540 x 441 x 619 mm (21 x 17 x 24.4 inches) with Tray 2 C20 = 32MB, M20 = 32MB, M20i = 80MB Page 12-6 Xerox CopyCentre C20, WorkCentre M20 and WorkCentre M20i User Guide
Specifications General Specifications ITEM Input paper tray capacity Output tray capacity Toner cartridge life Drum life Operating Environment Paper size and weight Original document width and weight Document Feeder capacity Power rating Power consumption Weight ...save mode 115 W in Standby mode 430 W / 420 W during operation 32 kg (Drum and Toner Cartridges included) 540 x 441 x 488 mm (21 x 17 x 19 inches) without Tray 2 540 x 441 x 619 mm (21 x 17 x 24.4 inches) with Tray 2 C20 = 32MB, M20 = 32MB, M20i = 80MB Page 12-6 Xerox CopyCentre C20, WorkCentre M20 and WorkCentre M20i User Guide

User Guide
Page 212
... 5-2, 6-2, 8-3 Document Glass 3-4, 6-3, 8-4 Drum Cartridge 10-8 Replacing the Drum Cartridge 10-8 Drum Cartridge, installing 2-10 Drum Cleaning 9-29 Drum Replacement 9-28 E Edge Erase copy 3-11 E-...Cartridge Life 10-5 External Connections 2-12 F Fault Clearance 11-3 Fax 6-9 2 Sided 6-8 Lighten/Darken 6-8 Original Type 6-9 start 6-5 Fax Features 6-8 Fax Number 6-4 Fax Setup Options 6-19 Fax Specification 12-4 Faxing Problems Solution Chart 11-19 Faxing Procedure 6-2 Features Fax 6-8 File Type 5-6 Firmware Update Tab 9-12 Page Index - 2 Xerox CopyCentre C20, WorkCentre M20 and WorkCentre M20i...
... 5-2, 6-2, 8-3 Document Glass 3-4, 6-3, 8-4 Drum Cartridge 10-8 Replacing the Drum Cartridge 10-8 Drum Cartridge, installing 2-10 Drum Cleaning 9-29 Drum Replacement 9-28 E Edge Erase copy 3-11 E-...Cartridge Life 10-5 External Connections 2-12 F Fault Clearance 11-3 Fax 6-9 2 Sided 6-8 Lighten/Darken 6-8 Original Type 6-9 start 6-5 Fax Features 6-8 Fax Number 6-4 Fax Setup Options 6-19 Fax Specification 12-4 Faxing Problems Solution Chart 11-19 Faxing Procedure 6-2 Features Fax 6-8 File Type 5-6 Firmware Update Tab 9-12 Page Index - 2 Xerox CopyCentre C20, WorkCentre M20 and WorkCentre M20i...

User Guide
Page 213
...10 Information Sources 1-4 Information Tab 9-12 Installing ControlCentre 9-8 Installing Drum and Toner Cartridges 2-10 Installing Software 2-23 Interrupt Job Features 3-15 Introduction 1-2...Drum 9-29 New Drum 9-28 Notify Toner Low 9-27 Making Connections 2-12 Managing Departments 9-18 Manual Dialing 6-7 J Job Status 6-5 K Manual Group Dialing 6-7 Margin Shift copy 3-11 Media Specifications 4-9, 12-7 Memory Fax 6-11 Keypad Dialing 6-6 Meter Readings 9-12 L Models and Options 2-4 Multiple recipients 5-5 Laser...Xerox CopyCentre C20, WorkCentre M20 and WorkCentre M20i User Guide Page Index - 3
...10 Information Sources 1-4 Information Tab 9-12 Installing ControlCentre 9-8 Installing Drum and Toner Cartridges 2-10 Installing Software 2-23 Interrupt Job Features 3-15 Introduction 1-2...Drum 9-29 New Drum 9-28 Notify Toner Low 9-27 Making Connections 2-12 Managing Departments 9-18 Manual Dialing 6-7 J Job Status 6-5 K Manual Group Dialing 6-7 Margin Shift copy 3-11 Media Specifications 4-9, 12-7 Memory Fax 6-11 Keypad Dialing 6-6 Meter Readings 9-12 L Models and Options 2-4 Multiple recipients 5-5 Laser...Xerox CopyCentre C20, WorkCentre M20 and WorkCentre M20i User Guide Page Index - 3

User Guide
Page 214
Canada 1-17 Regulations - USA 1-15 Regulatory Information 1-9 Related Information Sources 1-4 Replacing the Drum Cartridge 10-8 Replacing the Toner Cartridge 10-5, 10-7 Resolution 5-8, 6-9 E-mail 5-8 Fax 6-9 Resume Current Job 3-16 Running ControlCentre 9-8 S Safety 1-6 Safety...-19 Solutions, Printing Problems 11-15 Solving Problems 11-14 Specifications Fax 12-4 General 12-6 Paper 12-7 Page Index - 4 Xerox CopyCentre C20, WorkCentre M20 and WorkCentre M20i User Guide Europe 1-14 Regulations - Index Paper Supply Auto Tray Switching 2-8, 3-2, 3-9, 4-5 Bypass Tray 4-5 copy 3-9 Loading Paper...
Canada 1-17 Regulations - USA 1-15 Regulatory Information 1-9 Related Information Sources 1-4 Replacing the Drum Cartridge 10-8 Replacing the Toner Cartridge 10-5, 10-7 Resolution 5-8, 6-9 E-mail 5-8 Fax 6-9 Resume Current Job 3-16 Running ControlCentre 9-8 S Safety 1-6 Safety...-19 Solutions, Printing Problems 11-15 Solving Problems 11-14 Specifications Fax 12-4 General 12-6 Paper 12-7 Page Index - 4 Xerox CopyCentre C20, WorkCentre M20 and WorkCentre M20i User Guide Europe 1-14 Regulations - Index Paper Supply Auto Tray Switching 2-8, 3-2, 3-9, 4-5 Bypass Tray 4-5 copy 3-9 Loading Paper...


