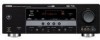
Owner's Manual
Page 3
... instructions contained in proper operating condition. 22 Wall or Ceiling Mounting - Adjust only those products distributed by Yamaha Corporation of cable entry as radiators, heat registers, stoves, or other products (including amplifiers) that provides guidelines for Class "B" digital devices. this product in a residential environment will not result in all installation instructions. The unit should be sure the antenna or cable system is connected...
... instructions contained in proper operating condition. 22 Wall or Ceiling Mounting - Adjust only those products distributed by Yamaha Corporation of cable entry as radiators, heat registers, stoves, or other products (including amplifiers) that provides guidelines for Class "B" digital devices. this product in a residential environment will not result in all installation instructions. The unit should be sure the antenna or cable system is connected...
Owner's Manual
Page 5
..., or other components 6 Step 3: Turn on the front panel or the remote control. and Canada models only 13 Information on jacks and cable plugs 14 Connecting video components 15 Connecting audio components 17 Connecting a Yamaha iPod universal dock 18 Using the VIDEO AUX jacks on the front panel .... 18 Connecting the FM and AM antennas 19 Connecting the power cable 19 Turning on and off the power 19 Front panel display 20 Optimizing the speaker setting for your DVD player and other components.... 60 Setting remote control codes 62 Resetting all remote control codes 63...
..., or other components 6 Step 3: Turn on the front panel or the remote control. and Canada models only 13 Information on jacks and cable plugs 14 Connecting video components 15 Connecting audio components 17 Connecting a Yamaha iPod universal dock 18 Using the VIDEO AUX jacks on the front panel .... 18 Connecting the FM and AM antennas 19 Connecting the power cable 19 Turning on and off the power 19 Front panel display 20 Optimizing the speaker setting for your DVD player and other components.... 60 Setting remote control codes 62 Resetting all remote control codes 63...
Owner's Manual
Page 6
... (3 COMPONENT VIDEO INs and 1 MONITOR OUT) ◆ S-video signal input/output capability ◆ Optical and coaxial digital audio signal jacks ◆ Sleep timer ◆ Cinema and music night listening modes ◆ Remote control with preset remote control codes Manufactured under license from loud sounds is often undetectable until it at a safe level. and Canada models only) ◆ Virtual CINEMA DSP ◆ SILENT CINEMA™ Sophisticated FM/AM tuner ◆ 40-station random and direct preset tuning ◆ Automatic preset tuning XM Satellite Radio...
... (3 COMPONENT VIDEO INs and 1 MONITOR OUT) ◆ S-video signal input/output capability ◆ Optical and coaxial digital audio signal jacks ◆ Sleep timer ◆ Cinema and music night listening modes ◆ Remote control with preset remote control codes Manufactured under license from loud sounds is often undetectable until it at a safe level. and Canada models only) ◆ Virtual CINEMA DSP ◆ SILENT CINEMA™ Sophisticated FM/AM tuner ◆ 40-station random and direct preset tuning ◆ Automatic preset tuning XM Satellite Radio...

Owner's Manual
Page 7
... the following parts. When the memory is without batteries for your local voltage BEFORE plugging the power cable into contact with general house waste; Remote control CODE SET TRANSMIT POWER TV POWER AV STANDBY POWER CD DVD DOCK V-AUX MD CD-R CBL DTV MULTI CH IN AUDIO SEL TUNER XM DVR TV VOL TV CH AMP VOLUME SOURCE TV Batteries (2) (AA, R06, UM-3) TV MUTE TV INPUT MUTE MUSIC ENTERTAIN MOVIE 1 2 3 STEREO 4 ENHANCER STRAIGHT DIRECT ST...
... the following parts. When the memory is without batteries for your local voltage BEFORE plugging the power cable into contact with general house waste; Remote control CODE SET TRANSMIT POWER TV POWER AV STANDBY POWER CD DVD DOCK V-AUX MD CD-R CBL DTV MULTI CH IN AUDIO SEL TUNER XM DVR TV VOL TV CH AMP VOLUME SOURCE TV Batteries (2) (AA, R06, UM-3) TV MUTE TV INPUT MUTE MUSIC ENTERTAIN MOVIE 1 2 3 STEREO 4 ENHANCER STRAIGHT DIRECT ST...

Owner's Manual
Page 9
.... To the surround right speaker To the surround left channel (L), right channel (R), "+" (red) and "-" (black) properly. Subwoofer AV receiver IN MD/ OUT (PLAY) CD-R (REC) OUTPUT SUB WOOFER Input jack Subwoofer cable SUBWOOFER OUTPUT jack English 5 En Connect the plain cable to the "-" (black) terminals. 3 Connect each speaker. XM ANTENNA SPEAKERS DOCK COMPONENT VIDEO DVD DTV/CBL DVR MONITOR OUT DVD VIDEO DTV/CBL IN DVR OUT MONITOR OUT PR DIGITAL INPUT PB S VIDEO OPTICAL CD 3 Y DTV/ CBL 2 MULTI CH INPUT FRONT SURROUND CENTER L VIDEO DVD DTV/CBL L AUDIO IN DVR...
.... To the surround right speaker To the surround left channel (L), right channel (R), "+" (red) and "-" (black) properly. Subwoofer AV receiver IN MD/ OUT (PLAY) CD-R (REC) OUTPUT SUB WOOFER Input jack Subwoofer cable SUBWOOFER OUTPUT jack English 5 En Connect the plain cable to the "-" (black) terminals. 3 Connect each speaker. XM ANTENNA SPEAKERS DOCK COMPONENT VIDEO DVD DTV/CBL DVR MONITOR OUT DVD VIDEO DTV/CBL IN DVR OUT MONITOR OUT PR DIGITAL INPUT PB S VIDEO OPTICAL CD 3 Y DTV/ CBL 2 MULTI CH INPUT FRONT SURROUND CENTER L VIDEO DVD DTV/CBL L AUDIO IN DVR...

Owner's Manual
Page 10
... unit. DVD player AV receiver 3 Connect the video cable to the composite video output jack of your DVD player and other components XM ANTENNA SPEAKERS DOCK COMPONENT VIDEO DVD DTV/CBL DVR MONITOR OUT DVD VIDEO DTV/CBL IN DVR OUT MONITOR OUT PR DIGITAL INPUT PB S VIDEO OPTICAL CD 3 Y DTV/ CBL 2 MULTI CH INPUT FRONT SURROUND CENTER L VIDEO DVD DTV/CBL L AUDIO IN DVR OUT CD DVD 1 R COAXIAL R SUBWOOFER AM GND FM 75 UNBAL. Quick start guide Step 2: Connect your DVD player and the DVD VIDEO jack of this unit. R SURROUND L CENTER R FRONT...
... unit. DVD player AV receiver 3 Connect the video cable to the composite video output jack of your DVD player and other components XM ANTENNA SPEAKERS DOCK COMPONENT VIDEO DVD DTV/CBL DVR MONITOR OUT DVD VIDEO DTV/CBL IN DVR OUT MONITOR OUT PR DIGITAL INPUT PB S VIDEO OPTICAL CD 3 Y DTV/ CBL 2 MULTI CH INPUT FRONT SURROUND CENTER L VIDEO DVD DTV/CBL L AUDIO IN DVR OUT CD DVD 1 R COAXIAL R SUBWOOFER AM GND FM 75 UNBAL. Quick start guide Step 2: Connect your DVD player and the DVD VIDEO jack of this unit. R SURROUND L CENTER R FRONT...

Owner's Manual
Page 22
...PR DIGITAL INPUT PB OPTICAL Y CD 3 DTV/ CBL 2 COAXIAL DVD 1 MULTI CH INPUT FRONT SURROUND CENTER L R SUBWOOFER STANDBY /ON PHONES SILENT CINEMA SPEAKERS A/B/OFF OPTIMIZER MIC EDIT SEARCH MODE PRESET/TUNING FM/AM CATEGORY A/B/C/D/E 1 l PRESET/TUNING/CH h SCENE 2 3 4 MEMORY DISPLAY TUNING AUTO/MAN'L TONE CONTROL l PROGRAM h STRAIGHT DIRECT STEREO l INPUT h AUDIO SELECT EFFECT VOLUME VIDEO VIDEO AUX L AUDIO R PORTABLE VIDEO VIDEO AUX L AUDIO R PORTABLE 3.5 mm stereo mini plug V L R Video output Audio output Audio output Yamaha iPod universal dock...
...PR DIGITAL INPUT PB OPTICAL Y CD 3 DTV/ CBL 2 COAXIAL DVD 1 MULTI CH INPUT FRONT SURROUND CENTER L R SUBWOOFER STANDBY /ON PHONES SILENT CINEMA SPEAKERS A/B/OFF OPTIMIZER MIC EDIT SEARCH MODE PRESET/TUNING FM/AM CATEGORY A/B/C/D/E 1 l PRESET/TUNING/CH h SCENE 2 3 4 MEMORY DISPLAY TUNING AUTO/MAN'L TONE CONTROL l PROGRAM h STRAIGHT DIRECT STEREO l INPUT h AUDIO SELECT EFFECT VOLUME VIDEO VIDEO AUX L AUDIO R PORTABLE VIDEO VIDEO AUX L AUDIO R PORTABLE 3.5 mm stereo mini plug V L R Video output Audio output Audio output Yamaha iPod universal dock...

Owner's Manual
Page 26
... MIC jack on a flat level surface with the microphone heading upward. OPTIMIZER MIC DISPLAY Y TUNING AUTO/MAN'L AUDIO SELECT VIDEO VIDEO AUX L AUDIO R PORTABLE Optimizer microphone The following check points before starting the AUTO SETUP operations. ❏ Speakers are connected appropriately. ❏ Headphones are disconnected from this unit analyzes the sound your speakers produce in your ears would be satisfactory. AUTO:MENU . Optimizing the speaker setting for your listening room Optimizing the speaker setting for loud test tones to be output...
... MIC jack on a flat level surface with the microphone heading upward. OPTIMIZER MIC DISPLAY Y TUNING AUTO/MAN'L AUDIO SELECT VIDEO VIDEO AUX L AUDIO R PORTABLE Optimizer microphone The following check points before starting the AUTO SETUP operations. ❏ Speakers are connected appropriately. ❏ Headphones are disconnected from this unit analyzes the sound your speakers produce in your ears would be satisfactory. AUTO:MENU . Optimizing the speaker setting for your listening room Optimizing the speaker setting for loud test tones to be output...

Owner's Manual
Page 35
Notes • Sound field programs cannot be selected when the component connected to the MULTI CH INPUT jacks is output. Press 9SPEAKERS on the front panel repeatedly to turn on or off the volume level of input jacks. Press EAUDIO SELECT (or IAUDIO SEL) repeatedly to select the desired audio input jack select setting. DVR V-AUX DTV/CBL DVD MD/CD-R TUNER CD XM A.SEL: AUTO Audio input jack select setting AUTO ANALOG Automatically selects input signals in the front panel display. The active front speaker set "FRONT B" to "ZONE B" (see...
Notes • Sound field programs cannot be selected when the component connected to the MULTI CH INPUT jacks is output. Press 9SPEAKERS on the front panel repeatedly to turn on or off the volume level of input jacks. Press EAUDIO SELECT (or IAUDIO SEL) repeatedly to select the desired audio input jack select setting. DVR V-AUX DTV/CBL DVD MD/CD-R TUNER CD XM A.SEL: AUTO Audio input jack select setting AUTO ANALOG Automatically selects input signals in the front panel display. The active front speaker set "FRONT B" to "ZONE B" (see...

Owner's Manual
Page 53
... sources input from the MULTI CH INPUT jacks. Selects the video source played in bold under each speaker, the speakers for the sources connected to the DIGITAL INPUT jacks on the rear panel of the front speakers connected to the FRONT B terminals. Parameter A)SPEAKER SET B)SP LEVEL C)SP DISTANCE D)CENTER GEQ E)LFE LEVEL F)D. Adjusts the muting level, audio delay, maximum volume level and initial volume level. Selects the decoder mode for low-frequency signal output, and the crossover frequency, and the location of this unit according to the component to be used. SET MENU SET...
... sources input from the MULTI CH INPUT jacks. Selects the video source played in bold under each speaker, the speakers for the sources connected to the DIGITAL INPUT jacks on the rear panel of the front speakers connected to the FRONT B terminals. Parameter A)SPEAKER SET B)SP LEVEL C)SP DISTANCE D)CENTER GEQ E)LFE LEVEL F)D. Adjusts the muting level, audio delay, maximum volume level and initial volume level. Selects the decoder mode for low-frequency signal output, and the crossover frequency, and the location of this unit according to the component to be used. SET MENU SET...
Owner's Manual
Page 55
... FRONT, ZONE B 1 SOUND MENU A)SPEAKER SET FRONT B;;;;FRONT [ ]/[ ]:Up/Down [p]/[[]:Select • Select "FRONT" to turn on or off and SPEAKERS B is turned on, all the speakers including the subwoofer in ): small Front speakers FRONT SP Choices: SMALL, LARGE 1 SOUND MENU A)SPEAKER SET FRONT SP p p p p p p ■ Speaker settings A)SPEAKER SET Use this feature to manually adjust any speaker settings or compensate for video signal processing delays when using LCD monitors or projectors. ;MANUAL SETUP 1 SOUND MENU 1/2 . The center channel signals are muted and this unit outputs sound at...
... FRONT, ZONE B 1 SOUND MENU A)SPEAKER SET FRONT B;;;;FRONT [ ]/[ ]:Up/Down [p]/[[]:Select • Select "FRONT" to turn on or off and SPEAKERS B is turned on, all the speakers including the subwoofer in ): small Front speakers FRONT SP Choices: SMALL, LARGE 1 SOUND MENU A)SPEAKER SET FRONT SP p p p p p p ■ Speaker settings A)SPEAKER SET Use this feature to manually adjust any speaker settings or compensate for video signal processing delays when using LCD monitors or projectors. ;MANUAL SETUP 1 SOUND MENU 1/2 . The center channel signals are muted and this unit outputs sound at...

Owner's Manual
Page 60
... to the DIGITAL INPUT jacks when you want to change the character in the following order, or press Dk to go in the Yamaha Universal Dock connected to this unit to automatically detect the type of . 2 INPUT MENU C)VOLUME TRIM DVD DVD ;;;;;;0.0dB MD MULTI CH IN CD CD-R DVD CBL DTV TUNER XM DOCK V-AUX DVR 2 Set the operation mode selector (K) to AMP and then press Dl / h on the power of each...
... to the DIGITAL INPUT jacks when you want to change the character in the following order, or press Dk to go in the Yamaha Universal Dock connected to this unit to automatically detect the type of . 2 INPUT MENU C)VOLUME TRIM DVD DVD ;;;;;;0.0dB MD MULTI CH IN CD CD-R DVD CBL DTV TUNER XM DOCK V-AUX DVR 2 Set the operation mode selector (K) to AMP and then press Dl / h on the power of each...

Owner's Manual
Page 62
... Satellite Radio signals. Choices: NO, YES 3 OPTION MENU B)MEMORY GUARD >OFF ON 3 OPTION MENU D)PARAM. all speaker levels - Display status: NONE, 0 to 100% Note "NONE" is displayed if XM Mini-Tuner Dock is displayed here. SET MENU ■ Memory guard B)MEMORY GUARD Use this feature to prevent accidental changes to DSP program parameter values and other "SET MENU" items. ■ Audio select C)AUDIO SELECT Use this feature to designate the default audio input jack select setting for the connected input source (see...
... Satellite Radio signals. Choices: NO, YES 3 OPTION MENU B)MEMORY GUARD >OFF ON 3 OPTION MENU D)PARAM. all speaker levels - Display status: NONE, 0 to 100% Note "NONE" is displayed if XM Mini-Tuner Dock is displayed here. SET MENU ■ Memory guard B)MEMORY GUARD Use this feature to prevent accidental changes to DSP program parameter values and other "SET MENU" items. ■ Audio select C)AUDIO SELECT Use this feature to designate the default audio input jack select setting for the connected input source (see...

Owner's Manual
Page 65
... Numeric buttons Numeric buttons Numeric buttons Numeric buttons Preset stations (1-8) Band 4 PRESET/CH k Up VCR channel up Up Preset up to 10 different components. 1 CODE SET TRANSMIT POWER TV POWER AV STANDBY POWER CD DVD DOCK V-AUX MD CD-R CBL DTV MULTI CH IN AUDIO SEL TUNER XM DVR TV VOL TV CH AMP VOLUME SOURCE TV TV MUTE TV INPUT MUTE MUSIC ENTERTAIN MODE 1 2 3 STEREO 4 2 3 4 5 6 MUSIC ENTERTAIN MODE 1 2 3 STEREO 4 ENHANCER STRAIGHT DIRECT ST. 5 6 7 8 SUR. Remote control features ■ Controlling other components Set the operation mode...
... Numeric buttons Numeric buttons Numeric buttons Numeric buttons Preset stations (1-8) Band 4 PRESET/CH k Up VCR channel up Up Preset up to 10 different components. 1 CODE SET TRANSMIT POWER TV POWER AV STANDBY POWER CD DVD DOCK V-AUX MD CD-R CBL DTV MULTI CH IN AUDIO SEL TUNER XM DVR TV VOL TV CH AMP VOLUME SOURCE TV TV MUTE TV INPUT MUTE MUSIC ENTERTAIN MODE 1 2 3 STEREO 4 2 3 4 5 6 MUSIC ENTERTAIN MODE 1 2 3 STEREO 4 ENHANCER STRAIGHT DIRECT ST. 5 6 7 8 SUR. Remote control features ■ Controlling other components Set the operation mode...

Owner's Manual
Page 71
... played. (Dolby Digital or DTS indicator in the front panel display does not light up.) The connected component is noise interference from the AC wall outlet and then plug it back on the power of this unit is set the volume level Adjust "MAX VOL." setting. "MEMORY GUARD" in not malfunction. This unit suddenly enters the standby mode. heard. IN jacks. Speaker cables are connected correctly. Set Audio input jack select to "OFF". Connect the audio cables firmly. Make sure all speaker cables...
... played. (Dolby Digital or DTS indicator in the front panel display does not light up.) The connected component is noise interference from the AC wall outlet and then plug it back on the power of this unit is set the volume level Adjust "MAX VOL." setting. "MEMORY GUARD" in not malfunction. This unit suddenly enters the standby mode. heard. IN jacks. Speaker cables are connected correctly. Set Audio input jack select to "OFF". Connect the audio cables firmly. Make sure all speaker cables...

Owner's Manual
Page 72
... SIGNAL LOADING OFF AIR - - - Troubleshooting ■ Tuner Problem Cause Remedy FM stereo reception is multi-path interference. There is updated. AM There are buzzing and whining noises. The signal is being updated. Noise can no longer This is no longer be tuned into with a good FM antenna. A TV set . Use the manual tuning method. Use the manual tuning method. Set preset stations. Use an outdoor antenna and a ground wire. and Canada models only) If an operation...
... SIGNAL LOADING OFF AIR - - - Troubleshooting ■ Tuner Problem Cause Remedy FM stereo reception is multi-path interference. There is updated. AM There are buzzing and whining noises. The signal is being updated. Noise can no longer This is no longer be tuned into with a good FM antenna. A TV set . Use the manual tuning method. Use the manual tuning method. Set preset stations. Use an outdoor antenna and a ground wire. and Canada models only) If an operation...
Owner's Manual
Page 73
... E-3:NOISY E-4:NO MIC E-5:USER CANCEL E-6:INTERNAL ERROR Cause Remedy Front L/R channel signals are connected. Background noise is not connected. Turn off noisy electric equipment like air conditioners or move them away from the optimizer microphone. During AUTO SETUP Cause Optimizer microphone is too loud. See page 22 - A surround channel signal is not detected. Connect the supplied optimizer microphone to the OPTIMIZER MIC jack on the front panel. Remedy Connect the supplied...
... E-3:NOISY E-4:NO MIC E-5:USER CANCEL E-6:INTERNAL ERROR Cause Remedy Front L/R channel signals are connected. Background noise is not connected. Turn off noisy electric equipment like air conditioners or move them away from the optimizer microphone. During AUTO SETUP Cause Optimizer microphone is too loud. See page 22 - A surround channel signal is not detected. Connect the supplied optimizer microphone to the OPTIMIZER MIC jack on the front panel. Remedy Connect the supplied...

Owner's Manual
Page 79
... 5ch Stereo, Sound field program ......... 35 ■A A)DISPLAY SET, Option menu ......... 57 A)INPUT ASSIGNMENT, Input menu 55 A)SPEAKER SET, Sound menu ......... 51 A.DELAY, Audio settings 54 AC OUTLET(S) (SWITCHED 19 AC OUTLET(S), Rear panel 10 Activating XM Satellite Radio 42 All Channel Search mode, XM tuning 43 All remote control codes resetting ....... 63 AM antenna, Connection 19 AM tuning 38 AMP, Operation mode selector 21 Amplifier function OSD display time, Display settings 57 Audio components, Connection 17 Audio delay, Audio settings 54 AUDIO jacks 14 Audio jacks 14...
... 5ch Stereo, Sound field program ......... 35 ■A A)DISPLAY SET, Option menu ......... 57 A)INPUT ASSIGNMENT, Input menu 55 A)SPEAKER SET, Sound menu ......... 51 A.DELAY, Audio settings 54 AC OUTLET(S) (SWITCHED 19 AC OUTLET(S), Rear panel 10 Activating XM Satellite Radio 42 All Channel Search mode, XM tuning 43 All remote control codes resetting ....... 63 AM antenna, Connection 19 AM tuning 38 AMP, Operation mode selector 21 Amplifier function OSD display time, Display settings 57 Audio components, Connection 17 Audio delay, Audio settings 54 AUDIO jacks 14 Audio jacks 14...

Owner's Manual
Page 80
..., Front panel display .... 20 PHONES jack 34 Play information display, iPod controlling 47 Playing video sources in the background 34 PLII Game 36 PLII Movie 36 PLII Music 36 Pop/Rock, Sound field program .......... 35 Power cable, Connection 19 Preset channel setting, XM tuning ...... 44 Preset Search mode, XM tuning .......... 43 Preset station exchange, FM/AM tuning 40 Preset station selection, FM/AM tuning 40 PRESET, Advanced setup 64 Pro Logic 36 Pure hi-fi stereo sound 32 ■R Remote control code default setting .... 62 Remote control code setting 62 Remote control codes...
..., Front panel display .... 20 PHONES jack 34 Play information display, iPod controlling 47 Playing video sources in the background 34 PLII Game 36 PLII Movie 36 PLII Music 36 Pop/Rock, Sound field program .......... 35 Power cable, Connection 19 Preset channel setting, XM tuning ...... 44 Preset Search mode, XM tuning .......... 43 Preset station exchange, FM/AM tuning 40 Preset station selection, FM/AM tuning 40 PRESET, Advanced setup 64 Pro Logic 36 Pure hi-fi stereo sound 32 ■R Remote control code default setting .... 62 Remote control code setting 62 Remote control codes...
Owner's Manual
Page 81
...display 20 Turning off the power 19 Turning on the power 19 TV controlling by remote control ........60 TV controlling, Remote control ...........60 TV Sports, Sound field program ..........35 TV, Operation mode selector 21 ■U Unable to play, iPod controlling status message .......70 UNIT, Speaker distance 53 Unit, Speaker distance 53 Unknown iPod, iPod controlling status message .......70 Unplug HP!, Auto setup error message 69 UPDATING, XM tuning status message 68 ■V VIDEO AUX jacks, Front panel ..........18 Video components, Connection ...........15 VIDEO jacks 14 Video...
...display 20 Turning off the power 19 Turning on the power 19 TV controlling by remote control ........60 TV controlling, Remote control ...........60 TV Sports, Sound field program ..........35 TV, Operation mode selector 21 ■U Unable to play, iPod controlling status message .......70 UNIT, Speaker distance 53 Unit, Speaker distance 53 Unknown iPod, iPod controlling status message .......70 Unplug HP!, Auto setup error message 69 UPDATING, XM tuning status message 68 ■V VIDEO AUX jacks, Front panel ..........18 Video components, Connection ...........15 VIDEO jacks 14 Video...


