

Owner's Manual
Page 87
... shows 100% after the engine oil is replaced and the display is under 19 mph (30 km/h). The engine oil life is in the front bumper. Multi-Information Display Outside Temperature U.S. CANADA OUTSIDE TEMPERATURE The temperature sensor is calculated based on the road surface. The temperature reading can adjust the outside... weather conditions, temperature readings near freezing (32°F, 0°C) could mean that ice is displayed. This shows the outside temperature display (see page 497 . 84 2010 TL For more information, see page 101 ). model is shown.
... shows 100% after the engine oil is replaced and the display is under 19 mph (30 km/h). The engine oil life is in the front bumper. Multi-Information Display Outside Temperature U.S. CANADA OUTSIDE TEMPERATURE The temperature sensor is calculated based on the road surface. The temperature reading can adjust the outside... weather conditions, temperature readings near freezing (32°F, 0°C) could mean that ice is displayed. This shows the outside temperature display (see page 497 . 84 2010 TL For more information, see page 101 ). model is shown.
Owner's Manual
Page 521
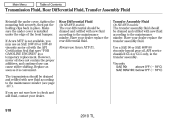
.... Viscosity SAE 90: above 0°F ( 18°C) SAE 80W-90: below 0°F ( 18°C) 518 2010 TL Have your dealer replace the transfer assembly fluid. Have your dealer replace the rear differential fluid. Transmission Fluid, Rear Differential ...Fluid, Transfer Assembly Fluid Reinstall the under the edge of the front bumper. If you may use an SAE 10W-30 or 10W-40 viscosity motor oil with new fluid according ... motor oil does not contain the proper additives, and continued use Acura ATF-Z1. If Acura MTF is convenient.
.... Viscosity SAE 90: above 0°F ( 18°C) SAE 80W-90: below 0°F ( 18°C) 518 2010 TL Have your dealer replace the transfer assembly fluid. Have your dealer replace the rear differential fluid. Transmission Fluid, Rear Differential ...Fluid, Transfer Assembly Fluid Reinstall the under the edge of the front bumper. If you may use an SAE 10W-30 or 10W-40 viscosity motor oil with new fluid according ... motor oil does not contain the proper additives, and continued use Acura ATF-Z1. If Acura MTF is convenient.

Owner's Manual
Page 528
Maintenance CONTINUED 525 2010 TL Remove the socket from the socket by turning it unlocks. Use a flat-tip screwdriver to remove the mounting bolts, and remove the holding clips from the bumper carefully. 4. Remove the bulb from the light assembly by pushing it in and turning it counterclockwise until it one-quarter turn counterclockwise. 5. Pull down the under cover from the inner fender. 3. Use a wrench to remove the three holding clip with a flat-tip screwdriver. Lights COVER HOLDING CLIP BOLTS BULB SOCKET HOLDING CLIP SPOILER 2.
Maintenance CONTINUED 525 2010 TL Remove the socket from the socket by turning it unlocks. Use a flat-tip screwdriver to remove the mounting bolts, and remove the holding clips from the bumper carefully. 4. Remove the bulb from the light assembly by pushing it in and turning it counterclockwise until it one-quarter turn counterclockwise. 5. Pull down the under cover from the inner fender. 3. Use a wrench to remove the three holding clip with a flat-tip screwdriver. Lights COVER HOLDING CLIP BOLTS BULB SOCKET HOLDING CLIP SPOILER 2.

Owner's Manual
Page 530
Maintenance CONTINUED 527 2010 TL Pull down . 5. Use a flat-tip screwdriver to remove the mounting bolts, and remove the holding clips from the bumper carefully. 4. Remove the bulb by pushing on the tab and pulling the connector down the under cover from the inner fender. 3. Remove the electrical connector from the bulb by turning it about one-quarter turn counterclockwise. Use a wrench to remove the three holding clip with a flat-tip screwdriver. Lights COVER HOLDING CLIP BOLTS BULB HOLDING CLIP SPOILER CONNECTOR 2.
Maintenance CONTINUED 527 2010 TL Pull down . 5. Use a flat-tip screwdriver to remove the mounting bolts, and remove the holding clips from the bumper carefully. 4. Remove the bulb by pushing on the tab and pulling the connector down the under cover from the inner fender. 3. Remove the electrical connector from the bulb by turning it about one-quarter turn counterclockwise. Use a wrench to remove the three holding clip with a flat-tip screwdriver. Lights COVER HOLDING CLIP BOLTS BULB HOLDING CLIP SPOILER CONNECTOR 2.

Owner's Manual
Page 574
... if the steering wheel is best to support the vehicle's weight. CONTINUED 571 2010 TL Emergency Towing Improper towing preparation will conf irm that the power mode is in the ACCESSORY (I ). If your vehicle by the bumpers will cause serious damage. ACCESSORY Mode is released. Leave the ignition switch in... ignition switch. The steering system can be transported with the f ront wheels of f the ground. For more information, see page 183 ). The bumpers are not designed to tow the vehicle no farther than 50 miles (80 km), and keep the speed below 35 mph (55 km/h). Follow the...
... if the steering wheel is best to support the vehicle's weight. CONTINUED 571 2010 TL Emergency Towing Improper towing preparation will conf irm that the power mode is in the ACCESSORY (I ). If your vehicle by the bumpers will cause serious damage. ACCESSORY Mode is released. Leave the ignition switch in... ignition switch. The steering system can be transported with the f ront wheels of f the ground. For more information, see page 183 ). The bumpers are not designed to tow the vehicle no farther than 50 miles (80 km), and keep the speed below 35 mph (55 km/h). Follow the...

Owner's Manual
Page 575
..., call a towing service to release the steering lock while your vehicle (see page 548 ). 572 2010 TL To use the detachable towing hook that mounts on the anchor in the spare tire (see pages 555... and 556 ). 2. Remove the towing hook and wheel nut wrench from the front bumper using a cloth and a flat-tip screwdriver to your vehicle's battery is dead, do this: 1.... Remove the cover from the tool case in the front bumper. Follow the proper jump starting procedures, Step 8 and Step 9, and the instructions to disconnect the jumper...
..., call a towing service to release the steering lock while your vehicle (see page 548 ). 572 2010 TL To use the detachable towing hook that mounts on the anchor in the spare tire (see pages 555... and 556 ). 2. Remove the towing hook and wheel nut wrench from the front bumper using a cloth and a flat-tip screwdriver to your vehicle's battery is dead, do this: 1.... Remove the cover from the tool case in the front bumper. Follow the proper jump starting procedures, Step 8 and Step 9, and the instructions to disconnect the jumper...
