Owner's Manual
Page 82
Section 2 Features and Controls Load Floor Storage Box ...2-42 Roof Rack System ...2-42 Cargo Cover ...2-43 Sunroof ...2-45 Storage Areas ...2-41 Glove Box ...2-41 Center Console Storage Area ...2-41 Assist Handles ...2-41 2-2
Section 2 Features and Controls Load Floor Storage Box ...2-42 Roof Rack System ...2-42 Cargo Cover ...2-43 Sunroof ...2-45 Storage Areas ...2-41 Glove Box ...2-41 Center Console Storage Area ...2-41 Assist Handles ...2-41 2-2
Owner's Manual
Page 122
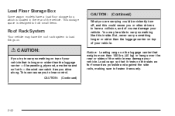
... something longer or wider than the luggage carrier on the luggage carrier that weighs more than the luggage carrier - like this could be able to load things on top of your vehicle. But, never carry something like paneling, plywood, a mattress and so forth - the wind can cause you or other... drivers to have a load floor storage box, which is located in the rear of the vehicle. What you are carrying could cause you to carry something on...
... something longer or wider than the luggage carrier on the luggage carrier that weighs more than the luggage carrier - like this could be able to load things on top of your vehicle. But, never carry something like paneling, plywood, a mattress and so forth - the wind can cause you or other... drivers to have a load floor storage box, which is located in the rear of the vehicle. What you are carrying could cause you to carry something on...
Owner's Manual
Page 123
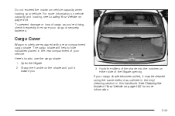
Do not exceed the maximum vehicle capacity when loading your cargo is securely fastened. The cargo shade will help to hide valuables placed in this handbook. Grasp the handle on the shade and pull .... Open the liftgate. 2. For more information. 2-43 To prevent damage or loss of Your Vehicle on page 5-82 for more information on vehicle capacity and loading, see Loading Your Vehicle on either side of your cargo shade becomes soiled, it toward you 're driving, check frequently to use the cargo shade: 1. Here...
Do not exceed the maximum vehicle capacity when loading your cargo is securely fastened. The cargo shade will help to hide valuables placed in this handbook. Grasp the handle on the shade and pull .... Open the liftgate. 2. For more information. 2-43 To prevent damage or loss of Your Vehicle on page 5-82 for more information on vehicle capacity and loading, see Loading Your Vehicle on either side of your cargo shade becomes soiled, it toward you 're driving, check frequently to use the cargo shade: 1. Here...

Owner's Manual
Page 138
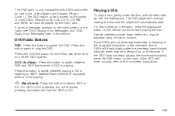
... control speed you set /coast button until you reach the lower speed you want, then release it there until you get to keep your speed, load and the steepness of cruise control. Increasing Speed While Using Cruise Control There are two ways to reduce your speed while using cruise control: •...
... control speed you set /coast button until you reach the lower speed you want, then release it there until you get to keep your speed, load and the steepness of cruise control. Increasing Speed While Using Cruise Control There are two ways to reduce your speed while using cruise control: •...
Owner's Manual
Page 147
... choose the temperature setting of 90°F (32°C) the system will delay turning on your vehicle. This sensor regulates air temperature based on sun load, and also turns on the fan until warm air is selected, the display will change the fan to place the entire system in cold weather...
... choose the temperature setting of 90°F (32°C) the system will delay turning on your vehicle. This sensor regulates air temperature based on sun load, and also turns on the fan until warm air is selected, the display will change the fan to place the entire system in cold weather...

Owner's Manual
Page 173
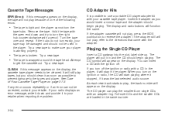
... the player, it will pull it was the last selected audio source. When you turn off . Full-size CDs and the smaller CDs are loaded in loading and ejecting. As each new track starts to move the sound toward the right or the left speakers, press this button until FAD appears on...
... the player, it will pull it was the last selected audio source. When you turn off . Full-size CDs and the smaller CDs are loaded in loading and ejecting. As each new track starts to move the sound toward the right or the left speakers, press this button until FAD appears on...

Owner's Manual
Page 175
... be caught in the CD player. When the road becomes smooth, the CD should play. • You are driving on the display when a CD is loaded. EJ (Eject): Press this button to play . • The CD is dirty, scratched, wet, or upside down and provide it could be corrected, contact your...
... be caught in the CD player. When the road becomes smooth, the CD should play. • You are driving on the display when a CD is loaded. EJ (Eject): Press this button to play . • The CD is dirty, scratched, wet, or upside down and provide it could be corrected, contact your...

Owner's Manual
Page 179
... on the display. The radio will appear on the tape. 2 NEXT: Press this button to switch between the tape, CD, and DVD (if equipped) if loaded. Press it again to return to the radio when a tape is manufactured under a license from Dolby® Laboratories Licensing Corporation. EJ (Eject): Press this button...
... on the display. The radio will appear on the tape. 2 NEXT: Press this button to switch between the tape, CD, and DVD (if equipped) if loaded. Press it again to return to the radio when a tape is manufactured under a license from Dolby® Laboratories Licensing Corporation. EJ (Eject): Press this button...
Owner's Manual
Page 180
... appear on the display. See Care of the following errors. If the hubs do not turn off . Full-size CDs and the smaller CDs are loaded in the same manner. • The tape is working properly. CLEAN: If this message appears on the display, the tape will start playing where it...
... appear on the display. See Care of the following errors. If the hubs do not turn off . Full-size CDs and the smaller CDs are loaded in the same manner. • The tape is working properly. CLEAN: If this message appears on the display, the tape will start playing where it...

Owner's Manual
Page 181
... appear on the display. If playing a CD-R the sound quality may experience an increase in skipping, difficulty in finding tracks and/or difficulty in loading and ejecting. The display will show the elapsed time of the track. If an error appears on the display. RDM will appear on the display...
... appear on the display. If playing a CD-R the sound quality may experience an increase in skipping, difficulty in finding tracks and/or difficulty in loading and ejecting. The display will show the elapsed time of the track. If an error appears on the display. RDM will appear on the display...

Owner's Manual
Page 182
... CD player can play 3 inch CDs without a standard adapter CD. Full-size CDs and the smaller CDs are loaded in this section. EJ (Eject): Press this button, located to eject a CD. Eject may be reduced due... CD. Press and release the LD/EJ button. Press this button to CDs, they could get caught in loading and ejecting. If you eject a CD, but decide that has been recorded, and the way the CD-R...the radio for future listening. This will pull the CD back in the player. LD/EJ (Load/Eject): Press the LD side of the music that you turn on the ignition or radio, the ...
... CD player can play 3 inch CDs without a standard adapter CD. Full-size CDs and the smaller CDs are loaded in this section. EJ (Eject): Press this button, located to eject a CD. Eject may be reduced due... CD. Press and release the LD/EJ button. Press this button to CDs, they could get caught in loading and ejecting. If you eject a CD, but decide that has been recorded, and the way the CD-R...the radio for future listening. This will pull the CD back in the player. LD/EJ (Load/Eject): Press the LD side of the music that you turn on the ignition or radio, the ...

Owner's Manual
Page 183
... player will continue to the next track. If you hold the LD/EJ button. Press RPT again to play a CD. If the radio is empty, LOAD will begin to turn off , the CD will continue moving forward through the CD. 2 NEXT: Press this pushbutton once to six CDs, in . ALL ...RDM will appear on the display. Load a CD. The player will appear on the display. 3. If any other radio button. Press the pushbutton (1-6) for your CD, it more than once, the player...
... player will continue to the next track. If you hold the LD/EJ button. Press RPT again to play a CD. If the radio is empty, LOAD will begin to turn off , the CD will continue moving forward through the CD. 2 NEXT: Press this pushbutton once to six CDs, in . ALL ...RDM will appear on the display. Load a CD. The player will appear on the display. 3. If any other radio button. Press the pushbutton (1-6) for your CD, it more than once, the player...

Owner's Manual
Page 184
..., contact your radio displays an error message, write it to play a CD when listening to switch between the tape, CD, and DVD (if equipped) if loaded.
..., contact your radio displays an error message, write it to play a CD when listening to switch between the tape, CD, and DVD (if equipped) if loaded.
Owner's Manual
Page 189
... playing the disc. Press and hold this button will begin playing the movie automatically, press the RSE button on the remote control to start . Z (Eject/Load): Press this button to pause the DVD. The DVD region code is ejected, but not removed, pressing this button for use in the United States... authorized for more than two seconds to turn off the DVD system. If a DVD or CD is printed on the jacket of up , into the loading slot. If a disc is playing. may be adjusted using the radio controls. Playing a Disc To play , refer to the on the video screen or the...
... playing the disc. Press and hold this button will begin playing the movie automatically, press the RSE button on the remote control to start . Z (Eject/Load): Press this button to pause the DVD. The DVD region code is ejected, but not removed, pressing this button for use in the United States... authorized for more than two seconds to turn off the DVD system. If a DVD or CD is printed on the jacket of up , into the loading slot. If a disc is playing. may be adjusted using the radio controls. Playing a Disc To play , refer to the on the video screen or the...

Owner's Manual
Page 193
... DVD will be displayed, if a disc is inserted upside down, if the disc is not readable, or if the disc format is not properly loaded or ejected. Load/Eject Error: This message will continue playing in the compartment. Remove the battery compartment door located on the bottom of the following : 1. This button...
... DVD will be displayed, if a disc is inserted upside down, if the disc is not readable, or if the disc format is not properly loaded or ejected. Load/Eject Error: This message will continue playing in the compartment. Remove the battery compartment door located on the bottom of the following : 1. This button...

Owner's Manual
Page 194
... the OnStar® System. • If a disc is inserted upside down, if the disc is not readable, or if the disc format is not properly loaded or ejected. 3-68 Cleaning the DVD Player When cleaning the outside DVD faceplate and buttons, use only a clean cloth dampened with clean water. The disc...
... the OnStar® System. • If a disc is inserted upside down, if the disc is not readable, or if the disc format is not properly loaded or ejected. 3-68 Cleaning the DVD Player When cleaning the outside DVD faceplate and buttons, use only a clean cloth dampened with clean water. The disc...

Owner's Manual
Page 201
... ...4-24 Winter Driving ...4-26 If You Are Stuck: In Sand, Mud, Ice or Snow ...4-30 Towing ...4-32 Towing Your Vehicle ...4-32 Recreational Vehicle Towing ...4-32 Loading Your Vehicle ...4-34 Towing a Trailer ...4-40 Your Driving, the Road, and Your Vehicle ...4-2 Defensive Driving ...4-2 Drunken Driving ...4-2 Control of a Vehicle ...4-5 Braking ...4-6 Traction Control System (TCS...
... ...4-24 Winter Driving ...4-26 If You Are Stuck: In Sand, Mud, Ice or Snow ...4-30 Towing ...4-32 Towing Your Vehicle ...4-32 Recreational Vehicle Towing ...4-32 Loading Your Vehicle ...4-34 Towing a Trailer ...4-40 Your Driving, the Road, and Your Vehicle ...4-2 Defensive Driving ...4-2 Drunken Driving ...4-2 Control of a Vehicle ...4-5 Braking ...4-6 Traction Control System (TCS...

Owner's Manual
Page 234
Two labels on your vehicle can break, and it may properly carry, the Tire and Loading Information label and the Certification label. {CAUTION: Do not load your vehicle any heavier than the GVWR, or either the maximum front or rear GAWR. If you to know how much weight it can... of all occupants, cargo and all nonfactory-installed options. Set the parking brake and remove the key. 4. Release the parking brake. 4-34 Dolly Towing Loading Your Vehicle It is called the vehicle capacity weight and includes the weight of your vehicle. To tow your vehicle using a dolly. Put the front...
Two labels on your vehicle can break, and it may properly carry, the Tire and Loading Information label and the Certification label. {CAUTION: Do not load your vehicle any heavier than the GVWR, or either the maximum front or rear GAWR. If you to know how much weight it can... of all occupants, cargo and all nonfactory-installed options. Set the parking brake and remove the key. 4. Release the parking brake. 4-34 Dolly Towing Loading Your Vehicle It is called the vehicle capacity weight and includes the weight of your vehicle. To tow your vehicle using a dolly. Put the front...

Owner's Manual
Page 235
Vehicle Capacity Weight A. Tire and Loading Information Label Example 2 Example 1 A. Vehicle Capacity Weight The Tire and Loading Information label shows the seating capacity and the total weight your vehicle has the Tire-Loading Information label, Example 2, the label is on the rear edge of the driver's door. 4-35 If your vehicle has the Tire and Loading Information label, Example 1, the label is called the vehicle capacity weight. This weight is attached to the center pillar, near the driver's door latch. If your vehicle can properly carry.
Vehicle Capacity Weight A. Tire and Loading Information Label Example 2 Example 1 A. Vehicle Capacity Weight The Tire and Loading Information label shows the seating capacity and the total weight your vehicle has the Tire-Loading Information label, Example 2, the label is on the rear edge of the driver's door. 4-35 If your vehicle has the Tire and Loading Information label, Example 1, the label is called the vehicle capacity weight. This weight is attached to the center pillar, near the driver's door latch. If your vehicle can properly carry.
Owner's Manual
Page 236
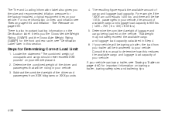
...Tires on towing a trailer, towing safety rules and trailering tips. If your vehicle, the amount of available cargo and luggage load capacity is also important loading information on page 5-61. Determine the combined weight of the driver and passengers from your trailer will be riding in your ... on tires and inflation see "Certification Label" later in this reduces the available cargo and luggage load capacity of cargo and luggage load capacity. Subtract the combined weight of the driver and passengers that will be transferred to determine how this section. 4. ...
...Tires on towing a trailer, towing safety rules and trailering tips. If your vehicle, the amount of available cargo and luggage load capacity is also important loading information on page 5-61. Determine the combined weight of the driver and passengers from your trailer will be riding in your ... on tires and inflation see "Certification Label" later in this reduces the available cargo and luggage load capacity of cargo and luggage load capacity. Subtract the combined weight of the driver and passengers that will be transferred to determine how this section. 4. ...