

User Manual
Page 3
... 5 1.2 Specifications 6 1.3 Minimum Hardware Requirement Table for Windows® VistaTM Premium 2008 and Basic Logo 10 1.4 Motherboard Layout 11 1.5 ASRock 1394_SPDIF I/O Plus 12 1.6 ASRock WiFi-802.11g Module Specifications (For X48TurboTwins-WiFi Only 13 2 Installation 14 2.1 Screw Holes 14 2.2 Pre-installation Precautions 14 2.3 CPU Installation 15 2.4 Installation of Heatsink and CPU fan 17 2.5 Installation of Memory Modules (DIMM 18 2.6 Expansion...
... 5 1.2 Specifications 6 1.3 Minimum Hardware Requirement Table for Windows® VistaTM Premium 2008 and Basic Logo 10 1.4 Motherboard Layout 11 1.5 ASRock 1394_SPDIF I/O Plus 12 1.6 ASRock WiFi-802.11g Module Specifications (For X48TurboTwins-WiFi Only 13 2 Installation 14 2.1 Screw Holes 14 2.2 Pre-installation Precautions 14 2.3 CPU Installation 15 2.4 Installation of Heatsink and CPU fan 17 2.5 Installation of Memory Modules (DIMM 18 2.6 Expansion...
User Manual
Page 4
... / VistaTM 64-bit Without RAID Functions 47 2.19.1 Installing Windows® 2000 / XP / XP 64-bit Without RAID Functions 47 2.19.2 Installing Windows® VistaTM / VistaTM 64-bit Without RAID Functions 48 2.20 DTS Operation Guide (For X48TurboTwins-WiFi Only) . 50 2.21 Untied Overclocking Technology 51 ... Screen 68 3.5.1 Boot Settings Configuration 68 3.6 Security Screen 69 3.7 Exit Screen 70 4 Software Support 71 4.1 Install Operating System 71 4.2 Support CD Information 71 4.2.1 Running Support CD 71 4.2.2 Drivers Menu 71 4.2.3 Utilities Menu 71 4.2.4 Contact Information 71 4
... / VistaTM 64-bit Without RAID Functions 47 2.19.1 Installing Windows® 2000 / XP / XP 64-bit Without RAID Functions 47 2.19.2 Installing Windows® VistaTM / VistaTM 64-bit Without RAID Functions 48 2.20 DTS Operation Guide (For X48TurboTwins-WiFi Only) . 50 2.21 Untied Overclocking Technology 51 ... Screen 68 3.5.1 Boot Settings Configuration 68 3.6 Security Screen 69 3.7 Exit Screen 70 4 Software Support 71 4.1 Install Operating System 71 4.2 Support CD Information 71 4.2.1 Running Support CD 71 4.2.2 Drivers Menu 71 4.2.3 Utilities Menu 71 4.2.4 Contact Information 71 4
User Manual
Page 8
..., please remove the AC power cord from your PC in the BIOS, applying Untied Overclocking Technology, or using the thirdparty overclocking tools. ASRock U-COP (see CAUTION 16) Certifications - It should be done at your system. This motherboard supports native FSB1600/1333/1066/800 MHz.... DDR3 1066 800 DDR2 667, DDR2 800, DDR3 800 8 - Before you do no need to page 27 and 28 for proper installation. 5. CPU Fan Tachometer - Microsoft® Windows® 2000 / XP / XP 64-bit / VistaTM / VistaTM 64-bit compliant (see CAUTION 15) - This motherboard supports Dual...
..., please remove the AC power cord from your PC in the BIOS, applying Untied Overclocking Technology, or using the thirdparty overclocking tools. ASRock U-COP (see CAUTION 16) Certifications - It should be done at your system. This motherboard supports native FSB1600/1333/1066/800 MHz.... DDR3 1066 800 DDR2 667, DDR2 800, DDR3 800 8 - Before you do no need to page 27 and 28 for proper installation. 5. CPU Fan Tachometer - Microsoft® Windows® 2000 / XP / XP 64-bit / VistaTM / VistaTM 64-bit compliant (see CAUTION 15) - This motherboard supports Dual...

User Manual
Page 9
... for details about eSATAII and eSATAII installation procedures. 11. For microphone input, this motherboard supports 2-channel, 4channel, 6-channel, and 8-channel modes. ASRock website http://www.asrock.com 13. It is not recommended to get the best system performance under Windows® XP and Windows® VistaTM. ASRock website: http://www.asrock.com 14. Please refer to -use...
... for details about eSATAII and eSATAII installation procedures. 11. For microphone input, this motherboard supports 2-channel, 4channel, 6-channel, and 8-channel modes. ASRock website http://www.asrock.com 13. It is not recommended to get the best system performance under Windows® XP and Windows® VistaTM. ASRock website: http://www.asrock.com 14. Please refer to -use...

User Manual
Page 10
ASRock WiFi-802.11g module and RAID / AHCI functions are required to meet above minimum hardware requirements in order to submit Windows® VistaTM Premium 2008 and Basic logo, please follow below table for Windows® VistaTM Premium 2008 logo. 10 Please refer to page 61 for detailed setup. 1 . 3 Minimum Hardware Requirement Table... the motherboard functions properly and unplug the power cord, then plug it back again. It is detected, the system will automatically shutdown. Before you install the PC system. 16. To improve heat dissipation, remember to use IDE mode under...
ASRock WiFi-802.11g module and RAID / AHCI functions are required to meet above minimum hardware requirements in order to submit Windows® VistaTM Premium 2008 and Basic logo, please follow below table for Windows® VistaTM Premium 2008 logo. 10 Please refer to page 61 for detailed setup. 1 . 3 Minimum Hardware Requirement Table... the motherboard functions properly and unplug the power cord, then plug it back again. It is detected, the system will automatically shutdown. Before you install the PC system. 16. To improve heat dissipation, remember to use IDE mode under...

User Manual
Page 22
...a customer incorrectly configures their system they will operate as 12-pipe cards while in a single PC. If you install. For Windows® XP Vendor Chipset ATI Radeon HD2900XT Radeon HD 2600XT Radeon HD 2600PRO Radeon X1950XTX Radeon X1950PRO Model Driver MSI... CrossFireTM components, a CrossFireTM Ready graphics card, a CrossFireTM Ready motherboard and a CrossFireTM Edition co-processor graphics card, must be installed correctly to benefit from ATITM or any 3D application. Please refer to below table for ATITM CrossFireTM driver updates. 2.7 CrossFireTM Operation...
...a customer incorrectly configures their system they will operate as 12-pipe cards while in a single PC. If you install. For Windows® XP Vendor Chipset ATI Radeon HD2900XT Radeon HD 2600XT Radeon HD 2600PRO Radeon X1950XTX Radeon X1950PRO Model Driver MSI... CrossFireTM components, a CrossFireTM Ready graphics card, a CrossFireTM Ready motherboard and a CrossFireTM Edition co-processor graphics card, must be installed correctly to benefit from ATITM or any 3D application. Please refer to below table for ATITM CrossFireTM driver updates. 2.7 CrossFireTM Operation...

User Manual
Page 24
.... We recommend using this utility to uninstall any VGA driver installed in your system, there is an optional download. Step 7. Step 8. Then you have Windows® XP Service Pack 2 or higher installed in your system. Restart your computer. Step 9. Install the VGA card drivers to installation. Connect the DVI monitor cable to the DVI connector...
.... We recommend using this utility to uninstall any VGA driver installed in your system, there is an optional download. Step 7. Step 8. Then you have Windows® XP Service Pack 2 or higher installed in your system. Restart your computer. Step 9. Install the VGA card drivers to installation. Connect the DVI monitor cable to the DVI connector...
User Manual
Page 43
...system. B. D. WARNING! C. Then, the drivers compatible to your system can work properly. 2.18 Installing Windows® XP / XP 64-bit / VistaTM / VistaTM 64-bit With RAID Functions If you want to install Windows® XP / XP 64-bit / VistaTM / VistaTM 64-bit OS on the screen, "...UTILITY Advanced screen IDE Configuration. Set "SATAII Configuration" to the OS you see these messages, Please insert a diskette into your optical drive to install Windows® XP / XP 64-bit on the support CD driver page. STEP 2: Make a SATA / SATAII Driver Diskette. A. During POST ...
...system. B. D. WARNING! C. Then, the drivers compatible to your system can work properly. 2.18 Installing Windows® XP / XP 64-bit / VistaTM / VistaTM 64-bit With RAID Functions If you want to install Windows® XP / XP 64-bit / VistaTM / VistaTM 64-bit OS on the screen, "...UTILITY Advanced screen IDE Configuration. Set "SATAII Configuration" to the OS you see these messages, Please insert a diskette into your optical drive to install Windows® XP / XP 64-bit on the support CD driver page. STEP 2: Make a SATA / SATAII Driver Diskette. A. During POST ...

User Manual
Page 44
...Intel® RAID driver. Windows XP)" for proper configuration. After the installation of page 43. Begin Windows® setup by using "RAID Installation Guide" to set RAID configuration, you are allowed to install Windows® XP / XP 64-bit on your system. (Windows® 2000 is located ...Support CD, "Guide to SATA Hard Disks Installation and RAID Configuration", which is located in the folder at the following path: .. \ RAID Installation Guide STEP 4: Install Windows® XP / XP 64-bit OS on your system. STEP 3: Use "RAID Installation Guide" to your system as well. ...
...Intel® RAID driver. Windows XP)" for proper configuration. After the installation of page 43. Begin Windows® setup by using "RAID Installation Guide" to set RAID configuration, you are allowed to install Windows® XP / XP 64-bit on your system. (Windows® 2000 is located ...Support CD, "Guide to SATA Hard Disks Installation and RAID Configuration", which is located in the folder at the following path: .. \ RAID Installation Guide STEP 4: Install Windows® XP / XP 64-bit OS on your system. STEP 3: Use "RAID Installation Guide" to your system as well. ...

User Manual
Page 46
... [RAID]. page, please insert the ASRock Support CD into the optical drive to boot your optical drive, and click the "Load Driver" button on the left on the bottom to set the option to check the installation guide in the folder at the following path: .. \ RAID Installation Guide STEP 3: Install Windows® VistaTM / VistaTM 64...
... [RAID]. page, please insert the ASRock Support CD into the optical drive to boot your optical drive, and click the "Load Driver" button on the left on the bottom to set the option to check the installation guide in the folder at the following path: .. \ RAID Installation Guide STEP 3: Install Windows® VistaTM / VistaTM 64...

User Manual
Page 47
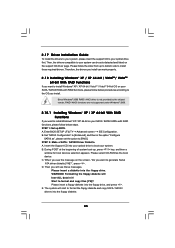
...Using SATA / SATAII HDDs and eSATAII devices without RAID functions, please follow below procedures according to the OS you install. STEP 3: Install Windows® XP / XP 64-bit OS on your system. (Windows® 2000 is not provided by following section 2.18.1 step 2 on page 43. Please make a SATA... XP 64-bit / VistaTM / VistaTM 64-bit OS on your system. 47 After reading the floppy disk, the driver will be presented. STEP 2: Install Windows® 2000 / XP / XP 64-bit OS on your SATA / SATAII HDDs without NCQ function STEP 1: Set up BIOS. When prompted, insert the...
...Using SATA / SATAII HDDs and eSATAII devices without RAID functions, please follow below procedures according to the OS you install. STEP 3: Install Windows® XP / XP 64-bit OS on your system. (Windows® 2000 is not provided by following section 2.18.1 step 2 on page 43. Please make a SATA... XP 64-bit / VistaTM / VistaTM 64-bit OS on your system. 47 After reading the floppy disk, the driver will be presented. STEP 2: Install Windows® 2000 / XP / XP 64-bit OS on your SATA / SATAII HDDs without NCQ function STEP 1: Set up BIOS. When prompted, insert the...

User Manual
Page 48
... than the version you want to install Windows?" B. page, please insert the ASRock Support CD into your system. Set... "SATAII Configuration" to [Enhanced], and then in the option "Configure SATAII as ", please set the option to [AHCI]. Are you sure you are in the following path in the option "Configure SATAII as ", please set at AHCI mode and install Windows...SATA / SATAII HDDs and eSATAII devices without RAID functions, please follow the instruction to install Windows® VistaTM / VistaTM 64-bit OS on your optical drive, and click the "...
... than the version you want to install Windows?" B. page, please insert the ASRock Support CD into your system. Set... "SATAII Configuration" to [Enhanced], and then in the option "Configure SATAII as ", please set the option to [AHCI]. Are you sure you are in the following path in the option "Configure SATAII as ", please set at AHCI mode and install Windows...SATA / SATAII HDDs and eSATAII devices without RAID functions, please follow the instruction to install Windows® VistaTM / VistaTM 64-bit OS on your optical drive, and click the "...

User Manual
Page 56
If you install Windows® XP and select [Auto], you install Windows® VistaTM and want to enable this function, please...overheated. Technology. CPU Thermal Throttling You may reduce CPU voltage and lead to [Enabled] if using Microsoft® Windows® XP, or Linux kernel version 2.4.18 or higher. Intel (R) SpeedStep(tm) tech. The default value... need to set the "Power Schemes" as Microsoft® Windows® XP. Please set this item to [Enabled]. This option will be hidden if the installed CPU does not support Intel (R) Virtualization Technology. This option ...
If you install Windows® XP and select [Auto], you install Windows® VistaTM and want to enable this function, please...overheated. Technology. CPU Thermal Throttling You may reduce CPU voltage and lead to [Enabled] if using Microsoft® Windows® XP, or Linux kernel version 2.4.18 or higher. Intel (R) SpeedStep(tm) tech. The default value... need to set the "Power Schemes" as Microsoft® Windows® XP. Please set this item to [Enabled]. This option will be hidden if the installed CPU does not support Intel (R) Virtualization Technology. This option ...

Quick Installation Guide
Page 26
...to your chassis. Please follow below procedures according to install at least 2 SATA / SATAII hard disks. It is not provided by the chipset vendor, RAID / AHCI functions are not supported under Windows® 2000. 26 ASRock X48TurboTwins-WiFi Motherboard English 2 . 1 1 Serial ATA ...(SATA) / Serial ATAII (SATAII) Hard Disks Installation This motherboard adopts Intel® ICH9R south bridge chipset that supports Serial ATA...
...to your chassis. Please follow below procedures according to install at least 2 SATA / SATAII hard disks. It is not provided by the chipset vendor, RAID / AHCI functions are not supported under Windows® 2000. 26 ASRock X48TurboTwins-WiFi Motherboard English 2 . 1 1 Serial ATA ...(SATA) / Serial ATAII (SATAII) Hard Disks Installation This motherboard adopts Intel® ICH9R south bridge chipset that supports Serial ATA...

Quick Installation Guide
Page 27
... the screen, "Do you want to [IDE]. At the beginning of system boot-up BIOS. Select the driver to install according to install a thirdparty AHCI driver. STEP 2: Install Windows® 2000 / XP / XP 64-bit OS on your optical drive to generate Serial ATA driver diskette [YN]?", ...Enhanced], and then in the option "Configure SATAII as the boot device. 2.14.1 Installing Windows® 2000 / XP / XP 64-bit Without RAID Functions If you want to boot your system. 27 ASRock X48TurboTwins-WiFi Motherboard English Please select CD-ROM as ", please set the option to format...
... the screen, "Do you want to [IDE]. At the beginning of system boot-up BIOS. Select the driver to install according to install a thirdparty AHCI driver. STEP 2: Install Windows® 2000 / XP / XP 64-bit OS on your optical drive to generate Serial ATA driver diskette [YN]?", ...Enhanced], and then in the option "Configure SATAII as the boot device. 2.14.1 Installing Windows® 2000 / XP / XP 64-bit Without RAID Functions If you want to boot your system. 27 ASRock X48TurboTwins-WiFi Motherboard English Please select CD-ROM as ", please set the option to format...

Quick Installation Guide
Page 28
...; VistaTM / VistaTM 64-bit OS on your system. Enter BIOS SETUP UTILITY Advanced screen IDE Configuration. A. A. STEP 2: Install Windows® VistaTM / VistaTM 64-bit OS on your system. 28 ASRock X48TurboTwins-WiFi Motherboard English Insert the Windows® VistaTM / VistaTM 64-bit optical disk into your optical drive, and click the "Load Driver" button on...
...; VistaTM / VistaTM 64-bit OS on your system. Enter BIOS SETUP UTILITY Advanced screen IDE Configuration. A. A. STEP 2: Install Windows® VistaTM / VistaTM 64-bit OS on your system. 28 ASRock X48TurboTwins-WiFi Motherboard English Insert the Windows® VistaTM / VistaTM 64-bit optical disk into your optical drive, and click the "Load Driver" button on...

RAID Installation Guide
Page 1
Guide to RAID Configurations 3 2.1 Introduction of RAID 3 2.2 RAID Configuration Precautions 5 2.3 Installing Windows® XP / XP 64-bit / VistaTM / VistaTM 64-bit With RAID Functions 6 2.4 Setting the BIOS RAID Items 11 2.5 Configuring the Intel RAID BIOS 11 2.6 Deleting RAID Volume 15 1 Guide to SATA Hard Disks Installation 2 1.1 Serial ATA (SATA) Hard Disks Installation 2 2. Guide to SATA Hard Disks Installation and RAID Configuration 1.
Guide to RAID Configurations 3 2.1 Introduction of RAID 3 2.2 RAID Configuration Precautions 5 2.3 Installing Windows® XP / XP 64-bit / VistaTM / VistaTM 64-bit With RAID Functions 6 2.4 Setting the BIOS RAID Items 11 2.5 Configuring the Intel RAID BIOS 11 2.6 Deleting RAID Volume 15 1 Guide to SATA Hard Disks Installation 2 1.1 Serial ATA (SATA) Hard Disks Installation 2 2. Guide to SATA Hard Disks Installation and RAID Configuration 1.

RAID Installation Guide
Page 6
... on your SATA / SATAII HDDs with RAID functions, please follow below procedures according to the OS you install. 2.3.1 Installing Windows® XP / XP 64-bit With RAID Functions If you want to install Windows® XP / XP 64-bit on the screen, "Do you want to generate Serial ATA driver ... option "Configure SATAII as the boot device. Enter BIOS SETUP UTILITY Advanced screen IDE Configuration. 2.3 Installing Windows® XP / XP 64-bit / VistaTM / VistaTM 64-bit With RAID Functions If you want to install Windows® XP / XP 64-bit / VistaTM / VistaTM 64-bit OS on your SATA /...
... on your SATA / SATAII HDDs with RAID functions, please follow below procedures according to the OS you install. 2.3.1 Installing Windows® XP / XP 64-bit With RAID Functions If you want to install Windows® XP / XP 64-bit on the screen, "Do you want to generate Serial ATA driver ... option "Configure SATAII as the boot device. Enter BIOS SETUP UTILITY Advanced screen IDE Configuration. 2.3 Installing Windows® XP / XP 64-bit / VistaTM / VistaTM 64-bit With RAID Functions If you want to install Windows® XP / XP 64-bit / VistaTM / VistaTM 64-bit OS on your SATA /...

RAID Installation Guide
Page 7
... CD, "Guide to manage RAID functions, you install. When done, exit Setup. 3. Begin Windows® setup by using "RAID Installation Guide" to set up system BIOS as step 2 of Windows® setup, press F6 to build an Intel "RAID Ready" system. 1. STEP 4: Install Windows® XP / XP 64-bit OS on ...your system. Please refer to the document in the Support CD, "Guide to SATA Hard Disks Installation and RAID Configuration", which is located in the folder at the following steps...
... CD, "Guide to manage RAID functions, you install. When done, exit Setup. 3. Begin Windows® setup by using "RAID Installation Guide" to set up system BIOS as step 2 of Windows® setup, press F6 to build an Intel "RAID Ready" system. 1. STEP 4: Install Windows® XP / XP 64-bit OS on ...your system. Please refer to the document in the Support CD, "Guide to SATA Hard Disks Installation and RAID Configuration", which is located in the folder at the following steps...

RAID Installation Guide
Page 9
..." to [Enhanced], and then in the option "Configure SATAII as", please set RAID configuration. When you see "Where do you want to install Windows® VistaTM / VistaTM 64-bit on your system, and follow below steps. B. Before you start to configure the RAID function, you need... Manager Information" for proper configuration. page, please insert the ASRock Support CD into the optical drive again to continue the installation. A. Please refer to the document in the Support CD, "Guide to SATA Hard Disks Installation and RAID Configuration", which is located in the folder at ...
..." to [Enhanced], and then in the option "Configure SATAII as", please set RAID configuration. When you see "Where do you want to install Windows® VistaTM / VistaTM 64-bit on your system, and follow below steps. B. Before you start to configure the RAID function, you need... Manager Information" for proper configuration. page, please insert the ASRock Support CD into the optical drive again to continue the installation. A. Please refer to the document in the Support CD, "Guide to SATA Hard Disks Installation and RAID Configuration", which is located in the folder at ...


