

Quick Start Guide
Page 2
...interface is subject to model's specifications 2 INTERFACE CONNECTOR 2 Connecting to component video/HDTV adapter 4. Connect one end of the power cord into the AC power socket on the projector first and then the computer. 3. Turn on the projector; Do not remove AC power...4 1. Composite video cable 5. Connect one end of the VGA cable to an electrical outlet. connect the other end to the VGA connector on the projector; Press the power button twice. 2. Adjust the position, focus and zoom. 4. USB cable 9. 3 RCA component cable 1 安裝 1. &#...
...interface is subject to model's specifications 2 INTERFACE CONNECTOR 2 Connecting to component video/HDTV adapter 4. Connect one end of the power cord into the AC power socket on the projector first and then the computer. 3. Turn on the projector; Do not remove AC power...4 1. Composite video cable 5. Connect one end of the VGA cable to an electrical outlet. connect the other end to the VGA connector on the projector; Press the power button twice. 2. Adjust the position, focus and zoom. 4. USB cable 9. 3 RCA component cable 1 安裝 1. &#...

User Manual
Page 2
... hereof and specifically disclaims the implied warranties of Acer Incorporated. The serial number and model number are registered trademarks of merchantability or fitness for identification purposes only and belong to their respective companies. Acer Projector X1110/X1110A/X1210/X1210A/...revisions or changes. Other companies' product names or trademarks are trademarks or registered trademarks of Acer Incorporated. Copyright © 2010. Acer Incorporated. Acer Projector X1110/X1110A/X1210/X1210A/X1210K/X1210S/X1213/X1216 Series User's Guide Original Issue: 3/2010 Changes may be...
... hereof and specifically disclaims the implied warranties of Acer Incorporated. The serial number and model number are registered trademarks of merchantability or fitness for identification purposes only and belong to their respective companies. Acer Projector X1110/X1110A/X1210/X1210A/...revisions or changes. Other companies' product names or trademarks are trademarks or registered trademarks of Acer Incorporated. Copyright © 2010. Acer Incorporated. Acer Projector X1110/X1110A/X1210/X1210A/X1210K/X1210S/X1213/X1216 Series User's Guide Original Issue: 3/2010 Changes may be...
User Manual
Page 7
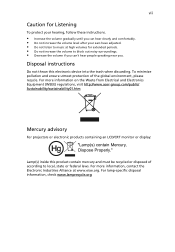
For lamp-specific disposal information, check www.lamprecycle.org vii Caution for extended periods. • Do not increase the volume to local, state or federal laws. Lamp(s) inside ... these instructions. • Increase the volume gradually until you . For more information on the Waste from Electrical and Electronics Equipment (WEEE) regulations, visit http://www.acer-group.com/public/ Sustainability/sustainability01.htm Mercury advisory For projectors or electronic products containing an LCD/CRT monitor or display: "Lamp(s) contain Mercury, Dispose Properly."
For lamp-specific disposal information, check www.lamprecycle.org vii Caution for extended periods. • Do not increase the volume to local, state or federal laws. Lamp(s) inside ... these instructions. • Increase the volume gradually until you . For more information on the Waste from Electrical and Electronics Equipment (WEEE) regulations, visit http://www.acer-group.com/public/ Sustainability/sustainability01.htm Mercury advisory For projectors or electronic products containing an LCD/CRT monitor or display: "Lamp(s) contain Mercury, Dispose Properly."

User Manual
Page 18
... turn blue. 4 Turn on your source automatically. • If the screen displays "Lock" & "Source" icons, it means the projector is locked onto a specific source type and there is no such type of input signal detected. • If the screen displays "No Signal", please make sure ...the signal cables are securely connected. English 8 Turning the Projector On/Off Turning On the Projector 1 Remove the lens cap. 2 Ensure that the power cord...
... turn blue. 4 Turn on your source automatically. • If the screen displays "Lock" & "Source" icons, it means the projector is locked onto a specific source type and there is no such type of input signal detected. • If the screen displays "No Signal", please make sure ...the signal cables are securely connected. English 8 Turning the Projector On/Off Turning On the Projector 1 Remove the lens cap. 2 Ensure that the power cord...


