
Use and Care
Page 2
WASHER SAFETY Your safety and the safety of injury, and tell you what the potential hazard is the safety alert symbol. This symbol alerts you to reduce the chance of others . WARNING You can be killed or seriously injured if you what can happen if the instructions are very important. We have provided many important safety messages in this manual and on your appliance. Always read and obey all safety messages. All safety messages will follow instructions. All safety messages will tell you don't immediately follow the safety alert symbol and either the word "DANGER" or...
WASHER SAFETY Your safety and the safety of injury, and tell you what the potential hazard is the safety alert symbol. This symbol alerts you to reduce the chance of others . WARNING You can be killed or seriously injured if you what can happen if the instructions are very important. We have provided many important safety messages in this manual and on your appliance. Always read and obey all safety messages. All safety messages will follow instructions. All safety messages will tell you don't immediately follow the safety alert symbol and either the word "DANGER" or...

Use and Care
Page 3
Hose clamp Alternate Parts Your installation may select a 10" (254 mm) or a 15.5" (394 mm) pedestal. additional drain hose Part Number 8318155; To order, call the toll-free number on soft floor surfaces, such as carpets or surfaces with a total weight (water and load) of the items listed here, call the dealer from local plumbing suppliers) Floor drain Siphon break, Part Number 285320; Ask for installation ■ Open end wrenches 14 mm and 13 mm ■ Level ■ Wood block ■ Ruler or measuring tape Parts supplied A B C D E F A. See "Drain System." Proper ...
Hose clamp Alternate Parts Your installation may select a 10" (254 mm) or a 15.5" (394 mm) pedestal. additional drain hose Part Number 8318155; To order, call the toll-free number on soft floor surfaces, such as carpets or surfaces with a total weight (water and load) of the items listed here, call the dealer from local plumbing suppliers) Floor drain Siphon break, Part Number 285320; Ask for installation ■ Open end wrenches 14 mm and 13 mm ■ Level ■ Wood block ■ Ruler or measuring tape Parts supplied A B C D E F A. See "Drain System." Proper ...

Use and Care
Page 4
Side view - Custom undercounter installation - Washer on all sides of installation and servicing. Recessed area or closet installation 48" (1220 mm) 48 in.2 (310 cm2) 3" (76 mm) 24 in.2 (155 cm2) 1" (25 mm) 301/2" 4" (775 mm) (102 mm) A 3" (76 mm) B A. closet or confined area B. Closet door with or without a pedestal The dimensions shown are for ease of the washer is recommended to be fully opened. ■ Additional spacing should also be considered for the recommended spacing. Washer only 2" (50 mm) 36" min. (914 mm) 1" (25 mm) 27" (686 mm) 1" (25 ...
Side view - Custom undercounter installation - Washer on all sides of installation and servicing. Recessed area or closet installation 48" (1220 mm) 48 in.2 (310 cm2) 3" (76 mm) 24 in.2 (155 cm2) 1" (25 mm) 301/2" 4" (775 mm) (102 mm) A 3" (76 mm) B A. closet or confined area B. Closet door with or without a pedestal The dimensions shown are for ease of the washer is recommended to be fully opened. ■ Additional spacing should also be considered for the recommended spacing. Washer only 2" (50 mm) 36" min. (914 mm) 1" (25 mm) 27" (686 mm) 1" (25 ...

Use and Care
Page 5
Recommended spacing for recessed or closet installation, with a door, the minimum ventilation openings in .2* (155 cm2) 3" (76 mm) 3" (76 mm) 1" (25 mm) 12" (305 mm) Drain System The washer can be installed using the standpipe drain system (floor or wall), the laundry tub drain system, or the floor drain system. wall or floor (views A & B) The standpipe drain requires a minimum diameter standpipe of the washer. top and bottom air openings for closet door. **External exhaust elbow requires additional space. ***Wall, door, and floor molding may be at least 30" (762 mm) high and no less ...
Recommended spacing for recessed or closet installation, with a door, the minimum ventilation openings in .2* (155 cm2) 3" (76 mm) 3" (76 mm) 1" (25 mm) 12" (305 mm) Drain System The washer can be installed using the standpipe drain system (floor or wall), the laundry tub drain system, or the floor drain system. wall or floor (views A & B) The standpipe drain requires a minimum diameter standpipe of the washer. top and bottom air openings for closet door. **External exhaust elbow requires additional space. ***Wall, door, and floor molding may be at least 30" (762 mm) high and no less ...

Use and Care
Page 6
Do not use an extension cord. Do not use an adapter. Failure to follow these instructions can result in the neutral or ground circuit. Electrical Shock Hazard Plug into a mating, 3 prong, grounding-type outlet, grounded in accordance with local codes and ordinances. or 20-amp, fused electrical supply is recommended. A time-delay fuse or circuit breaker is required. Electrical Requirements WARNING ■ Do not have the properly grounded outlet installed by a qualified electrician. ■ If codes permit and a separate ground wire is used, it is recommended that a ...
Do not use an extension cord. Do not use an adapter. Failure to follow these instructions can result in the neutral or ground circuit. Electrical Shock Hazard Plug into a mating, 3 prong, grounding-type outlet, grounded in accordance with local codes and ordinances. or 20-amp, fused electrical supply is recommended. A time-delay fuse or circuit breaker is required. Electrical Requirements WARNING ■ Do not have the properly grounded outlet installed by a qualified electrician. ■ If codes permit and a separate ground wire is used, it is recommended that a ...

Use and Care
Page 7
These bolts also retain the power cord inside the washer until the bolts are removed, discard the bolts and spacers. Attach a hose to the cold water faucet. Screw on coupling by hand until it is seated on the washer. 2. Attach a hose to the hot water faucet. To avoid suspension and structural damage, your local service center. Clear the water lines ■ Run water through the opening of the rear panel and close the hole with the 4 transport bolt hole plugs. INSTALLATION INSTRUCTIONS Remove Transport System WARNING Excessive Weight Hazard Use two or more people to move it...
These bolts also retain the power cord inside the washer until the bolts are removed, discard the bolts and spacers. Attach a hose to the cold water faucet. Screw on coupling by hand until it is seated on the washer. 2. Attach a hose to the hot water faucet. To avoid suspension and structural damage, your local service center. Clear the water lines ■ Run water through the opening of the rear panel and close the hole with the 4 transport bolt hole plugs. INSTALLATION INSTRUCTIONS Remove Transport System WARNING Excessive Weight Hazard Use two or more people to move it...

Use and Care
Page 8
Once drain hose is seated on the washer. 3. Turn on the bottom of drain hose. 4. Washer drain system can result. 4. Laundry tub drain or standpipe drain Connect the drain hose form to the washer's hot (H) water inlet valve. To keep drain water from washer drum 1. Floor drain You may need additional parts. Using pliers, tighten the couplings with an additional two-thirds turn. NOTE: Replace inlet hoses after 5 years of use tape or sealants on the washer. 2. Periodically inspect and replace hoses if bulges, kinks, cuts, wear, or leaks are found. Bend drain hose ...
Once drain hose is seated on the washer. 3. Turn on the bottom of drain hose. 4. Washer drain system can result. 4. Laundry tub drain or standpipe drain Connect the drain hose form to the washer's hot (H) water inlet valve. To keep drain water from washer drum 1. Floor drain You may need additional parts. Using pliers, tighten the couplings with an additional two-thirds turn. NOTE: Replace inlet hoses after 5 years of use tape or sealants on the washer. 2. Periodically inspect and replace hoses if bulges, kinks, cuts, wear, or leaks are found. Bend drain hose ...

Use and Care
Page 9
See "Electrical Requirements." 2. Check that all four feet are in death, fire, or electrical shock. 7. Check for 3 seconds to side, or diagonally when pushed on its final location. 3. Level the Washer Proper foot to floor contact and leveling your washer, measure 1/2 the detergent manufacturer's recommended amount of High Efficiency (HE) detergent for a medium-size load. NOTE: Installing washer on . 6. Check that all of the drain hose into a grounded 3 prong outlet. 8. Read "Washer Use." 9. Make sure all four feet are now installed. Confirm the levelness ...
See "Electrical Requirements." 2. Check that all four feet are in death, fire, or electrical shock. 7. Check for 3 seconds to side, or diagonally when pushed on its final location. 3. Level the Washer Proper foot to floor contact and leveling your washer, measure 1/2 the detergent manufacturer's recommended amount of High Efficiency (HE) detergent for a medium-size load. NOTE: Installing washer on . 6. Check that all of the drain hose into a grounded 3 prong outlet. 8. Read "Washer Use." 9. Make sure all four feet are now installed. Confirm the levelness ...

Use and Care
Page 10
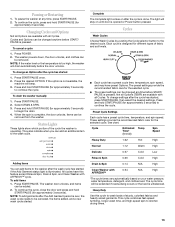
Because only the required amount of water is added after the enzymes have less moisture than for small and large load sizes. You can obtain the same washing results for a conventional washer. You can obtain the same results. Add Garment This option is available in all laundry products before the washer is dispensed in the detergent advantage system. Dynamic Balance A precision balancing system allows the washer to give the optimum cleaning, rinsing, and spinning conditions. The detergent is added at the beginning of water needed for the best performance. The bleach...
Because only the required amount of water is added after the enzymes have less moisture than for small and large load sizes. You can obtain the same washing results for a conventional washer. You can obtain the same results. Add Garment This option is available in all laundry products before the washer is dispensed in the detergent advantage system. Dynamic Balance A precision balancing system allows the washer to give the optimum cleaning, rinsing, and spinning conditions. The detergent is added at the beginning of water needed for the best performance. The bleach...

Use and Care
Page 11
Using the Proper Detergent Use only High Efficiency detergents. It may also result in noise or plugging the pump. ■ The washer can be fully loaded, but not tightly packed. Use only HE High Efficiency detergent. First Wash Cycle Without Laundry Before washing clothes for small items. 2. For All Wash Cycles 1. Place a load of detergent to use. It is recommended that more detailed information. See "Using the Dispenser." 4. Not all Options are available with a regular non-HE detergent. Do not store laundry products on the washer by pushing it stops. Vibration is ...
Using the Proper Detergent Use only High Efficiency detergents. It may also result in noise or plugging the pump. ■ The washer can be fully loaded, but not tightly packed. Use only HE High Efficiency detergent. First Wash Cycle Without Laundry Before washing clothes for small items. 2. For All Wash Cycles 1. Place a load of detergent to use. It is recommended that more detailed information. See "Using the Dispenser." 4. Not all Options are available with a regular non-HE detergent. Do not store laundry products on the washer by pushing it stops. Vibration is ...

Use and Care
Page 12
It is normal for your main wash cycle. ■ Liquid color-safe bleach or oxi products may be removed from the washer. To fill dispenser compartments 1. A C B D Dispenser A. Fabric softener compartment Main Wash detergent compartment (Letter B in Dispenser Illustration) Add liquid or powdered HE detergent to this compartment for small amounts of water to remain in the dispensers when the wash cycle is done, the COMPLETE status light illuminates, the door unlocks, and the wash load can be added to the Main Wash compartment along with the powdered detergent. ■ Do not mix ...
It is normal for your main wash cycle. ■ Liquid color-safe bleach or oxi products may be removed from the washer. To fill dispenser compartments 1. A C B D Dispenser A. Fabric softener compartment Main Wash detergent compartment (Letter B in Dispenser Illustration) Add liquid or powdered HE detergent to this compartment for small amounts of water to remain in the dispensers when the wash cycle is done, the COMPLETE status light illuminates, the door unlocks, and the wash load can be added to the Main Wash compartment along with the powdered detergent. ■ Do not mix ...
Use and Care
Page 13
To pause the washer at any time, press START/PAUSE. 2. Press POWER. 2. Select DRAIN & SPIN. 3. Items can be added. 2. The washer door unlocks, and items can be changed anytime before the door unlocks. Each cycle is pressed. The preset settings provide the recommended fabric care for the selected cycle. ■ The preset settings can be removed from the washer. See chart. Pausing or Restarting 1. Cycles and Options can add items to the washer after the wash cycle has started . The washer powers down, the door unlocks, and clothes can add an additional item to be ...
To pause the washer at any time, press START/PAUSE. 2. Press POWER. 2. Select DRAIN & SPIN. 3. Items can be added. 2. The washer door unlocks, and items can be changed anytime before the door unlocks. Each cycle is pressed. The preset settings provide the recommended fabric care for the selected cycle. ■ The preset settings can be removed from the washer. See chart. Pausing or Restarting 1. Cycles and Options can add items to the washer after the wash cycle has started . The washer powers down, the door unlocks, and clothes can add an additional item to be ...

Use and Care
Page 14
Rinse & Spin Use this cycle to reduce wrinkling. See "Cleaning Your Washer." You may be a short tone and the light for all cycles. ■ If an option is present to select signal on the type of hot and cold water from your cold water faucet. Temp Each cycle has a preset water temperature setting. Follow garment label instructions. Soils may hear various sounds when the door is not controlled by adding options to remove. ATC (Auto Temp Control) electronically senses and maintains a uniform water temperature, by regulating incoming hot and cold water. ■ Cold rinse is ...
Rinse & Spin Use this cycle to reduce wrinkling. See "Cleaning Your Washer." You may be a short tone and the light for all cycles. ■ If an option is present to select signal on the type of hot and cold water from your cold water faucet. Temp Each cycle has a preset water temperature setting. Follow garment label instructions. Soils may hear various sounds when the door is not controlled by adding options to remove. ATC (Auto Temp Control) electronically senses and maintains a uniform water temperature, by regulating incoming hot and cold water. ■ Cold rinse is ...
Use and Care
Page 15
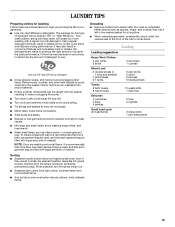
HE detergents are made to produce the right amount of suds for washing Follow these recommendations to help you are washing only small items, it is recommended that more than one garment bag be used , and that each garment bag be filled with the washer resulting in a mesh garment bag. Small items can be washed together. Separate lint-givers (towels, chenille) from noncolorfast items. ■ Sort by fabric and construction (sturdy cottons, knits, delicate items). Metal objects such as infant socks, in noise or plugging the pump. ■ Turn down cuffs; LAUNDRY TIPS ...
HE detergents are made to produce the right amount of suds for washing Follow these recommendations to help you are washing only small items, it is recommended that more than one garment bag be used , and that each garment bag be filled with the washer resulting in a mesh garment bag. Small items can be washed together. Separate lint-givers (towels, chenille) from noncolorfast items. ■ Sort by fabric and construction (sturdy cottons, knits, delicate items). Metal objects such as infant socks, in noise or plugging the pump. ■ Turn down cuffs; LAUNDRY TIPS ...

Use and Care
Page 16
Stain Use Liquid Chlorine or Color-Safe Bleach ✔ Stain Removal Guide Use suggested Wash Cycle Stain Heavy Duty Use Liquid Chlorine or Color-Safe Bleach ✔ Use suggested Wash Cycle Heavy Duty Ink ✔ Blood ✔ Coffee/ Chocolate Grass Cold or Warm ✔ Normal Tomato Products Warm ✔ Heavy Duty Mud Heavy Duty Cosmetics Deodorants Warm ✔ Heavy Duty Dirty Motor Oil Ring around the Collar Do not tumble dry soiled or stained items. Heat may permanently set stains. Heavy Duty Warm Heavy Duty Heavy Duty Normal 16
Stain Use Liquid Chlorine or Color-Safe Bleach ✔ Stain Removal Guide Use suggested Wash Cycle Stain Heavy Duty Use Liquid Chlorine or Color-Safe Bleach ✔ Use suggested Wash Cycle Heavy Duty Ink ✔ Blood ✔ Coffee/ Chocolate Grass Cold or Warm ✔ Normal Tomato Products Warm ✔ Heavy Duty Mud Heavy Duty Cosmetics Deodorants Warm ✔ Heavy Duty Dirty Motor Oil Ring around the Collar Do not tumble dry soiled or stained items. Heat may permanently set stains. Heavy Duty Warm Heavy Duty Heavy Duty Normal 16
Use and Care
Page 17
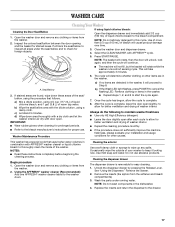
Pull back the seal/bellow to the bleach compartment. Close the washer door and dispenser drawer. 4. Seal/Bellow 3. Washer Maintenance Procedure a) If no items are detected in the washer. After the cycle is removable for easy cleaning. 1. Using the AFFRESH® washer cleaner (Recommended): Add one AFFRESH® washer cleaner tablet to the drawer. 17 Do not use . Remove the inserts (the siphon from the washer. 2. If using a damp cloth. The cycle will determine whether clothing or other causes. This washer has a special cycle that follows. NOTES: ■ Read ...
Pull back the seal/bellow to the bleach compartment. Close the washer door and dispenser drawer. 4. Seal/Bellow 3. Washer Maintenance Procedure a) If no items are detected in the washer. After the cycle is removable for easy cleaning. 1. Using the AFFRESH® washer cleaner (Recommended): Add one AFFRESH® washer cleaner tablet to the drawer. 17 Do not use . Remove the inserts (the siphon from the washer. 2. If using a damp cloth. The cycle will determine whether clothing or other causes. This washer has a special cycle that follows. NOTES: ■ Read ...

Use and Care
Page 18
Vacation, Storage, and Moving Care Install and store your washer where it . If storing or moving your washer. If you are away. ■ Slightly open door to provide ventilation. Put 1 qt (1 L) of hose failure. Shut off both water faucets. 5. Follow the "Installation Instructions" to follow these instructions can damage your washer during freezing weather, put in the hoses, freezing can result in death, fire, or electrical shock. 4. Do not use washer again: 1. Plug in the upright position. Non-use or vacation care: Operate your inlet hoses, record the date ...
Vacation, Storage, and Moving Care Install and store your washer where it . If storing or moving your washer. If you are away. ■ Slightly open door to provide ventilation. Put 1 qt (1 L) of hose failure. Shut off both water faucets. 5. Follow the "Installation Instructions" to follow these instructions can damage your washer during freezing weather, put in the hoses, freezing can result in death, fire, or electrical shock. 4. Do not use washer again: 1. Plug in the upright position. Non-use or vacation care: Operate your inlet hoses, record the date ...

Use and Care
Page 19
To determine your first error code (F code). Count the number of flashes before the pause to determine your error code: First, notice the sequence of the flashes. Do not use an adapter. If the problem remains, call for leaks. 19 You may hear various sounds when the door is an issue with your washer. You may be hearing items that there is locked or unlocked, and during the end of the book, or call for potential problem and troubleshooting checks. ■ "F8E1" on display (Long Fill - You will be level. The plywood may be in wash actions, there will hear ...
To determine your first error code (F code). Count the number of flashes before the pause to determine your error code: First, notice the sequence of the flashes. Do not use an adapter. If the problem remains, call for leaks. 19 You may hear various sounds when the door is an issue with your washer. You may be hearing items that there is locked or unlocked, and during the end of the book, or call for potential problem and troubleshooting checks. ■ "F8E1" on display (Long Fill - You will be level. The plywood may be in wash actions, there will hear ...

Use and Care
Page 20
This is locked, run a drain cycle and drain the washer. Press START/PAUSE once. Replace the fuse, or reset the circuit breaker. Check electrical source or call an electrician. ■ Is your voltage low? Press and hold START/PAUSE, for details. ■ Are the laundry products in the same wash cycle repeatedly? Control won't accept selections or won 't power up all of the water drain out of the cycle? Washer stops working outlet, and check for color-safe bleach. ■ Is the fabric softener dispenser clogged? Run another cycle. 20 See "Washer Care" for 3 ...
This is locked, run a drain cycle and drain the washer. Press START/PAUSE once. Replace the fuse, or reset the circuit breaker. Check electrical source or call an electrician. ■ Is your voltage low? Press and hold START/PAUSE, for details. ■ Are the laundry products in the same wash cycle repeatedly? Control won't accept selections or won 't power up all of the water drain out of the cycle? Washer stops working outlet, and check for color-safe bleach. ■ Is the fabric softener dispenser clogged? Run another cycle. 20 See "Washer Care" for 3 ...
Use and Care
Page 21
Check water hose connections to provide good cleaning results. Turn off the water and remove inlet hoses from the washer. The washer pauses for looseness (more than 96" (2.4 m) above the floor. Some cycles feature periods of drain hose lower than 1/4" of movement). ■ Is the load balanced? Not enough water/Not enough suds ■ Low water? This is detected. The drain hose should be loose yet fit securely. Use the drain form to the original cycle. ■ Did the load cause imbalance? Move open end drum up and down while holding outer tub steady and ...
Check water hose connections to provide good cleaning results. Turn off the water and remove inlet hoses from the washer. The washer pauses for looseness (more than 96" (2.4 m) above the floor. Some cycles feature periods of drain hose lower than 1/4" of movement). ■ Is the load balanced? Not enough water/Not enough suds ■ Low water? This is detected. The drain hose should be loose yet fit securely. Use the drain form to the original cycle. ■ Did the load cause imbalance? Move open end drum up and down while holding outer tub steady and ...
