

User Manual
Page 3
Contents Notices...v Safety information vi About this guide vi P5G41T-M LX2/BR specifications summary viii Chapter 1: Product introduction 1.1 Before you proceed 1-1 1.2 Motherboard overview 1-2 1.2.1 Motherboard layout 1-2 1.2.2 Layout ...Internal connectors 1-9 1.8 Software support 1-15 1.8.1 Installing an operating system 1-15 1.8.2 Support DVD information 1-15 1.8.3 ASUS Express Gate 1-16 Chapter 2: BIOS information 2.1 Managing and updating your BIOS 2-1 2.1.1 ASUS Update utility 2-1 2.1.2 ASUS EZ Flash 2 2-2 2.1.3 ASUS CrashFree BIOS 2-3 2.2 BIOS setup program 2-3 iii
Contents Notices...v Safety information vi About this guide vi P5G41T-M LX2/BR specifications summary viii Chapter 1: Product introduction 1.1 Before you proceed 1-1 1.2 Motherboard overview 1-2 1.2.1 Motherboard layout 1-2 1.2.2 Layout ...Internal connectors 1-9 1.8 Software support 1-15 1.8.1 Installing an operating system 1-15 1.8.2 Support DVD information 1-15 1.8.3 ASUS Express Gate 1-16 Chapter 2: BIOS information 2.1 Managing and updating your BIOS 2-1 2.1.1 ASUS Update utility 2-1 2.1.2 ASUS EZ Flash 2 2-2 2.1.3 ASUS CrashFree BIOS 2-3 2.2 BIOS setup program 2-3 iii
User Manual
Page 10
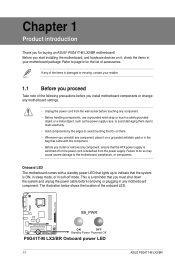
...damaged or missing, contact your motherboard package. Failure to do so may cause severe damage to page ix for buying an ASUS® P5G41T-M LX2/BR motherboard! The illustration below shows the location of the following precautions before you install motherboard components or change any component, .... • Before you uninstall any motherboard settings. • Unplug the power cord from the power supply. SB_PWR P5G41T-M LX2/BR ON OFF Standby Power Powered Off P5G41T-M LX2/BR Onboard power LED 1-1 ASUS P5G41T-M LX2/BR Refer to the motherboard, peripherals, or components.
...damaged or missing, contact your motherboard package. Failure to do so may cause severe damage to page ix for buying an ASUS® P5G41T-M LX2/BR motherboard! The illustration below shows the location of the following precautions before you install motherboard components or change any component, .... • Before you uninstall any motherboard settings. • Unplug the power cord from the power supply. SB_PWR P5G41T-M LX2/BR ON OFF Standby Power Powered Off P5G41T-M LX2/BR Onboard power LED 1-1 ASUS P5G41T-M LX2/BR Refer to the motherboard, peripherals, or components.

User Manual
Page 12
.../loss/incorrect removal of repair only if the damage is on a DDR2 DIMM socket. DDR3 modules are not bent. ASUS will process Return Merchandise Authorization (RMA) requests only if the motherboard comes with two Double Data Rate 3 (DDR3) Dual ...processors. • Upon purchase of the DDR3 DIMM sockets: DIMM_A1 DIMM_B1 Channel Channel A Channel B Sockets DIMM_A1 DIMM_B1 P5G41T-M LX2/BR P5G41T-M LX2/BR 240-pin DDR3 DIMM sockets 1-3 ASUS P5G41T-M LX2/BR Contact your retailer immediately if the PnP cap is notched differently to the PnP cap/socket contacts/motherboard components.
.../loss/incorrect removal of repair only if the damage is on a DDR2 DIMM socket. DDR3 modules are not bent. ASUS will process Return Merchandise Authorization (RMA) requests only if the motherboard comes with two Double Data Rate 3 (DDR3) Dual ...processors. • Upon purchase of the DDR3 DIMM sockets: DIMM_A1 DIMM_B1 Channel Channel A Channel B Sockets DIMM_A1 DIMM_B1 P5G41T-M LX2/BR P5G41T-M LX2/BR 240-pin DDR3 DIMM sockets 1-3 ASUS P5G41T-M LX2/BR Contact your retailer immediately if the PnP cap is notched differently to the PnP cap/socket contacts/motherboard components.

User Manual
Page 14
... slot and press firmly until the card is already installed in a chassis). 3. Remove the bracket opposite the slot that complies with the PCI Express specifications. 1-5 ASUS P5G41T-M LX2/BR Align the card connector with the screw you intend to the card. 3. See Chapter 2 for the expansion card. The following sub‑sections describe the...
... slot and press firmly until the card is already installed in a chassis). 3. Remove the bracket opposite the slot that complies with the PCI Express specifications. 1-5 ASUS P5G41T-M LX2/BR Align the card connector with the screw you intend to the card. 3. See Chapter 2 for the expansion card. The following sub‑sections describe the...

User Manual
Page 16
..., DRAM in slow refresh, power supply in the BIOS. 2. KBPWR 12 23 +5V +5VSB (Default) P5G41T-M LX2/BR P5G41T-M LX2/BR Keyboard Power Setting 3. USBPW1-4 12 23 +5V +5VSB (Default) USBPW5-8 P5G41T-M LX2/BR 12 23 +5V +5VSB (Default) P5G41T-M LX2/BR USB Device Wake-Up 1-7 ASUS P5G41T-M LX2/BR When you set this jumper to pins 2-3 (+5VSB), you to enable or disable the keyboard wake...
..., DRAM in slow refresh, power supply in the BIOS. 2. KBPWR 12 23 +5V +5VSB (Default) P5G41T-M LX2/BR P5G41T-M LX2/BR Keyboard Power Setting 3. USBPW1-4 12 23 +5V +5VSB (Default) USBPW5-8 P5G41T-M LX2/BR 12 23 +5V +5VSB (Default) P5G41T-M LX2/BR USB Device Wake-Up 1-7 ASUS P5G41T-M LX2/BR When you set this jumper to pins 2-3 (+5VSB), you to enable or disable the keyboard wake...

User Manual
Page 18
...2.0 devices. 9. These two 4-pin Universal Serial Bus (USB) ports are uncertain about the minimum power supply requirement for details. 1-9 ASUS P5G41T-M LX2/BR This port is for pointing devices or other VGA-compatible devices. 10. Otherwise, the system will not boot. • We recommend ...Volts GND +3 Volts +3 Volts PIN 1 GND +5 Volts +5 Volts +5 Volts -5 Volts GND GND GND PSON# GND -12 Volts +3 Volts P5G41T-M LX2/BR ATX power connectors • For a fully configured system, we recommend that complies with more power-consuming devices or when you intend to connect the ...
...2.0 devices. 9. These two 4-pin Universal Serial Bus (USB) ports are uncertain about the minimum power supply requirement for details. 1-9 ASUS P5G41T-M LX2/BR This port is for pointing devices or other VGA-compatible devices. 10. Otherwise, the system will not boot. • We recommend ...Volts GND +3 Volts +3 Volts PIN 1 GND +5 Volts +5 Volts +5 Volts -5 Volts GND GND GND PSON# GND -12 Volts +3 Volts P5G41T-M LX2/BR ATX power connectors • For a fully configured system, we recommend that complies with more power-consuming devices or when you intend to connect the ...

User Manual
Page 20
... to the motherboard's IDE connector, then select one of device(s) - CD Right Audio Channel GND GND Left Audio Channel P5G41T-M LX2/BR P5G41T-M LX2/BR Internal audio connector 1-11 ASUS P5G41T-M LX2/BR 4. There are three connectors on the IDE connector is removed to receive stereo audio input from sound sources such as "... connector (40-1 pin PRI_IDE) The onboard IDE connector is set as a CD-ROM, TV tuner, or MPEG card. PIN1 PRI_IDE P5G41T-M LX2/BR NOTE:Orient the red markings on the Ultra DMA cable connector. Master Slave Master Slave Cable connector Black Black Gray Black or gray ...
... to the motherboard's IDE connector, then select one of device(s) - CD Right Audio Channel GND GND Left Audio Channel P5G41T-M LX2/BR P5G41T-M LX2/BR Internal audio connector 1-11 ASUS P5G41T-M LX2/BR 4. There are three connectors on the IDE connector is removed to receive stereo audio input from sound sources such as "... connector (40-1 pin PRI_IDE) The onboard IDE connector is set as a CD-ROM, TV tuner, or MPEG card. PIN1 PRI_IDE P5G41T-M LX2/BR NOTE:Orient the red markings on the Ultra DMA cable connector. Master Slave Master Slave Cable connector Black Black Gray Black or gray ...

User Manual
Page 22
... AGND NC NC NC AAFP PIN 1 PIN 1 MIC2 MICPWR Line out_R NC Line out_L PORT1 L PORT1 R PORT2 R SENSE_SEND PORT2 L P5G41T-M LX2/BR HD-audio-compliant Legacy AC'97 pin definition compliant definition P5G41T-M LX2/BR Front panel audio connector • We recommend that supports either HD Audio or legacy AC`97 audio standard. Front panel...'s high-definition audio capability. • If you want to connect an AC'97 front panel audio module to [AC97]. CHASSIS +5VSB_MB Chassis Signal GND P5G41T-M LX2/BR P5G41T-M LX2/BR Chassis intrusion connector 1-13 ASUS P5G41T-M LX2/BR
... AGND NC NC NC AAFP PIN 1 PIN 1 MIC2 MICPWR Line out_R NC Line out_L PORT1 L PORT1 R PORT2 R SENSE_SEND PORT2 L P5G41T-M LX2/BR HD-audio-compliant Legacy AC'97 pin definition compliant definition P5G41T-M LX2/BR Front panel audio connector • We recommend that supports either HD Audio or legacy AC`97 audio standard. Front panel...'s high-definition audio capability. • If you want to connect an AC'97 front panel audio module to [AC97]. CHASSIS +5VSB_MB Chassis Signal GND P5G41T-M LX2/BR P5G41T-M LX2/BR Chassis intrusion connector 1-13 ASUS P5G41T-M LX2/BR

User Manual
Page 24
Visit the ASUS website at any time without notice. Always install the latest OS version and corresponding updates to maximize the features of your computer. The DVD automatically ... system This motherboard supports Windows® XP/Vista/7 operating systems (OS). To run the DVD. 1-15 ASUS P5G41T-M LX2/BR Refer to your computer, browse the contents of the Support DVD are subject to change at www.asus.com for better compatibility and system stability. 1.8.2 Support DVD information The Support DVD that comes with the...
Visit the ASUS website at any time without notice. Always install the latest OS version and corresponding updates to maximize the features of your computer. The DVD automatically ... system This motherboard supports Windows® XP/Vista/7 operating systems (OS). To run the DVD. 1-15 ASUS P5G41T-M LX2/BR Refer to your computer, browse the contents of the Support DVD are subject to change at www.asus.com for better compatibility and system stability. 1.8.2 Support DVD information The Support DVD that comes with the...

User Manual
Page 26
... zero (0); The Splash Screen The Express Gate's splash screen appears eight seconds after you through basic Express Gate configurations including language, date, and time. 1-17 ASUS P5G41T-M LX2/BR click to immediately enter the existing OS • To enter the motherboard BIOS Setup program, click Exit on the splash screen and then hold down... Express Gate environment hot keys Key + + + + + Function Switch between applications Bring the Power-Off dialog box Save screen snapshots to file When you are using ASUS Express Gate for the detailed software instructions.
... zero (0); The Splash Screen The Express Gate's splash screen appears eight seconds after you through basic Express Gate configurations including language, date, and time. 1-17 ASUS P5G41T-M LX2/BR click to immediately enter the existing OS • To enter the motherboard BIOS Setup program, click Exit on the splash screen and then hold down... Express Gate environment hot keys Key + + + + + Function Switch between applications Bring the Power-Off dialog box Save screen snapshots to file When you are using ASUS Express Gate for the detailed software instructions.

User Manual
Page 28
...the Enable checkbox. Express Gate automatically uses the connected port. If Security is connected to configure the static IP settings manually. Exits ASUS Express Gate. In the WiFi tab of the Advanced Network Settings box, key in the SSID field. Left-click this step....only when a removable storage device / USB drive is running (e.g. Right-click it to enable WiFi and establish the wireless connection. 1-19 ASUS P5G41T-M LX2/BR Click Yes to activate the new setting. Click Configuration Panel LaunchBar. Make the proper network configurations. If you installed on the hard disk...
...the Enable checkbox. Express Gate automatically uses the connected port. If Security is connected to configure the static IP settings manually. Exits ASUS Express Gate. In the WiFi tab of the Advanced Network Settings box, key in the SSID field. Left-click this step....only when a removable storage device / USB drive is running (e.g. Right-click it to enable WiFi and establish the wireless connection. 1-19 ASUS P5G41T-M LX2/BR Click Yes to activate the new setting. Click Configuration Panel LaunchBar. Make the proper network configurations. If you installed on the hard disk...

User Manual
Page 30
... details. To repair Express Gate: Click Start > All Programs > Express Gate > Express Gate Installer > Repair this software. 1-21 ASUS P5G41T-M LX2/BR Refer to configure Express Gate. Main Advanced Power BIOS SETUP UTILITY Boot Tools Exit ASUS EZ Flash 2 Express Gate Enter OS Timer Reset User Data [Auto] [10 Seconds] [No] Press ENTER to run...
... details. To repair Express Gate: Click Start > All Programs > Express Gate > Express Gate Installer > Repair this software. 1-21 ASUS P5G41T-M LX2/BR Refer to configure Express Gate. Main Advanced Power BIOS SETUP UTILITY Boot Tools Exit ASUS EZ Flash 2 Express Gate Enter OS Timer Reset User Data [Auto] [10 Seconds] [No] Press ENTER to run...

User Manual
Page 31
...before you to avoid network traffic, or click Auto Select then click Next. Select the ASUS FTP site nearest you update the BIOS using the ASUS Update utility. 2.1.1 ASUS Update utility The ASUS Update is a utility that allows you to manage, save, and update the motherboard BIOS... the Internet, then click Next. Updating the BIOS To update the BIOS: 1. Select Update BIOS from the Internet a. ASUS P5G41T-M LX2/BR 2-1 Click the Utilities tab, then click ASUS Update. 3. Installing ASUS Update To install ASUS Update: 1. Copy the original motherboard BIOS using this utility.
...before you to avoid network traffic, or click Auto Select then click Next. Select the ASUS FTP site nearest you update the BIOS using the ASUS Update utility. 2.1.1 ASUS Update utility The ASUS Update is a utility that allows you to manage, save, and update the motherboard BIOS... the Internet, then click Next. Updating the BIOS To update the BIOS: 1. Select Update BIOS from the Internet a. ASUS P5G41T-M LX2/BR 2-1 Click the Utilities tab, then click ASUS Update. 3. Installing ASUS Update To install ASUS Update: 1. Copy the original motherboard BIOS using this utility.

User Manual
Page 33
...to the floppy disk drive, if supported. 3. Entering BIOS Setup at startup To enter BIOS Setup at www.asus.com. • The removable devices that ASUS CrashFree BIOS support vary with its parameters. Entering BIOS Setup after POST To enter BIOS Setup after the utility ... item under the Exit menu. If you to turn on again. 2.1.3 ASUS CrashFree BIOS The ASUS CrashFree BIOS is an auto recovery tool that allows you do not press , POST continues with motherboard models. ASUS P5G41T-M LX2/BR 2-3 The utility automatically checks the devices for details. 2.2 BIOS setup program...
...to the floppy disk drive, if supported. 3. Entering BIOS Setup at startup To enter BIOS Setup at www.asus.com. • The removable devices that ASUS CrashFree BIOS support vary with its parameters. Entering BIOS Setup after POST To enter BIOS Setup after the utility ... item under the Exit menu. If you to turn on again. 2.1.3 ASUS CrashFree BIOS The ASUS CrashFree BIOS is an auto recovery tool that allows you do not press , POST continues with motherboard models. ASUS P5G41T-M LX2/BR 2-3 The utility automatically checks the devices for details. 2.2 BIOS setup program...

User Manual
Page 35
...] [Compatible] [Enhanced] Enhanced Mode Support On [S-ATA] Sets Serial ATA, Parallel ATA or both as native mode. Configuration options: [0] [5] [10] [15] [20] [25] [30] [35] ASUS P5G41T-M LX2/BR 2-5 Select ARMD (ATAPI Removable Media Device) if your device is set or change the configurations for detecting ATA/ATAPI devices. Type [Auto] Selects the type...
...] [Compatible] [Enhanced] Enhanced Mode Support On [S-ATA] Sets Serial ATA, Parallel ATA or both as native mode. Configuration options: [0] [5] [10] [15] [20] [25] [30] [35] ASUS P5G41T-M LX2/BR 2-5 Select ARMD (ATAPI Removable Media Device) if your device is set or change the configurations for detecting ATA/ATAPI devices. Type [Auto] Selects the type...

User Manual
Page 37
... to enable or disable the No-Execution Page Protection Technology. Intel(R) SpeedStep(TM) Tech [Enabled] Allows you to use the EIST. Configuration options: [Enabled] [Disabled] ASUS P5G41T-M LX2/BR 2-7
... to enable or disable the No-Execution Page Protection Technology. Intel(R) SpeedStep(TM) Tech [Enabled] Allows you to use the EIST. Configuration options: [Enabled] [Disabled] ASUS P5G41T-M LX2/BR 2-7

User Manual
Page 39
... options: [Disabled] [378] [278] [3BC] Parallel Port Mode [Normal] Allows you to select parallel port IRQ. Configuration options: [Auto] [Floppy] [Forced FDD] [Hard Disk] [CDROM] ASUS P5G41T-M LX2/BR 2-9 Configuration options: [IRQ5] [IRQ7] 2.4.4 USB Configuration The items in . If no USB device is detected, the legacy USB support is plugged in this item to...
... options: [Disabled] [378] [278] [3BC] Parallel Port Mode [Normal] Allows you to select parallel port IRQ. Configuration options: [Auto] [Floppy] [Forced FDD] [Hard Disk] [CDROM] ASUS P5G41T-M LX2/BR 2-9 Configuration options: [IRQ5] [IRQ7] 2.4.4 USB Configuration The items in . If no USB device is detected, the legacy USB support is plugged in this item to...

User Manual
Page 41
... External Modem [Disabled] Enables or disables RI to [Power On], the system goes into ON state after an AC power loss. Configuration options: [Disabled] [Enabled] ASUS P5G41T-M LX2/BR 2-11 When this item is set to generate a wake event. This feature requires an ATX power supply that provides at least 1A on the +5VSB...
... External Modem [Disabled] Enables or disables RI to [Power On], the system goes into ON state after an AC power loss. Configuration options: [Disabled] [Enabled] ASUS P5G41T-M LX2/BR 2-11 When this item is set to generate a wake event. This feature requires an ATX power supply that provides at least 1A on the +5VSB...

User Manual
Page 43
.... User Access Level [Full Access] This item allows you set a Supervisor Password: 1. In the password box, key in a password containing up to any field. [Limited] - ASUS P5G41T-M LX2/BR 2-13 The Supervisor Password item on top of the screen shows the default Not Installed. The User Password item on top of the screen shows...
.... User Access Level [Full Access] This item allows you set a Supervisor Password: 1. In the password box, key in a password containing up to any field. [Limited] - ASUS P5G41T-M LX2/BR 2-13 The Supervisor Password item on top of the screen shows the default Not Installed. The User Password item on top of the screen shows...

User Manual
Page 45
menu. Select+FFEEFFEo-11Sn11Sn0Ct0CeeorSSCGSEf eeheaxtSSGGSEhllanvieeoeaxeeeneetllnviccgroeeteettteaapccorlntttaaioSIOdSlnnctpHSIudsreteEctbHemilxfre-eEreopioemslxnntmecpinrtteheisn ASUS P5G41T-M LX2/BR 2-15 Pressing does not immediately menu or from the legend bar to the BIOS items. Main Advanced Power Exit Options Exit & Save Changes Exit & Discard ...
menu. Select+FFEEFFEo-11Sn11Sn0Ct0CeeorSSCGSEf eeheaxtSSGGSEhllanvieeoeaxeeeneetllnviccgroeeteettteaapccorlntttaaioSIOdSlnnctpHSIudsreteEctbHemilxfre-eEreopioemslxnntmecpinrtteheisn ASUS P5G41T-M LX2/BR 2-15 Pressing does not immediately menu or from the legend bar to the BIOS items. Main Advanced Power Exit Options Exit & Save Changes Exit & Discard ...


