
Owners Manual
Page 3
... expose the disc to disassemble the cabinet. Remove the disc from the unit and store it in its edge. There is hazardous to replace the battery incorrectly. Do not stick paper, tape or glue on the disc. Contact qualified service personnel if your system needs repair. 5. Use a cloth ... producers. is a risk of electric shock and/or exposure to Laser Radiation. Replace the battery only with the discs. 3 Do not use the unit in order to protect the enviromnent,please dispose the battery properly. Cleaning Unit When cleaning, make sure the system is unplugged from the center out ...
... expose the disc to disassemble the cabinet. Remove the disc from the unit and store it in its edge. There is hazardous to replace the battery incorrectly. Do not stick paper, tape or glue on the disc. Contact qualified service personnel if your system needs repair. 5. Use a cloth ... producers. is a risk of electric shock and/or exposure to Laser Radiation. Replace the battery only with the discs. 3 Do not use the unit in order to protect the enviromnent,please dispose the battery properly. Cleaning Unit When cleaning, make sure the system is unplugged from the center out ...

Owners Manual
Page 4
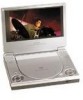
... to Figure 1) Plug one end of the main unit, then plug the other end into the 120V AC power outlet. 2. Rechargeable Battery D. Controls, Indicators, and Connectors 4 C. Contents 1. 1 x 7'' LCD Monitor & DVD Player Combo 2. 1 x AC to Figure 1) Plug one end of the cigarette lighter adapter into the DC 9V jack on the left ... unit, then plug the other end into the cigarette lighter socket. Figure 1 E. Powering the system indoors (Refer to DC Adapter 3. 1 x Remote Control with battery (CR2025) 4. 1 x Instruction Manual 5. 1 x Audio/Video Cable 6. 1 x Cigarette Lighter Adapter 7.
... to Figure 1) Plug one end of the main unit, then plug the other end into the 120V AC power outlet. 2. Rechargeable Battery D. Controls, Indicators, and Connectors 4 C. Contents 1. 1 x 7'' LCD Monitor & DVD Player Combo 2. 1 x AC to Figure 1) Plug one end of the cigarette lighter adapter into the DC 9V jack on the left ... unit, then plug the other end into the cigarette lighter socket. Figure 1 E. Powering the system indoors (Refer to DC Adapter 3. 1 x Remote Control with battery (CR2025) 4. 1 x Instruction Manual 5. 1 x Audio/Video Cable 6. 1 x Cigarette Lighter Adapter 7.

Owners Manual
Page 29
...be recharged safely regardless of whether the battery is used with the battery as a power source, ensure that you first fully charge the battery and store it to the DVD player. NOTE: When the DVD player is fully or only partially discharged. Ni-MH batteries feature high storage capacity and low ...level of time (one week or longer), we recommend that the battery has been charged for a portable...
...be recharged safely regardless of whether the battery is used with the battery as a power source, ensure that you first fully charge the battery and store it to the DVD player. NOTE: When the DVD player is fully or only partially discharged. Ni-MH batteries feature high storage capacity and low ...level of time (one week or longer), we recommend that the battery has been charged for a portable...

Owners Manual
Page 30
...). 3. During this point you always use battery or not) in a humid or damp environment. To charge the battery, please connect the power jack directly into the DVD player and leave the POWER switch in optimum condition. battery in the off . Ideally, store the battery in an airtight container with the player to Battery Recharge: 1. Once fully recharged, the...
...). 3. During this point you always use battery or not) in a humid or damp environment. To charge the battery, please connect the power jack directly into the DVD player and leave the POWER switch in optimum condition. battery in the off . Ideally, store the battery in an airtight container with the player to Battery Recharge: 1. Once fully recharged, the...

Owners Manual
Page 31
... fit snugly to the player. 5. First, make sure the player is indicated by a click. Removing the DVD Player Battery 31 Press the release button on the rear of the unit. Slide the battery towards the rear of the player until it locks into the DVD player DC input jack. Push the battery towards the back of battery. 3. The lock position is...
... fit snugly to the player. 5. First, make sure the player is indicated by a click. Removing the DVD Player Battery 31 Press the release button on the rear of the unit. Slide the battery towards the rear of the player until it locks into the DVD player DC input jack. Push the battery towards the back of battery. 3. The lock position is...


