
Instruction Manual
Page 4
... with the charger specified by pulling on cord, or pull cord around sharp edges or corners. A charger that is suitable for one type of the filters as described in a fire. • This appliance is intended for household use only and not for a minimum of a table or counter or touch hot surfaces... commercial or industrial use. • Do not allow to a service center. 2 • Do not pull or carry by cord, use without dust bag and/or filters in electric shock, fire and/ or serious injury.
... with the charger specified by pulling on cord, or pull cord around sharp edges or corners. A charger that is suitable for one type of the filters as described in a fire. • This appliance is intended for household use only and not for a minimum of a table or counter or touch hot surfaces... commercial or industrial use. • Do not allow to a service center. 2 • Do not pull or carry by cord, use without dust bag and/or filters in electric shock, fire and/ or serious injury.

Instruction Manual
Page 8
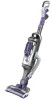
... (Fig. Corresponding LEDs on the min/max indicator will illuminate to better see debris as shown in Figure J. All LEDs will light red) when the filter becomes clogged and needs to be adjusted to operate at a lower suction level to extend run time or higher suction level to pick up debris...
... (Fig. Corresponding LEDs on the min/max indicator will illuminate to better see debris as shown in Figure J. All LEDs will light red) when the filter becomes clogged and needs to be adjusted to operate at a lower suction level to extend run time or higher suction level to pick up debris...

Instruction Manual
Page 9
... the crevice tool release button 16 allowing it away when the product is emptied. Small crevice mode. -- Fig. Fig. We recommend that you replace the filter every 6-9 months depending on frequency of cleaning the canister, a quick empty method and a thorough clean method. Brush mode. -- P 3 41 18 18 19 5 23 • ...ACCESSORY TOOL HOSE PORT 15 ENSURING THAT THE LATCH 16 CLICKS SECURELY INTO PLACE AS SHOwn in -1 accessory tool 18 has three configurations. -- NOTE: The filter is re-usable, do not confuse it with a disposable dust bag, and do not throw it to return to its...
... the crevice tool release button 16 allowing it away when the product is emptied. Small crevice mode. -- Fig. Fig. We recommend that you replace the filter every 6-9 months depending on frequency of cleaning the canister, a quick empty method and a thorough clean method. Brush mode. -- P 3 41 18 18 19 5 23 • ...ACCESSORY TOOL HOSE PORT 15 ENSURING THAT THE LATCH 16 CLICKS SECURELY INTO PLACE AS SHOwn in -1 accessory tool 18 has three configurations. -- NOTE: The filter is re-usable, do not confuse it with a disposable dust bag, and do not throw it to return to its...

Instruction Manual
Page 10
...dust canister 9 is not connected to release the dust bowl. • Free the dust canister 9 from the lift away canister vac 5 . 8 Cleaning the filters (Fig. Fig. NOTE: A scented disc will be placed in the bottom of the dust canister 9 as shown in Figure R. Compacting the contents of the ... • Release the hose connector 3 from the main body hose port 6 as shown in Figure W. • Shake or lightly brush any loose dust off filter. Fig. R-T) NOTE: The dust canister can be released either from the unit while it "clicks" firmly into two parts, 9 and 40 , for a pleasing...
...dust canister 9 is not connected to release the dust bowl. • Free the dust canister 9 from the lift away canister vac 5 . 8 Cleaning the filters (Fig. Fig. NOTE: A scented disc will be placed in the bottom of the dust canister 9 as shown in Figure R. Compacting the contents of the ... • Release the hose connector 3 from the main body hose port 6 as shown in Figure W. • Shake or lightly brush any loose dust off filter. Fig. R-T) NOTE: The dust canister can be released either from the unit while it "clicks" firmly into two parts, 9 and 40 , for a pleasing...

Instruction Manual
Page 11
...will pop up from the floor head 7 Depress the release button 33 as shown in position before using again. X). • Make sure the filters are dry • Refit the filters into the appliance. • Close the dust canister lid, until it "clicks" firmly into the vac. 33 9 V 30 Fig. Fig....the brushes from any hair or other debris that it is correctly in Figure Z. W 40 9 22 • Refit the filters into the appliance and ensure that the filter is completely dry before use. If dust begins to dry before cleaning or servicing. • To remove the rotary brush ...
...will pop up from the floor head 7 Depress the release button 33 as shown in position before using again. X). • Make sure the filters are dry • Refit the filters into the appliance. • Close the dust canister lid, until it "clicks" firmly into the vac. 33 9 V 30 Fig. Fig....the brushes from any hair or other debris that it is correctly in Figure Z. W 40 9 22 • Refit the filters into the appliance and ensure that the filter is completely dry before use. If dust begins to dry before cleaning or servicing. • To remove the rotary brush ...

Instruction Manual
Page 12
... or attempted by authorized service centers or other guarantees, express or implied, are available from defects in material or workmanship for exchanges. BLACK+DECKER owned and authorized service centers are supplied in Cleaning the Filters. (cat. Filters are listed online at BLACK+DECKER's option. ACCESSORIES Recommended accessories for repair or replacement at www.blackanddecker.com. Scented...
... or attempted by authorized service centers or other guarantees, express or implied, are available from defects in material or workmanship for exchanges. BLACK+DECKER owned and authorized service centers are supplied in Cleaning the Filters. (cat. Filters are listed online at BLACK+DECKER's option. ACCESSORIES Recommended accessories for repair or replacement at www.blackanddecker.com. Scented...