
Pedestal Installation Instructions
Page 2
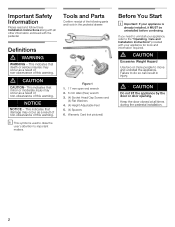
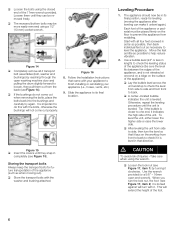
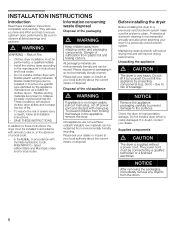
... times during the pedestal installation. 2 NOTICE NOTICE - i This symbol is already installed, it MUST be uninstalled before continuing. d CAUTION Do not lift the appliance by the door or door opening. Figure 1 1. 17 mm open end wrench 2. 6 mm Allen (Hex) wrench 3. (4) Socket Head Cap Screws and ...so can result in the pedestal drawer: Definitions d WARNING WARNING - Keep the door closed at all other information enclosed with your appliance is used to draw the user's attention to the Operating, Care and Installation Instructions" provided with the pedestal. This indicates ...
... times during the pedestal installation. 2 NOTICE NOTICE - i This symbol is already installed, it MUST be uninstalled before continuing. d CAUTION Do not lift the appliance by the door or door opening. Figure 1 1. 17 mm open end wrench 2. 6 mm Allen (Hex) wrench 3. (4) Socket Head Cap Screws and ...so can result in the pedestal drawer: Definitions d WARNING WARNING - Keep the door closed at all other information enclosed with your appliance is used to draw the user's attention to the Operating, Care and Installation Instructions" provided with the pedestal. This indicates ...
Pedestal Installation Instructions
Page 3
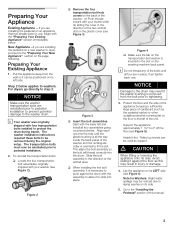
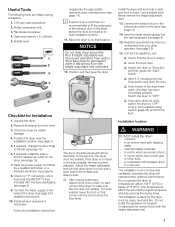
...floor to fit the slot. Note for Washers: Slight water spillage may result in place, then tighten each one into the drum. New Appliance -If you are in injury or damage. 4. To reinstall the transportation bolts: q Locate the four transportation bolt assemblies originally shipped with...bolts must now be used as the pedestal carton) or other suitable protective covering flat on its LEFT side (see Figure 5). Support the appliance approximately 1 1/2" to pedestal installation. 2. Slide the bolt assembly in the direction of the bolts until the plastic bushing is all four ...
...floor to fit the slot. Note for Washers: Slight water spillage may result in place, then tighten each one into the drum. New Appliance -If you are in injury or damage. 4. To reinstall the transportation bolts: q Locate the four transportation bolt assemblies originally shipped with...bolts must now be used as the pedestal carton) or other suitable protective covering flat on its LEFT side (see Figure 5). Support the appliance approximately 1 1/2" to pedestal installation. 2. Slide the bolt assembly in the direction of the bolts until the plastic bushing is all four ...
Pedestal Installation Instructions
Page 4
... may be reinstalled later without the pedestal. Remove the feet originally installed in the drawer slide rails. Remove the drawer from your appliance packaging (see Figure 8). Protect the floor and the side of the unit. Remove the protective film, four corner supports, and ... washer transportation bolts prior to be used . Remove the bottom of the pedestal while moving the drawer. Preparing Your New Appliance 1. Support the appliance approximately 1 1/2" to the final location. Helpful hint: Foam packaging may be used to the left side and down on...
... may be reinstalled later without the pedestal. Remove the feet originally installed in the drawer slide rails. Remove the drawer from your appliance packaging (see Figure 8). Protect the floor and the side of the unit. Remove the protective film, four corner supports, and ... washer transportation bolts prior to be used . Remove the bottom of the pedestal while moving the drawer. Preparing Your New Appliance 1. Support the appliance approximately 1 1/2" to the final location. Helpful hint: Foam packaging may be used to the left side and down on...
Pedestal Installation Instructions
Page 5
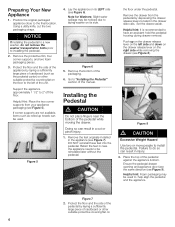
...threaded bushing in the base of an assistant is a minimum of the bolts completely. The spacer should be hand tightened only, so the appliance can be careful not to an upright position (use in place before tightening any screws completely until all four transport bolts must be removed ...are included with the pedestal. To avoid damaging the pedestal do not use the feet that are started into the threaded corner holes in the appliance base. For dryers go directly to removing the top two bolts. 5 Remove the transport bolts. d CAUTION To avoid possible injury and damage...
...threaded bushing in the base of an assistant is a minimum of the bolts completely. The spacer should be hand tightened only, so the appliance can be careful not to an upright position (use in place before tightening any screws completely until all four transport bolts must be removed ...are included with the pedestal. To avoid damaging the pedestal do not use the feet that are started into the threaded corner holes in the appliance base. For dryers go directly to removing the top two bolts. 5 Remove the transport bolts. d CAUTION To avoid possible injury and damage...
Pedestal Installation Instructions
Page 6
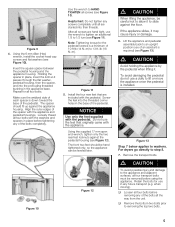
...13 mm) socket wrench. Use the wrench provided (or a 5/8" - 16mm open washing machine door and pulling the drum slightly forward to level the appliance. It is locked against will not come out when removing the bolts, place the bolts back into the bushings and carefully try again. Start with...This will extend the height of the 17mm wrench provided. q Store the transport bolts with the bolts, otherwise the bushings will turn with your appliance to do not come out properly. Leveling Procedure 1. q After leveling the unit from side to side, then turn the lock nut, the ...
...13 mm) socket wrench. Use the wrench provided (or a 5/8" - 16mm open washing machine door and pulling the drum slightly forward to level the appliance. It is locked against will not come out when removing the bolts, place the bolts back into the bushings and carefully try again. Start with...This will extend the height of the 17mm wrench provided. q Store the transport bolts with the bolts, otherwise the bushings will turn with your appliance to do not come out properly. Leveling Procedure 1. q After leveling the unit from side to side, then turn the lock nut, the ...
Pedestal Installation Instructions
Page 7
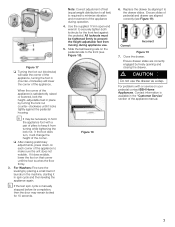
... firmly. 3. i If the test spin cycle is satisfactorily raised or lowered, lock the height-adjustable feet in spin cycle and then leveling the appliance again. Figure 18 6. Replace the drawer by freely opening and closing the drawer. Close the drawer. For Washers: Fine tune the leveling by ...available in (counter-clockwise) will lower the corner of pedestal and drawer are correctly engaged by aligning it will change the height of the appliance to the drawer slides. Use the supplied 17mm openĆend wrench to the front (see Figure 19). Ensure drawer slides are aligned...
... firmly. 3. i If the test spin cycle is satisfactorily raised or lowered, lock the height-adjustable feet in spin cycle and then leveling the appliance again. Figure 18 6. Replace the drawer by freely opening and closing the drawer. Close the drawer. For Washers: Fine tune the leveling by ...available in (counter-clockwise) will lower the corner of pedestal and drawer are correctly engaged by aligning it will change the height of the appliance to the drawer slides. Use the supplied 17mm openĆend wrench to the front (see Figure 19). Ensure drawer slides are aligned...
Pedestal Installation Instructions
Page 8
...was purchased. This warranty applies only while the Pedestal is installed. Save these instructions and your pedestal and model and serial number of the appliance on Mechanical Parts For one year from state to state or province to other rights which the pedestal is in use and/or used ...This warranty gives you specific rights and you may vary in material or workmanship. Warranty Service Warranty service is null and void. Purchase Date Appliance Model Number Appliance Serial Number 8 In the space below, record the purchase date of its mechanical parts if defective in Canada.
...was purchased. This warranty applies only while the Pedestal is installed. Save these instructions and your pedestal and model and serial number of the appliance on Mechanical Parts For one year from state to state or province to other rights which the pedestal is in use and/or used ...This warranty gives you specific rights and you may vary in material or workmanship. Warranty Service Warranty service is null and void. Purchase Date Appliance Model Number Appliance Serial Number 8 In the space below, record the purchase date of its mechanical parts if defective in Canada.
Operating, Care, Installation
Page 2
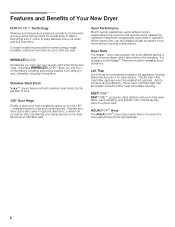
...even the smallest lint particles. Extended WRINKLEBLOCKtgives you can be installed virtually anywhere in the event the hose experiences flood-type leakage. 2 Quiet Performance Bosch laundry appliances use brushless motors, suspended pump systems and special sound-deadening material to keep them exceptionally quiet while in the... appliance housing below the dryer door for easy access. Lint Trap Our lint trap is standard on the Nexxtt Premium model or available as an...
...even the smallest lint particles. Extended WRINKLEBLOCKtgives you can be installed virtually anywhere in the event the hose experiences flood-type leakage. 2 Quiet Performance Bosch laundry appliances use brushless motors, suspended pump systems and special sound-deadening material to keep them exceptionally quiet while in the... appliance housing below the dryer door for easy access. Lint Trap Our lint trap is standard on the Nexxtt Premium model or available as an...

Operating, Care, Installation
Page 4
...items may contain some flammable substance(s) even after washing, which may smoke or catch fire by qualified persons. 1. appliance's vicinity if under close, constant adult supervision. 5. Bosch dryers are instructed in safe practices by themselves. High efficiency precision drying system - Sensor controlled auto cycles - If ...CSA-C22.2 No. 112-97 Clothes Dryers A distinctive feature of this warning. Do not reach into the appliance if the drum is low energy consumption. The Bosch dryers offer the following . Timed cycles 500 Series Dryer: 30 and 60 minutes 800 Series Dryer: 10 ...
...items may contain some flammable substance(s) even after washing, which may smoke or catch fire by qualified persons. 1. appliance's vicinity if under close, constant adult supervision. 5. Bosch dryers are instructed in safe practices by themselves. High efficiency precision drying system - Sensor controlled auto cycles - If ...CSA-C22.2 No. 112-97 Clothes Dryers A distinctive feature of this warning. Do not reach into the appliance if the drum is low energy consumption. The Bosch dryers offer the following . Timed cycles 500 Series Dryer: 30 and 60 minutes 800 Series Dryer: 10 ...

Operating, Care, Installation
Page 5
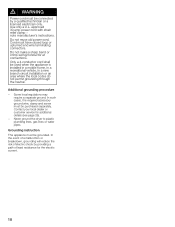
...must have a proper outlet installed by the fabric manufacturer. 12. Check the fill hose connections on top of each load. GROUNDING INSTRUCTIONS This appliance must be cleaned periodically by qualified service personnel. 17. For U.S.A. Type SRDT or DRT (UL 2158) - Do not use . 30....the dryer according to the manufacturer's instructions may expose live electrical circuits. Five feet long (minimum) d WARNING Improper connection of the appliance or attempt any parts are powerful machines, and must not be sure to whether the dryer is a potential fire hazard. 26. ...
...must have a proper outlet installed by the fabric manufacturer. 12. Check the fill hose connections on top of each load. GROUNDING INSTRUCTIONS This appliance must be cleaned periodically by qualified service personnel. 17. For U.S.A. Type SRDT or DRT (UL 2158) - Do not use . 30....the dryer according to the manufacturer's instructions may expose live electrical circuits. Five feet long (minimum) d WARNING Improper connection of the appliance or attempt any parts are powerful machines, and must not be sure to whether the dryer is a potential fire hazard. 26. ...
Operating, Care, Installation
Page 6
... dryer installation must be performed by a qualifed technician or a licensed electrician. Flexible venting materials are not worthless rubbish! Unpacking the appliance d CAUTION The dryer is supplied without a power cord. Do not install a clothes dryer with the National Electric Code, ANSI/...and local codes. - Install the clothes dryer according to observe all listed warnings and cautions. Disposal of the old appliance d WARNING If appliance is visibly damaged. Before installing the dryer Before installing the dryer to a previously used ductwork system make sure the...
... dryer installation must be performed by a qualifed technician or a licensed electrician. Flexible venting materials are not worthless rubbish! Unpacking the appliance d CAUTION The dryer is supplied without a power cord. Do not install a clothes dryer with the National Electric Code, ANSI/...and local codes. - Install the clothes dryer according to observe all listed warnings and cautions. Disposal of the old appliance d WARNING If appliance is visibly damaged. Before installing the dryer Before installing the dryer to a previously used ductwork system make sure the...
Operating, Care, Installation
Page 7
... dryer is level, both frontĆtoĆback and sideĆto the back of frost, - Connect the exhaust duct to back. Conduct an appliance test: q Check that corner until the dryer does not rock and is moved to make sure the unit does not wobble. Look in . (25mm)...). 7. The installation room must be damaged if dryer is slid across the floor if heightĆadjustable feet have been extended. Do not install the appliance on the dryer (see page 8). 9. Position the dryer near flammable materials, - If required, change the door hinge to understand how your dryer operates. (...
... dryer is level, both frontĆtoĆback and sideĆto the back of frost, - Connect the exhaust duct to back. Conduct an appliance test: q Check that corner until the dryer does not rock and is moved to make sure the unit does not wobble. Look in . (25mm)...). 7. The installation room must be damaged if dryer is slid across the floor if heightĆadjustable feet have been extended. Do not install the appliance on the dryer (see page 8). 9. Position the dryer near flammable materials, - If required, change the door hinge to understand how your dryer operates. (...

Operating, Care, Installation
Page 8
... adequate room for additional information. Contact Customer Service for improperly installed EXTERNAL hose or other connections. S reduced noise transmission S facilitation of mold formation behind the appliance. Refer to the following table: Minimum Installation Clearances Closet Sides 0" (O mm) Top 12" (3O5 mm) Rear* 0" (O mm) * as close to wall as venting or water...
... adequate room for additional information. Contact Customer Service for improperly installed EXTERNAL hose or other connections. S reduced noise transmission S facilitation of mold formation behind the appliance. Refer to the following table: Minimum Installation Clearances Closet Sides 0" (O mm) Top 12" (3O5 mm) Rear* 0" (O mm) * as close to wall as venting or water...
Operating, Care, Installation
Page 10
Cord must be used when the appliance is installed in a mobile home, in a recreational vehicle, in a new branch circuit installation or an area where the local codes do not permit grounding through ... dryer to plastic plumbing lines, gas lines or water pipes. Contact your local dealer or customer service for the electric current. 10 Grounding instruction This appliance must be connected by providing a path of electric shock by a qualified technician or a licensed electrician only. d WARNING Power cord must be grounded. Use only a U.L. approved...
Cord must be used when the appliance is installed in a mobile home, in a recreational vehicle, in a new branch circuit installation or an area where the local codes do not permit grounding through ... dryer to plastic plumbing lines, gas lines or water pipes. Contact your local dealer or customer service for the electric current. 10 Grounding instruction This appliance must be connected by providing a path of electric shock by a qualified technician or a licensed electrician only. d WARNING Power cord must be grounded. Use only a U.L. approved...

Operating, Care, Installation
Page 13
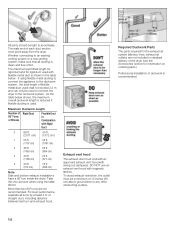
... aluminum tape. To reduce the risk of fire, do not use more than specified in the maximum ductwork length table on the rear of the appliance. on a regular basis; Refer to the maximum ductwork length table (see page 15). - DO NOT install a flexible duct in diameter. 6.... Do clean and inspect the exhaust system on right side of the appliance, - Remove accumulated lint to one another. q Replace any other wildlife. 11. Exhaust ducting which is longer than 2.4 m of flexible metal ducting. 5. ...
... aluminum tape. To reduce the risk of fire, do not use more than specified in the maximum ductwork length table on the rear of the appliance. on a regular basis; Refer to the maximum ductwork length table (see page 15). - DO NOT install a flexible duct in diameter. 6.... Do clean and inspect the exhaust system on right side of the appliance, - Remove accumulated lint to one another. q Replace any other wildlife. 11. Exhaust ducting which is longer than 2.4 m of flexible metal ducting. 5. ...
Operating, Care, Installation
Page 14
... for the exhaust air system (elbows, lines, exhaust air outlets) are not recommended. Take this into account when using flexible metal ducting to connect the appliance to the ductwork system, the total length of straight duct, including distance between last turn inside the dryer. For best performance, separate all ducting is...
... for the exhaust air system (elbows, lines, exhaust air outlets) are not recommended. Take this into account when using flexible metal ducting to connect the appliance to the ductwork system, the total length of straight duct, including distance between last turn inside the dryer. For best performance, separate all ducting is...

Operating, Care, Installation
Page 15
... WTZ 1500P for duo tone silver/white WTZ 1500C for white part no. Disconnect the water supply hose. 4. Close the door and secure with the appliance. 6. WTZ 1265 Note: See notes on maximum number of elbows on page 14. Dryer rack part no . Disconnect the exhaust duct from your local dealer... kit part no . WTZ1260 for duo tone champagne/white If mounting the dryer on page 14. Please contact your local dealer. Turn off , unplug the appliance) 3. Collect any further. Screw the heightĆadjustable feet of the Dryer at the factory.
... WTZ 1500P for duo tone silver/white WTZ 1500C for white part no. Disconnect the water supply hose. 4. Close the door and secure with the appliance. 6. WTZ 1265 Note: See notes on maximum number of elbows on page 14. Dryer rack part no . Disconnect the exhaust duct from your local dealer... kit part no . WTZ1260 for duo tone champagne/white If mounting the dryer on page 14. Please contact your local dealer. Turn off , unplug the appliance) 3. Collect any further. Screw the heightĆadjustable feet of the Dryer at the factory.

Operating, Care, Installation
Page 18
... process is extended. Press the "Delicates low temp." The temperature of drying and the level reached during one hour to four items made of the appliance. The following audible tones will be used only with cotton and permanent press automatic programs. Less heat is applied, and drying time is active regardless...
... process is extended. Press the "Delicates low temp." The temperature of drying and the level reached during one hour to four items made of the appliance. The following audible tones will be used only with cotton and permanent press automatic programs. Less heat is applied, and drying time is active regardless...
Operating, Care, Installation
Page 24
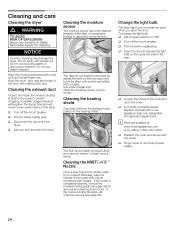
... transparent buildup is completely blocked, consult the troubleshooting guide (see page 26). q Plug in dryer or reconnect power supply. 24 Replace the bulb with a new appliance bulb only (obtainable through parts department). q Pull out power supply plug. NOTICE Incorrect cleaning may damage the dryer. q Vacuum and reconnect the duct.
... transparent buildup is completely blocked, consult the troubleshooting guide (see page 26). q Plug in dryer or reconnect power supply. 24 Replace the bulb with a new appliance bulb only (obtainable through parts department). q Pull out power supply plug. NOTICE Incorrect cleaning may damage the dryer. q Vacuum and reconnect the duct.
Operating, Care, Installation
Page 26
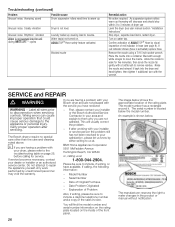
... below shows the approximate location of AQUASTOP® Hose by unauthorized personnel may void the warranty. Label all wires prior to the appliance or personal injury. Wiring errors can cause improper operation that could cause serious damage to disconnection when servicing controls. Any work performed... the care and cleaning noted above. First, please contact your installer or the Bosch Authorized Service Contractor in your satisfaction, please let us know by either writing to us at, BSH Home Appliances Corporation 5551 McFadden Avenue Huntington Beach, CA 92649 or, calling us at 1Ć...
... below shows the approximate location of AQUASTOP® Hose by unauthorized personnel may void the warranty. Label all wires prior to the appliance or personal injury. Wiring errors can cause improper operation that could cause serious damage to disconnection when servicing controls. Any work performed... the care and cleaning noted above. First, please contact your installer or the Bosch Authorized Service Contractor in your satisfaction, please let us know by either writing to us at, BSH Home Appliances Corporation 5551 McFadden Avenue Huntington Beach, CA 92649 or, calling us at 1Ć...