
Accessory Catalog
Page 2
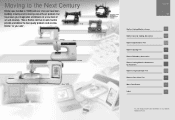
... ZZ3-B894 QuattroTM 6000D Chain-stitch sewing machine for the production of straw hats Contents 02 FZ2-B1 Brother Sewing Machine Lineup 03-04 Brother General Sewing Accessories 05-16 Brother Embellishment Feet 17-24 Brother Quilting Feet 25-28 Brother Embroidery Accessories 29-66 Brother Sewing Machine Attachments for PQ Series 0637-0740 Brother Serger/Overlock Feet 71-74 Brother Cover Stitch Feet 75-78...
... ZZ3-B894 QuattroTM 6000D Chain-stitch sewing machine for the production of straw hats Contents 02 FZ2-B1 Brother Sewing Machine Lineup 03-04 Brother General Sewing Accessories 05-16 Brother Embellishment Feet 17-24 Brother Quilting Feet 25-28 Brother Embroidery Accessories 29-66 Brother Sewing Machine Attachments for PQ Series 0637-0740 Brother Serger/Overlock Feet 71-74 Brother Cover Stitch Feet 75-78...
Accessory Catalog
Page 3
... incredibly sophisticated and innovative but powerful sewing and quilting machines. Innov-is QC1000 Advanced Sewing & Quilting Machine A quilting machine filled with a compact yet powerful sewing and quilting machine. Brother Sewing Machine Lineup 03 Please select your very own customized stitches or embroidery motifs. We invite you need a lightweight and affordable sewing machine for travel! Some models feature automatic machine embroidery as well. F : PS3100, PS3700 G: XL3500i...
... incredibly sophisticated and innovative but powerful sewing and quilting machines. Innov-is QC1000 Advanced Sewing & Quilting Machine A quilting machine filled with a compact yet powerful sewing and quilting machine. Brother Sewing Machine Lineup 03 Please select your very own customized stitches or embroidery motifs. We invite you need a lightweight and affordable sewing machine for travel! Some models feature automatic machine embroidery as well. F : PS3100, PS3700 G: XL3500i...

Accessory Catalog
Page 17
... stitch Open toe quilting foot "O" for greater visibility Echo quilting foot "E" for details.) www.brother.com This Embroidery Card Reader is compatible with the Brother Innov-is Project Book (See page 18 for perfect echo quilting - The Border Frame enables...é Creator Function. - Change your machine with the SAVR4000D Premium Package. Basting Function to prevent shrinkage and misalignment of difficult to the actual machine: - SAVR4500D Duetta™ 4500D/Innov-is4000D Nightie Innov-is 4000D sewing and embroidery machine. * Requires additional purchases. Expand the ...
... stitch Open toe quilting foot "O" for greater visibility Echo quilting foot "E" for details.) www.brother.com This Embroidery Card Reader is compatible with the Brother Innov-is Project Book (See page 18 for perfect echo quilting - The Border Frame enables...é Creator Function. - Change your machine with the SAVR4000D Premium Package. Basting Function to prevent shrinkage and misalignment of difficult to the actual machine: - SAVR4500D Duetta™ 4500D/Innov-is4000D Nightie Innov-is 4000D sewing and embroidery machine. * Requires additional purchases. Expand the ...
Accessory Catalog
Page 33
...QuattroTM 6000D Embroidery Machine Hoops Select hoops appropriate for thread delivery or bobbin storage. Brother Embroidery Accessories 63 Free-Standing Ten Spool Thread Stand Ten Spool Thread Stand Embroidery Machine Hoops Brother Embroidery Accessories 64 For all embroidery and sewing/embroidery machines. SA539 DuettaTM4500D...x 160 mm (approx. 10-1/4 x 6-1/4 inches) SA428 • Medium Plus: 180 x 130 mm (approx. 7 x 5 inches) SA429 For PC-6500, 8200, 8500, 8500D series: • Extra-large: 300 x 130 mm (approx. 12 x 5 inches) • Small: 20 x 60 mm (approx. 1 ...
...QuattroTM 6000D Embroidery Machine Hoops Select hoops appropriate for thread delivery or bobbin storage. Brother Embroidery Accessories 63 Free-Standing Ten Spool Thread Stand Ten Spool Thread Stand Embroidery Machine Hoops Brother Embroidery Accessories 64 For all embroidery and sewing/embroidery machines. SA539 DuettaTM4500D...x 160 mm (approx. 10-1/4 x 6-1/4 inches) SA428 • Medium Plus: 180 x 130 mm (approx. 7 x 5 inches) SA429 For PC-6500, 8200, 8500, 8500D series: • Extra-large: 300 x 130 mm (approx. 12 x 5 inches) • Small: 20 x 60 mm (approx. 1 ...
Accessory Catalog
Page 34
...Innov-is Project Book (See page 33 for Brother sewing and embroidering machines. 61 Color Thread Set with Wooden Rack ETKSP999 PacesetterTM Polyester Threads (61 Color Thread Set with other sewing and embroidery machine brands. Polyester retains its color beauty and ...PC and ULT series machines and the PE-400D and Innov-is ideal for Brother® Embroidery Machines, but compatible with Wooden Rack) Our high sheen 100% polyester mini king embroidery thread (1100 yds) is designed to provide a good foundation as well as decorative sewing. Dependable thread delivery through machine...
...Innov-is Project Book (See page 33 for Brother sewing and embroidering machines. 61 Color Thread Set with Wooden Rack ETKSP999 PacesetterTM Polyester Threads (61 Color Thread Set with other sewing and embroidery machine brands. Polyester retains its color beauty and ...PC and ULT series machines and the PE-400D and Innov-is ideal for Brother® Embroidery Machines, but compatible with Wooden Rack) Our high sheen 100% polyester mini king embroidery thread (1100 yds) is designed to provide a good foundation as well as decorative sewing. Dependable thread delivery through machine...

Users Manual - English
Page 4
...Winding the bobbin and setting the bobbin thread 15 Setting the bobbin 17 UPPER THREADING 18 Thread according to number and arrow marks on machine 18 Auto-threading device 20 START/STOP 21 "START/STOP" button 21 Foot controller 21 STITCH WIDTH AND STITCH LENGTH 22 Stitch ...power is turned on 12 Adjusting the brightness of eyelet (Actual size 59 BUTTON SEWING 60 Attaching buttons with four holes 61 Attaching a shank to the LCD message 29 Installing embroidery foot "Q 29 Changing the embroidery foot 30 Feed dog adjustment 30 CHANGING THE NEEDLE 31 Setting the needle securely...
...Winding the bobbin and setting the bobbin thread 15 Setting the bobbin 17 UPPER THREADING 18 Thread according to number and arrow marks on machine 18 Auto-threading device 20 START/STOP 21 "START/STOP" button 21 Foot controller 21 STITCH WIDTH AND STITCH LENGTH 22 Stitch ...power is turned on 12 Adjusting the brightness of eyelet (Actual size 59 BUTTON SEWING 60 Attaching buttons with four holes 61 Attaching a shank to the LCD message 29 Installing embroidery foot "Q 29 Changing the embroidery foot 30 Feed dog adjustment 30 CHANGING THE NEEDLE 31 Setting the needle securely...

Users Manual - English
Page 6
... A " 153 MAINTENANCE 154 CLEANING 154 Cleaning the screen 154 Cleaning the sewing machine surface .........154 Cleaning the shuttle 154 CHANGING THE LIGHT BULB 156 RELATED CHART OF SEWING FABRICS, THREAD AND NEEDLE 157 ERROR MESSAGES 158 Warning messages 158 Instruction messages...and stitches 166 Mechanical trouble 167 SEWING CHART 168 PATTERNS (PROGRAMMED IN MACHINE) 171 Utility stitches 171 Character sewing 171 Character embroidering chart 174 Frame pattern embroidering chart 174 PATTERNS (MEMORY CARD 175 One point mark embroidery pattern 175 *MY CUSTOM STITCHTM is...
... A " 153 MAINTENANCE 154 CLEANING 154 Cleaning the screen 154 Cleaning the sewing machine surface .........154 Cleaning the shuttle 154 CHANGING THE LIGHT BULB 156 RELATED CHART OF SEWING FABRICS, THREAD AND NEEDLE 157 ERROR MESSAGES 158 Warning messages 158 Instruction messages...and stitches 166 Mechanical trouble 167 SEWING CHART 168 PATTERNS (PROGRAMMED IN MACHINE) 171 Utility stitches 171 Character sewing 171 Character embroidering chart 174 Frame pattern embroidering chart 174 PATTERNS (MEMORY CARD 175 One point mark embroidery pattern 175 *MY CUSTOM STITCHTM is...

Users Manual - English
Page 8
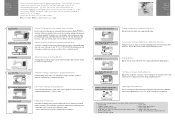
... from the socket-outlet. - When leaving the sewing machine unattended, the main switch of the accessory compartment toward you to fit in figure III. For U.S.A. Part Name Part Code 1 Buttonhole foot "A" X57789-101 2 Embroidery foot "Q" XA2159-101 3 Overcasting foot "G" X51162...must be unplugged. - When servicing the sewing machine, or when removing covers or changing bulbs, the machine or the electrical set X58358-001 * Always use BROTHER accessories recommended for foot controller operation. 4 Power cord Use to connect machine to install the proper outlet. B. FLAT...
... from the socket-outlet. - When leaving the sewing machine unattended, the main switch of the accessory compartment toward you to fit in figure III. For U.S.A. Part Name Part Code 1 Buttonhole foot "A" X57789-101 2 Embroidery foot "Q" XA2159-101 3 Overcasting foot "G" X51162...must be unplugged. - When servicing the sewing machine, or when removing covers or changing bulbs, the machine or the electrical set X58358-001 * Always use BROTHER accessories recommended for foot controller operation. 4 Power cord Use to connect machine to install the proper outlet. B. FLAT...

Users Manual - English
Page 9
... Foot controller 29 Embroidery unit 30 Hard case Part Code U.S.A. Note (For U.S.A. only) Foot controller: Model J2 This foot controller can be attached to the explanatory sheet which is inserted in the instruction book. * The extra spool pin which is provided as an accessory should be used for sewing machine model PC-8200. 7 XA1821-001...
... Foot controller 29 Embroidery unit 30 Hard case Part Code U.S.A. Note (For U.S.A. only) Foot controller: Model J2 This foot controller can be attached to the explanatory sheet which is inserted in the instruction book. * The extra spool pin which is provided as an accessory should be used for sewing machine model PC-8200. 7 XA1821-001...

Users Manual - English
Page 11
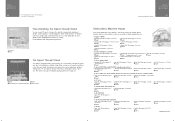
... STITCH" KEY Use this key when you through each operation UTILITY STITCH CHARACTER DECORATIVE STITCH EMBROIDERY EMBROIDERY EDIT OPERATION GUIDE MEMORY RECALL 1 C. SELECTION KEYS * Depending on how to use machine functions such as straight stitches, buttonholes, etc. 2 "CHARACTER/DECORATIVE STITCH" KEY Use ...upper threading, bobbin winding and bobbin thread setting. 6 "MEMORY RECALL" KEY Use this key to sew alphabetical characters and other decorative stitches. 3 "EMBROIDERY" KEY Use this key to retrieve combined patterns which are combinations of characters or by means of other...
... STITCH" KEY Use this key when you through each operation UTILITY STITCH CHARACTER DECORATIVE STITCH EMBROIDERY EMBROIDERY EDIT OPERATION GUIDE MEMORY RECALL 1 C. SELECTION KEYS * Depending on how to use machine functions such as straight stitches, buttonholes, etc. 2 "CHARACTER/DECORATIVE STITCH" KEY Use ...upper threading, bobbin winding and bobbin thread setting. 6 "MEMORY RECALL" KEY Use this key to sew alphabetical characters and other decorative stitches. 3 "EMBROIDERY" KEY Use this key to retrieve combined patterns which are combinations of characters or by means of other...

Users Manual - English
Page 32
...careful not to touch the needle during button sewing as well. Feed dogs are continuing to sew, slide the lever to the left of embroidery foot "Q", pull embroidery foot "Q" downward to install it . 5 2. Feed dog adjustment With the accessory compartment off the machine, the feed dog adjustment lever can be ... as far as it will go to remove it . While pressing the black button to the left of the sewing machine. Raise the presser foot lever to the machine, the feed dogs drop automatically. 30 If you are lowered during this time, otherwise injury may result. Raise ...
...careful not to touch the needle during button sewing as well. Feed dogs are continuing to sew, slide the lever to the left of embroidery foot "Q", pull embroidery foot "Q" downward to install it . 5 2. Feed dog adjustment With the accessory compartment off the machine, the feed dog adjustment lever can be ... as far as it will go to remove it . While pressing the black button to the left of the sewing machine. Raise the presser foot lever to the machine, the feed dogs drop automatically. 30 If you are lowered during this time, otherwise injury may result. Raise ...

Users Manual - English
Page 98
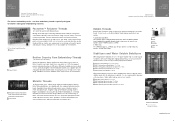
... material for recommended fabrics, threads and needles to use in order to use in the machine attach interfacing to the reverse side. FABRIC THREAD NEEDLE When sewing thin or stretch fabrics, fabrics with the place where the pattern is particularly helpful when...pattern slippages may occur when using different fabric thicknesses or types of the holes. * When sewing patterns in positioning. This acts as a stabilizer. #50 - #60 Thin and medium fabrics 75/11 (Embroidery) Thick fabrics 90/14 (Embroidery) Stretch fabrics #14 golden needle 1 Fabric 2 Stabilizer 3 Thin paper 2 N 3 Using...
... material for recommended fabrics, threads and needles to use in order to use in the machine attach interfacing to the reverse side. FABRIC THREAD NEEDLE When sewing thin or stretch fabrics, fabrics with the place where the pattern is particularly helpful when...pattern slippages may occur when using different fabric thicknesses or types of the holes. * When sewing patterns in positioning. This acts as a stabilizer. #50 - #60 Thin and medium fabrics 75/11 (Embroidery) Thick fabrics 90/14 (Embroidery) Stretch fabrics #14 golden needle 1 Fabric 2 Stabilizer 3 Thin paper 2 N 3 Using...

Users Manual - English
Page 102
... "Q" CAUTION Be sure to turn off the main power switch when connecting or removing the embroidery unit and embroidery card (memory card). (2) Connect embroidery unit firmly into the plug connector and socket of the sewing machine. (3) Do not touch the connector of stretch fabrics, thin fabrics and fabric with both hands to the pattern selected...
... "Q" CAUTION Be sure to turn off the main power switch when connecting or removing the embroidery unit and embroidery card (memory card). (2) Connect embroidery unit firmly into the plug connector and socket of the sewing machine. (3) Do not touch the connector of stretch fabrics, thin fabrics and fabric with both hands to the pattern selected...

Users Manual - English
Page 105
.... (Refer to page 116.) 103 When displayed in reverse, the machine will stop after each character sewn. SELECTING AND SEWING PATTERNS Selecting alphabetical characters How to change the color of each character is being displayed, touch the "EMBROIDERY" key before selecting the character. 2. Combine characters. (Refer to page 85.) 1 2 4 3 1 Touch this key to...
.... (Refer to page 116.) 103 When displayed in reverse, the machine will stop after each character sewn. SELECTING AND SEWING PATTERNS Selecting alphabetical characters How to change the color of each character is being displayed, touch the "EMBROIDERY" key before selecting the character. 2. Combine characters. (Refer to page 85.) 1 2 4 3 1 Touch this key to...

Users Manual - English
Page 115
... displayed at this thread in your left hand while leaving a certain amount of slack in the illustration will be embroidered and the sewing machine will be used at the left edge of the screen. 113 Select the desired pattern. Thread the needle for each pattern is ...part indicated by (1) in the thread. * Be sure to 6 stitches have a color displayed below each part will then stop the sewing machine and cut off any color you are using the embroidery unit, the foot controller cannot be displayed. * The color displayed below them; Embroidering 5 5 Example: 1. The order of the...
... displayed at this thread in your left hand while leaving a certain amount of slack in the illustration will be embroidered and the sewing machine will be used at the left edge of the screen. 113 Select the desired pattern. Thread the needle for each pattern is ...part indicated by (1) in the thread. * Be sure to 6 stitches have a color displayed below each part will then stop the sewing machine and cut off any color you are using the embroidery unit, the foot controller cannot be displayed. * The color displayed below them; Embroidering 5 5 Example: 1. The order of the...

Users Manual - English
Page 123
... the point where embroidering is not a sign of the embroidery for the next color (or character) to be embroidered (without embroidering). 4 The needle will return to the original screen (sewing screen). 3. Touch the "FORWARD SEARCH" key to move forward to continue. 4. Stop the sewing machine, raise the needle and the presser foot lever and...
... the point where embroidering is not a sign of the embroidery for the next color (or character) to be embroidered (without embroidering). 4 The needle will return to the original screen (sewing screen). 3. Touch the "FORWARD SEARCH" key to move forward to continue. 4. Stop the sewing machine, raise the needle and the presser foot lever and...

Users Manual - English
Page 126
...the frame shape to sew appliques. 1. Embroidering appliques (using the same frame pattern shape and the " " stitch as in step 2. 4. Embroider a base fabric in step 2, and then attach it to the base fabric so that it into the embroidery frame and attach the embroidery frame to embroider the ...3. Cut neatly around the outside of the applique material which is created in the same way using a frame pattern) You can use it to the machine. 2. Select the applique material for the project, attach a stabilizer material, place it follows the frame shape just stitched. 1 Fabric glue 1 5....
...the frame shape to sew appliques. 1. Embroidering appliques (using the same frame pattern shape and the " " stitch as in step 2. 4. Embroider a base fabric in step 2, and then attach it to the base fabric so that it into the embroidery frame and attach the embroidery frame to embroider the ...3. Cut neatly around the outside of the applique material which is created in the same way using a frame pattern) You can use it to the machine. 2. Select the applique material for the project, attach a stabilizer material, place it follows the frame shape just stitched. 1 Fabric glue 1 5....

Users Manual - English
Page 138
...key. A screen such as the left will be displayed. Now embroider the word "HAPPY". * If the "MULTI COLOR" key is touched, the sewing machine will stop after each character in a different color. 3. Embroider in the order shown by the frame pattern. 1. Once embroidering is completed, a screen ... followed by the color changes. * For details on the layout screen (refer to page 116) before carrying out embroidery. If an incorrect embroidery frame is used, the embroidery foot may touch the frame, or injury may result. The pattern parts will be the one -point pattern. EMBROIDERING...
...key. A screen such as the left will be displayed. Now embroider the word "HAPPY". * If the "MULTI COLOR" key is touched, the sewing machine will stop after each character in a different color. 3. Embroider in the order shown by the frame pattern. 1. Once embroidering is completed, a screen ... followed by the color changes. * For details on the layout screen (refer to page 116) before carrying out embroidery. If an incorrect embroidery frame is used, the embroidery foot may touch the frame, or injury may result. The pattern parts will be the one -point pattern. EMBROIDERING...

Users Manual - English
Page 143
... three memory function areas; one is found on the sewing side of the machine and the other two are found on the sewing side of the machine. 1 Release button * Make sure that the power is turned off before doing this key to retrieve the...the saved pattern. 2 Touch this . 1. Sewing function: saves a variety of the machine. Embroidery function: saves characters and memory card patterns when using the embroidery or embroidery edit function. 1 Preparation: Remove the embroidery unit if retrieving patterns saved on the embroidery side of characters, patterns, decorative stitches and ...
... three memory function areas; one is found on the sewing side of the machine and the other two are found on the sewing side of the machine. 1 Release button * Make sure that the power is turned off before doing this key to retrieve the...the saved pattern. 2 Touch this . 1. Sewing function: saves a variety of the machine. Embroidery function: saves characters and memory card patterns when using the embroidery or embroidery edit function. 1 Preparation: Remove the embroidery unit if retrieving patterns saved on the embroidery side of characters, patterns, decorative stitches and ...

Users Manual - English
Page 177
...embroidery pattern 1 ... 0 0 1 2 ... 8 0 0 3 ... 9 0 0 1 ... 7 0 4 2 ... 8 0 0 3 ... 9 0 0 1 ... 2 0 5 2 ... 3 3 9 3 ... 9 0 0 1 ... 3 3 9 2 ... 2 0 5 3 ... 9 0 0 1 ... 3 3 9 2 ... 8 0 0 3 ... 9 0 0 1 ... 2 0 5 2 ... 0 0 1 3 ... 9 0 0 1 ... 0 0 1 2 ... 8 0 0 3 ... 9 0 0 1 ... 2 0 5 2 ... 8 0 0 3 ... 9 0 0 1 ... 3 0 7 2 ... 0 1 9 3 ... 9 0 0 Order of sewing Embroidery... 5 1 3 3 ... 0 0 1 4 ... 2 0 8 5 ... 2 0 5 6 ... 5 1 3 Patterns which are stored in the machine or memory cards are not to be used for home use . 175 These patterns are for any activity other than home use only.
...embroidery pattern 1 ... 0 0 1 2 ... 8 0 0 3 ... 9 0 0 1 ... 7 0 4 2 ... 8 0 0 3 ... 9 0 0 1 ... 2 0 5 2 ... 3 3 9 3 ... 9 0 0 1 ... 3 3 9 2 ... 2 0 5 3 ... 9 0 0 1 ... 3 3 9 2 ... 8 0 0 3 ... 9 0 0 1 ... 2 0 5 2 ... 0 0 1 3 ... 9 0 0 1 ... 0 0 1 2 ... 8 0 0 3 ... 9 0 0 1 ... 2 0 5 2 ... 8 0 0 3 ... 9 0 0 1 ... 3 0 7 2 ... 0 1 9 3 ... 9 0 0 Order of sewing Embroidery... 5 1 3 3 ... 0 0 1 4 ... 2 0 8 5 ... 2 0 5 6 ... 5 1 3 Patterns which are stored in the machine or memory cards are not to be used for home use . 175 These patterns are for any activity other than home use only.


