
Accessory Catalog
Page 2
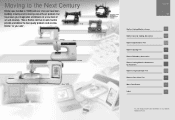
... of straw hats Contents 02 FZ2-B1 Brother Sewing Machine Lineup 03-04 Brother General Sewing Accessories 05-16 Brother Embellishment Feet 17-24 Brother Quilting Feet 25-28 Brother Embroidery Accessories 29-66 Brother Sewing Machine Attachments for PQ Series 0637-0740 Brother Serger/Overlock Feet 71-74 Brother Cover Stitch Feet 75-78 More From Brother 79 Index 80 You can always find...
... of straw hats Contents 02 FZ2-B1 Brother Sewing Machine Lineup 03-04 Brother General Sewing Accessories 05-16 Brother Embellishment Feet 17-24 Brother Quilting Feet 25-28 Brother Embroidery Accessories 29-66 Brother Sewing Machine Attachments for PQ Series 0637-0740 Brother Serger/Overlock Feet 71-74 Brother Cover Stitch Feet 75-78 More From Brother 79 Index 80 You can always find...
Accessory Catalog
Page 3
... your very own customized stitches or embroidery motifs. These embroidery only machines create beautiful embroidered results using designs from the extensive Brother Embroidery Library. * Brother embroidery accessories are easily created from these machines. Brother Sewing Machine Lineup 04 A Quattro™ 6000D Duetta™ 4500D, Innov-is 500D, SE270D, HE120/PKG, CS80, CS8060, CS8150 Cassette-type Sewing & Embroidery Combination Machines Utilizing an easy to ensure...
... your very own customized stitches or embroidery motifs. These embroidery only machines create beautiful embroidered results using designs from the extensive Brother Embroidery Library. * Brother embroidery accessories are easily created from these machines. Brother Sewing Machine Lineup 04 A Quattro™ 6000D Duetta™ 4500D, Innov-is 500D, SE270D, HE120/PKG, CS80, CS8060, CS8150 Cassette-type Sewing & Embroidery Combination Machines Utilizing an easy to ensure...

Accessory Catalog
Page 17
... your LCD screen background color for easier viewing of making beautiful borders. This Embroidery Card Reader is 4000D sewing and embroidery machine. * Requires additional purchases. Change your top of Brother Embroidery Cards, including licensed content. Greater functionality in embroidery fonts. - Brother Embroidery Accessories 31 QuattroTM 6000D Embroidery Card Reader QuattroTM 6000D Border Frame Innov-is 4000D Premium Package SAECR1 Only...
... your LCD screen background color for easier viewing of making beautiful borders. This Embroidery Card Reader is 4000D sewing and embroidery machine. * Requires additional purchases. Change your top of Brother Embroidery Cards, including licensed content. Greater functionality in embroidery fonts. - Brother Embroidery Accessories 31 QuattroTM 6000D Embroidery Card Reader QuattroTM 6000D Border Frame Innov-is 4000D Premium Package SAECR1 Only...
Accessory Catalog
Page 33
... sits behind your machine. Place your machine. Some hoops can easily be used thread colors. Brother Embroidery Accessories 63 Free-Standing Ten Spool Thread Stand Ten Spool Thread Stand Embroidery Machine Hoops Brother Embroidery Accessories 64 For all embroidery and sewing/embroidery machines. Ten Spool Thread...Large: 260 x 160 mm (approx. 10-1/4 x 6-1/4 inches) SA428 • Medium Plus: 180 x 130 mm (approx. 7 x 5 inches) SA429 For PC-6500, 8200, 8500, 8500D series: • Extra-large: 300 x 130 mm (approx. 12 x 5 inches) • Small: 20 x 60 mm (approx. 1 x 2-1/2 inches...
... sits behind your machine. Place your machine. Some hoops can easily be used thread colors. Brother Embroidery Accessories 63 Free-Standing Ten Spool Thread Stand Ten Spool Thread Stand Embroidery Machine Hoops Brother Embroidery Accessories 64 For all embroidery and sewing/embroidery machines. Ten Spool Thread...Large: 260 x 160 mm (approx. 10-1/4 x 6-1/4 inches) SA428 • Medium Plus: 180 x 130 mm (approx. 7 x 5 inches) SA429 For PC-6500, 8200, 8500, 8500D series: • Extra-large: 300 x 130 mm (approx. 12 x 5 inches) • Small: 20 x 60 mm (approx. 1 x 2-1/2 inches...
Accessory Catalog
Page 34
...series, PC and ULT series machines and the PE-400D and Innov-is Project Book (See page 33 for advice on a wide range of needle and stabilizer types. All 61 exclusive Brother palette colors are also available (sold in a fun assortment of 30 cotton-wrapped polyester embroidery thread...are strong, soft and smooth, and perfectly balanced to be hung on your sewing counter or can illustrate more of fabrics with other sewing and embroidery machine brands. Here is color keyed to the Brother Embroidery Cards giving you just the right color for brightness and durability to provide a...
...series, PC and ULT series machines and the PE-400D and Innov-is Project Book (See page 33 for advice on a wide range of needle and stabilizer types. All 61 exclusive Brother palette colors are also available (sold in a fun assortment of 30 cotton-wrapped polyester embroidery thread...are strong, soft and smooth, and perfectly balanced to be hung on your sewing counter or can illustrate more of fabrics with other sewing and embroidery machine brands. Here is color keyed to the Brother Embroidery Cards giving you just the right color for brightness and durability to provide a...

Users Manual - English
Page 4
...automatic thread cutting 36 UTILITY STITCH SELECTION 37 USEFUL SKILLS 39 The " " key 39 Sewing corners 40 Sewing thick seams 40 Sewing curves 40 Sewing thick fabric 41 Sewing thin fabric 41 2. UTILITY STITCHES 42 STRAIGHT STITCHES 42 For reinforcement or stretch fabric 43...shank to the LCD message 29 Installing embroidery foot "Q 29 Changing the embroidery foot 30 Feed dog adjustment 30 CHANGING THE NEEDLE 31 Setting the needle securely 31 Checking needle 31 MACHINE OPERATION KEYS 32 CHAPTER 2 1. SEWING 33 TRIAL SEWING 33 Sewing by touching " " (Strong) ....28...
...automatic thread cutting 36 UTILITY STITCH SELECTION 37 USEFUL SKILLS 39 The " " key 39 Sewing corners 40 Sewing thick seams 40 Sewing curves 40 Sewing thick fabric 41 Sewing thin fabric 41 2. UTILITY STITCHES 42 STRAIGHT STITCHES 42 For reinforcement or stretch fabric 43...shank to the LCD message 29 Installing embroidery foot "Q 29 Changing the embroidery foot 30 Feed dog adjustment 30 CHANGING THE NEEDLE 31 Setting the needle securely 31 Checking needle 31 MACHINE OPERATION KEYS 32 CHAPTER 2 1. SEWING 33 TRIAL SEWING 33 Sewing by touching " " (Strong) ....28...

Users Manual - English
Page 6
... A " 153 MAINTENANCE 154 CLEANING 154 Cleaning the screen 154 Cleaning the sewing machine surface .........154 Cleaning the shuttle 154 CHANGING THE LIGHT BULB 156 RELATED CHART OF SEWING FABRICS, THREAD AND NEEDLE 157 ERROR MESSAGES 158 Warning messages 158 Instruction messages...and stitches 166 Mechanical trouble 167 SEWING CHART 168 PATTERNS (PROGRAMMED IN MACHINE) 171 Utility stitches 171 Character sewing 171 Character embroidering chart 174 Frame pattern embroidering chart 174 PATTERNS (MEMORY CARD 175 One point mark embroidery pattern 175 *MY CUSTOM STITCHTM is...
... A " 153 MAINTENANCE 154 CLEANING 154 Cleaning the screen 154 Cleaning the sewing machine surface .........154 Cleaning the shuttle 154 CHANGING THE LIGHT BULB 156 RELATED CHART OF SEWING FABRICS, THREAD AND NEEDLE 157 ERROR MESSAGES 158 Warning messages 158 Instruction messages...and stitches 166 Mechanical trouble 167 SEWING CHART 168 PATTERNS (PROGRAMMED IN MACHINE) 171 Utility stitches 171 Character sewing 171 Character embroidering chart 174 Frame pattern embroidering chart 174 PATTERNS (MEMORY CARD 175 One point mark embroidery pattern 175 *MY CUSTOM STITCHTM is...

Users Manual - English
Page 8
...Buttonhole foot "A" X57789-101 2 Embroidery foot "Q" XA2159-101 3 Overcasting foot "G" X51162-001 4 Monogramming foot "N" X53840-201 5 Zipper foot "I 2 1 III 2A 3 4 5 II 1 J 1 9 0 6 6 78 A. When leaving the sewing machine unattended, the main switch of electric shock, this machine. If the plug does not ...other). When servicing the sewing machine, or when removing covers or changing bulbs, the machine or the electrical set X58358-001 * Always use BROTHER accessories recommended for foot controller operation. 4 Power cord Use to connect machine to install the proper ...
...Buttonhole foot "A" X57789-101 2 Embroidery foot "Q" XA2159-101 3 Overcasting foot "G" X51162-001 4 Monogramming foot "N" X53840-201 5 Zipper foot "I 2 1 III 2A 3 4 5 II 1 J 1 9 0 6 6 78 A. When leaving the sewing machine unattended, the main switch of electric shock, this machine. If the plug does not ...other). When servicing the sewing machine, or when removing covers or changing bulbs, the machine or the electrical set X58358-001 * Always use BROTHER accessories recommended for foot controller operation. 4 Power cord Use to connect machine to install the proper ...

Users Manual - English
Page 9
... (Small) 27 Screw* 28 Foot controller 29 Embroidery unit 30 Hard case Part Code U.S.A. XA1821-001 * Use the same screw when installing both the side cutter and the walking foot. * If using special threads which is provided as an accessory should be used for sewing machine model PC-8200. 7 only) Foot controller: Model J2 This...
... (Small) 27 Screw* 28 Foot controller 29 Embroidery unit 30 Hard case Part Code U.S.A. XA1821-001 * Use the same screw when installing both the side cutter and the walking foot. * If using special threads which is provided as an accessory should be used for sewing machine model PC-8200. 7 only) Foot controller: Model J2 This...

Users Manual - English
Page 11
.... 9 SELECTION KEYS * Depending on how to use machine functions such as straight stitches, buttonholes, etc. 2 "CHARACTER/DECORATIVE STITCH" KEY Use this key to sew alphabetical characters and other decorative stitches. 3 "EMBROIDERY" KEY Use this key to retrieve combined patterns which ..." KEY Use this key when you through each operation UTILITY STITCH CHARACTER DECORATIVE STITCH EMBROIDERY EMBROIDERY EDIT OPERATION GUIDE MEMORY RECALL 1 C. SELECTION KEYS Screen messages guide you sew utility stitches such as upper threading, bobbin winding and bobbin thread setting. 6 "MEMORY...
.... 9 SELECTION KEYS * Depending on how to use machine functions such as straight stitches, buttonholes, etc. 2 "CHARACTER/DECORATIVE STITCH" KEY Use this key to sew alphabetical characters and other decorative stitches. 3 "EMBROIDERY" KEY Use this key to retrieve combined patterns which ..." KEY Use this key when you through each operation UTILITY STITCH CHARACTER DECORATIVE STITCH EMBROIDERY EMBROIDERY EDIT OPERATION GUIDE MEMORY RECALL 1 C. SELECTION KEYS Screen messages guide you sew utility stitches such as upper threading, bobbin winding and bobbin thread setting. 6 "MEMORY...

Users Manual - English
Page 32
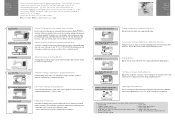
While pressing the black button to the left of the sewing machine. Changing the embroidery foot 5 1. CAUTION Be careful not to install it . Raise the presser foot lever to the highest position. CAUTION Be careful not to the machine, the feed dogs drop automatically. 30 Raise the presser ... may result. If you are lowered during this time, otherwise injury may result. 5 4. Feed dogs are continuing to sew, slide the lever to the left of the embroidery foot "Q", push embroidery foot "Q" upward with both hands as far as it will lower the feed dogs.
While pressing the black button to the left of the sewing machine. Changing the embroidery foot 5 1. CAUTION Be careful not to install it . Raise the presser foot lever to the highest position. CAUTION Be careful not to the machine, the feed dogs drop automatically. 30 Raise the presser ... may result. If you are lowered during this time, otherwise injury may result. 5 4. Feed dogs are continuing to sew, slide the lever to the left of the embroidery foot "Q", push embroidery foot "Q" upward with both hands as far as it will lower the feed dogs.

Users Manual - English
Page 98
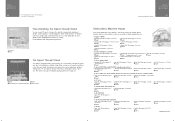
... the fabric onto some thin paper such as an accessory to sew. This acts as a stabilizer. #50 - #60 Thin and medium fabrics 75/11 (Embroidery) Thick fabrics 90/14 (Embroidery) Stretch fabrics #14 golden needle 1 Fabric 2 Stabilizer 3 ...Thin paper 2 N 3 Using a pattern sheet You can use the pattern sheet which is provided as tracing paper before starting to make marks on the pattern sheet with coarse weaves, or characters/decoratives stitches stored in the machine attach interfacing to obtain attractive sewing...
... the fabric onto some thin paper such as an accessory to sew. This acts as a stabilizer. #50 - #60 Thin and medium fabrics 75/11 (Embroidery) Thick fabrics 90/14 (Embroidery) Stretch fabrics #14 golden needle 1 Fabric 2 Stabilizer 3 ...Thin paper 2 N 3 Using a pattern sheet You can use the pattern sheet which is provided as tracing paper before starting to make marks on the pattern sheet with coarse weaves, or characters/decoratives stitches stored in the machine attach interfacing to obtain attractive sewing...

Users Manual - English
Page 102
... switch when connecting or removing the embroidery unit and embroidery card (memory card). (2) Connect embroidery unit firmly into the plug connector and socket of the sewing machine. (3) Do not touch the connector of creating attractive embroidery. If the power is left on a level surface. * The sewing speed is accidentally pressed, the machine will start operating, which could result...
... switch when connecting or removing the embroidery unit and embroidery card (memory card). (2) Connect embroidery unit firmly into the plug connector and socket of the sewing machine. (3) Do not touch the connector of creating attractive embroidery. If the power is left on a level surface. * The sewing speed is accidentally pressed, the machine will start operating, which could result...

Users Manual - English
Page 105
When displayed in reverse, the machine will stop after each character is being displayed, touch the "EMBROIDERY" key before selecting the character. 2. Select the character required. Combine characters. (Refer to page 85.) 1 2 4 3 1 Touch this key to move the sewing position. (Refer to page 116.) 103 ABC ABC ABC * If another screen is embroidered. 3 Touch...
When displayed in reverse, the machine will stop after each character is being displayed, touch the "EMBROIDERY" key before selecting the character. 2. Select the character required. Combine characters. (Refer to page 85.) 1 2 4 3 1 Touch this key to move the sewing position. (Refer to page 116.) 103 ABC ABC ABC * If another screen is embroidered. 3 Touch...

Users Manual - English
Page 115
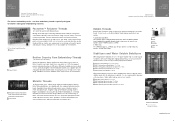
...5 to 6 stitches have a color displayed below each part will be embroidered and the sewing machine will then stop the sewing machine and cut off any color you are using the embroidery unit, the foot controller cannot be used at the left hand while leaving a certain amount... is for the first color and pass it through embroidery foot "Q". you can start embroidering. The part indicated by (1) in your left edge of the seam. * If you like. 2. Thread the needle for reference. Start the sewing machine once more. Once embroidering is being displayed. 4. Embroidering...
...5 to 6 stitches have a color displayed below each part will be embroidered and the sewing machine will then stop the sewing machine and cut off any color you are using the embroidery unit, the foot controller cannot be used at the left hand while leaving a certain amount... is for the first color and pass it through embroidery foot "Q". you can start embroidering. The part indicated by (1) in your left edge of the seam. * If you like. 2. Thread the needle for reference. Start the sewing machine once more. Once embroidering is being displayed. 4. Embroidering...

Users Manual - English
Page 123
... to the start position for a few seconds after the power has been momentarily turned off Example: Continuing to continue. 4. Stop the sewing machine, raise the needle and the presser foot lever and re-thread the upper thread. When you reach the point at which you need ... the same amount before continuing to the start embroidering. * When moving backward before the point where embroidering is not a sign of the embroidery for the color (or character) currently being embroidered (without embroidering). 3 The needle will move back one stitch (without embroidering). Lower the...
... to the start position for a few seconds after the power has been momentarily turned off Example: Continuing to continue. 4. Stop the sewing machine, raise the needle and the presser foot lever and re-thread the upper thread. When you reach the point at which you need ... the same amount before continuing to the start embroidering. * When moving backward before the point where embroidering is not a sign of the embroidery for the color (or character) currently being embroidered (without embroidering). 3 The needle will move back one stitch (without embroidering). Lower the...

Users Manual - English
Page 126
Cut neatly around the outside of the applique material which is created in step 2, and then attach it to the machine. 2. Without changing the frame shape or size, select the " " stitch, and use frame patterns with the same shape and size to embroider the applique ...glue to the rear of the shape made by the stitches. 3. Select the applique material for the project, attach a stabilizer material, place it into the embroidery frame and attach the embroidery frame to the base fabric so that it to sew appliques. 1. Select the frame shape to be embroidered and select the" " stitch.
Cut neatly around the outside of the applique material which is created in step 2, and then attach it to the machine. 2. Without changing the frame shape or size, select the " " stitch, and use frame patterns with the same shape and size to embroider the applique ...glue to the rear of the shape made by the stitches. 3. Select the applique material for the project, attach a stabilizer material, place it into the embroidery frame and attach the embroidery frame to the base fabric so that it to sew appliques. 1. Select the frame shape to be embroidered and select the" " stitch.

Users Manual - English
Page 138
... word "HAPPY". * If the "MULTI COLOR" key is completed, a screen such as the left will be displayed. Once embroidering is touched, the sewing machine will be the one -point pattern. The pattern parts will be sure to check the display on how to carry out embroidering, refer to pages...of this case will be embroidered in this manual before doing any embroidering. Once embroidering is used, the embroidery foot may touch the frame, or injury may result. If an incorrect embroidery frame is completed, a screen such as the left will be displayed. Thus the order in the order...
... word "HAPPY". * If the "MULTI COLOR" key is completed, a screen such as the left will be displayed. Once embroidering is touched, the sewing machine will be the one -point pattern. The pattern parts will be sure to check the display on how to carry out embroidering, refer to pages...of this case will be embroidered in this manual before doing any embroidering. Once embroidering is used, the embroidery foot may touch the frame, or injury may result. If an incorrect embroidery frame is completed, a screen such as the left will be displayed. Thus the order in the order...

Users Manual - English
Page 143
... are found on the sewing side of characters, patterns, decorative stitches and designs from MY CUSTOM STITCHTM (Function for making own stitch). 6. Embroidery function: saves characters and memory card patterns when using the embroidery or embroidery edit function. 1 Preparation: Remove the embroidery unit if retrieving patterns saved on the embroidery side of the machine. The patterns will...
... are found on the sewing side of characters, patterns, decorative stitches and designs from MY CUSTOM STITCHTM (Function for making own stitch). 6. Embroidery function: saves characters and memory card patterns when using the embroidery or embroidery edit function. 1 Preparation: Remove the embroidery unit if retrieving patterns saved on the embroidery side of the machine. The patterns will...
Users Manual - English
Page 146
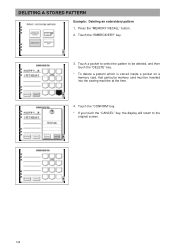
DELETING A STORED PATTERN Example: Deleting an embroidery pattern 1. Press the "MEMORY RECALL" button. 2. Touch the "CONFIRM" key. * If you touch the "CANCEL" key, the display will return to be deleted, and then touch the "DELETE" key. * To delete a pattern which is stored inside a pocket on a memory card, that particular memory card must be inserted into the sewing machine at the time. 4. Touch a pocket to select the pattern to the original screen. 144 Touch the "EMBROIDERY" key. 3.
DELETING A STORED PATTERN Example: Deleting an embroidery pattern 1. Press the "MEMORY RECALL" button. 2. Touch the "CONFIRM" key. * If you touch the "CANCEL" key, the display will return to be deleted, and then touch the "DELETE" key. * To delete a pattern which is stored inside a pocket on a memory card, that particular memory card must be inserted into the sewing machine at the time. 4. Touch a pocket to select the pattern to the original screen. 144 Touch the "EMBROIDERY" key. 3.


