
User Guide
Page 3
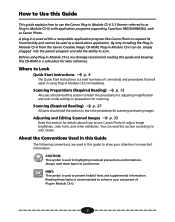
...and Editing Scanned Images p. 33 Read this guide to draw your attention to scan. CAUTION: This symbol is used within a compatible application program like Canon Photo to expand its functionality and cannot be simply plugged into the parent program and add the ability to important information. A plug-in Module CS... scanning. Scanning Preparations (Required Reading) p. 12 All users should read this CD-ROM in a safe place for details about how to use the Canon Plug-in Module CS-U) with application programs supporting CanoScan FB630U/FB636U, such as a stand-alone application.
...and Editing Scanned Images p. 33 Read this guide to draw your attention to scan. CAUTION: This symbol is used within a compatible application program like Canon Photo to expand its functionality and cannot be simply plugged into the parent program and add the ability to important information. A plug-in Module CS... scanning. Scanning Preparations (Required Reading) p. 12 All users should read this CD-ROM in a safe place for details about how to use the Canon Plug-in Module CS-U) with application programs supporting CanoScan FB630U/FB636U, such as a stand-alone application.

User Guide
Page 9
... entire document glass area will start and display its control panel. Quick Start Instructions Those who wish to the computer, then start Canon Photo. 2. Installing Plug-in Module CS-U Follow the instructions described in the Quick Start Guide to be scanned and displayed in ...Module CS-U automatically calibrates itself for a few moments without displaying an image in Module CS-U will be scanned on the scanner. 2. Select CanoScan FB630U/FB636U. The calibration results are stored until the computer power is used with the program). 3. Preview Window ª Plug-in Module CS-U ...
... entire document glass area will start and display its control panel. Quick Start Instructions Those who wish to the computer, then start Canon Photo. 2. Installing Plug-in Module CS-U Follow the instructions described in the Quick Start Guide to be scanned and displayed in ...Module CS-U automatically calibrates itself for a few moments without displaying an image in Module CS-U will be scanned on the scanner. 2. Select CanoScan FB630U/FB636U. The calibration results are stored until the computer power is used with the program). 3. Preview Window ª Plug-in Module CS-U ...

User Guide
Page 14
... or Adobe Photoshop. 14 Choose the [File] menu, [Import] and [CanonPI CS-U 3.3.0]. Then, in Module CS-U from within Canon Photo or Photoshop. 1. Always start it from within an application program, such as a stand-alone program. Select [Get from that the scanner is attached to ...-in Module CS-U control panel will appear. ª ª Caution Plug-in Module CS-U shipped with your package may differ from Scanner], and then select CanoScan FB630U/FB636U. 2. Select Plug-in the Get Pictures dialog box, click [Open Them]. 1. Start Canon Photo or Photoshop.
... or Adobe Photoshop. 14 Choose the [File] menu, [Import] and [CanonPI CS-U 3.3.0]. Then, in Module CS-U from within Canon Photo or Photoshop. 1. Always start it from within an application program, such as a stand-alone program. Select [Get from that the scanner is attached to ...-in Module CS-U control panel will appear. ª ª Caution Plug-in Module CS-U shipped with your package may differ from Scanner], and then select CanoScan FB630U/FB636U. 2. Select Plug-in the Get Pictures dialog box, click [Open Them]. 1. Start Canon Photo or Photoshop.

User Guide
Page 52
... recommended that you scan the image at 75 dpi, the minimum size for the secondary scan (vertical dimension). 52 The maximum optical resolution of the CanoScan FB630U or FB636U is also approximately 0.12 inch or 0.30 centimeter per side. In general, it is approximately 0.12 inch or 0.30 centimeter per side. Different...
... recommended that you scan the image at 75 dpi, the minimum size for the secondary scan (vertical dimension). 52 The maximum optical resolution of the CanoScan FB630U or FB636U is also approximately 0.12 inch or 0.30 centimeter per side. In general, it is approximately 0.12 inch or 0.30 centimeter per side. Different...
User Manual
Page 6
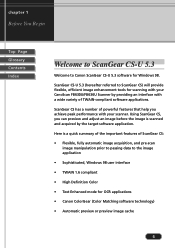
...8226; Sophisticated, Windows 98 user interface • TWAIN 1.6 compliant • High Definition Color • Text Enhanced mode for OCR applications • Canon ColorGear (Color Matching software technology) • Automatic preview or preview image cache 6 Here is scanned and acquired by providing an interface with a wide... performance with your scanner. chapter 1 Before You Begin Top Page Glossary Contents Index Welcome to ScanGear CS-U 5.3 Welcome to Canon ScanGear CS-U 5.3 software for scanning with your CanoScan FB630U/FB636U Scanner by the target software application.
...8226; Sophisticated, Windows 98 user interface • TWAIN 1.6 compliant • High Definition Color • Text Enhanced mode for OCR applications • Canon ColorGear (Color Matching software technology) • Automatic preview or preview image cache 6 Here is scanned and acquired by providing an interface with a wide... performance with your scanner. chapter 1 Before You Begin Top Page Glossary Contents Index Welcome to ScanGear CS-U 5.3 Welcome to Canon ScanGear CS-U 5.3 software for scanning with your CanoScan FB630U/FB636U Scanner by the target software application.

User Manual
Page 11
... opening setting determines what you see every time you launch ScanGear CS from the parent software application. In the Scanners and Cameras Properties window, click CanoScan FB630U/FB636U and click the Properties button. 4. Select the Preview at opening setting has been adjusted in the Preview Area of the ScanGear CS main window...
... opening setting determines what you see every time you launch ScanGear CS from the parent software application. In the Scanners and Cameras Properties window, click CanoScan FB630U/FB636U and click the Properties button. 4. Select the Preview at opening setting has been adjusted in the Preview Area of the ScanGear CS main window...

User Manual
Page 13
.... Start the software application you are now ready to your software application may be slightly Note different. This is a very general description of the scanner (CanoScan FB630U/FB636U) from the list and click the OK button. For details, refer to start scanning. 13 Pull down the File menu and select the Select... box select the name of this simple procedure to use for your software application manual. 1. The procedure for scanning. 2. You are going to select the CanoScan FB630U/ FB636U as the scanner source.
.... Start the software application you are now ready to your software application may be slightly Note different. This is a very general description of the scanner (CanoScan FB630U/FB636U) from the list and click the OK button. For details, refer to start scanning. 13 Pull down the File menu and select the Select... box select the name of this simple procedure to use for your software application manual. 1. The procedure for scanning. 2. You are going to select the CanoScan FB630U/ FB636U as the scanner source.

User Manual
Page 21
..., and click Control Panel. 2. it cannot be opened from the Control Panel; To open the Preferences sheet 1. In the Scanners and Cameras Properties window, click CanoScan FB630U/FB636U and click the Properties button. 21 chapter 3 Settings in the Windows Control Panel Top Page Glossary Contents Index Preferences Settings Displaying the Preferences Sheet...
..., and click Control Panel. 2. it cannot be opened from the Control Panel; To open the Preferences sheet 1. In the Scanners and Cameras Properties window, click CanoScan FB630U/FB636U and click the Properties button. 21 chapter 3 Settings in the Windows Control Panel Top Page Glossary Contents Index Preferences Settings Displaying the Preferences Sheet...

User Manual
Page 25
On the Windows desktop click the Start button, point to Settings, and click Control Panel. 2. In the Control Panel window, double-click the Scanners and Cameras icon. 3. In the Scanners and Cameras Properties window, click CanoScan FB630U/FB636U and click the Properties button. 25 chapter 3 Settings in the Windows Control Panel Top Page Glossary Contents Index Events Setting Selecting an Application for Starting Up with the Start Button The events setting on the Events sheet determines which parent application starts automatically when the Start Button on the scanner is pressed. 1.
On the Windows desktop click the Start button, point to Settings, and click Control Panel. 2. In the Control Panel window, double-click the Scanners and Cameras icon. 3. In the Scanners and Cameras Properties window, click CanoScan FB630U/FB636U and click the Properties button. 25 chapter 3 Settings in the Windows Control Panel Top Page Glossary Contents Index Events Setting Selecting an Application for Starting Up with the Start Button The events setting on the Events sheet determines which parent application starts automatically when the Start Button on the scanner is pressed. 1.


