
User Manual
Page 18
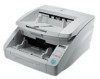
... and functions of the DR-6050C/7550C/9050C parts are going to fall off of the eject tray. (See p. 3-10.) g Eject Paper Stoppers Adjust to fit the length of documents, to avoid document spillage. (See p. 3-10.) h Document Guides Adjust to fit the width of documents, so that ejected documents stack neatly. (See p. 3-10.) i Document Guides Adjust to be...
... and functions of the DR-6050C/7550C/9050C parts are going to fall off of the eject tray. (See p. 3-10.) g Eject Paper Stoppers Adjust to fit the length of documents, to avoid document spillage. (See p. 3-10.) h Document Guides Adjust to fit the width of documents, so that ejected documents stack neatly. (See p. 3-10.) i Document Guides Adjust to be...

User Manual
Page 76
Place the new feed roller on the scanner (b). 5-9 Chapter 5 Maintenance 3. 2. Pull the roller lock lever down. 6. Slide the feed roller to the right, and then pull them towards you. 7. Put the feed roller in place (a), and align the notch in the roller's axle with the shaft on the pin. 4. Remove the feed roller. Open the roller cover. 5.
Place the new feed roller on the scanner (b). 5-9 Chapter 5 Maintenance 3. 2. Pull the roller lock lever down. 6. Slide the feed roller to the right, and then pull them towards you. 7. Put the feed roller in place (a), and align the notch in the roller's axle with the shaft on the pin. 4. Remove the feed roller. Open the roller cover. 5.

User Manual
Page 78
Pull the roller lock lever down to unlock the roller. 6. Align the notches in the roller with your fingers, and pull it up (a) and move it . Set the retard roller into place in the scanner. 3. Push the roller lock lever up to remove it to the left (b) to lock the retard roller in the direction indicated by the arrow. 4. 2. Chapter 5 Maintenance 5. Remove the retard roller. 7. Grasp the roller cover with the shaft pins in the scanner, then slide the roller lock lever in place. 5-11
Pull the roller lock lever down to unlock the roller. 6. Align the notches in the roller with your fingers, and pull it up (a) and move it . Set the retard roller into place in the scanner. 3. Push the roller lock lever up to remove it to the left (b) to lock the retard roller in the direction indicated by the arrow. 4. 2. Chapter 5 Maintenance 5. Remove the retard roller. 7. Grasp the roller cover with the shaft pins in the scanner, then slide the roller lock lever in place. 5-11

Reference Guide
Page 18
... width of documents. + Document Guide Lock Lever Locks the Document Guides. , Document Feed Tray Load documents to fit the length of the documents. Document Feeder Tray Extension / Extension Wire Extend as needed to be scanned here. - Names and Functions of Parts The names and functions of the eject tray. h Document Guides Adjust to fall off of the DR-6050C/7550C/9050C parts...
... width of documents. + Document Guide Lock Lever Locks the Document Guides. , Document Feed Tray Load documents to fit the length of the documents. Document Feeder Tray Extension / Extension Wire Extend as needed to be scanned here. - Names and Functions of Parts The names and functions of the eject tray. h Document Guides Adjust to fall off of the DR-6050C/7550C/9050C parts...

Reference Guide
Page 51
Place the new feed roller on the scanner (b). 43 Open the roller cover. 3. Pull the roller lock lever down. 5. Remove the feed roller. 6. Slide the feed roller to the right, and then pull them towards you. 7. 2. Put the feed roller in place (a), and align the notch in the roller's axle with the shaft on the pin. 3 Maintenance 4.
Place the new feed roller on the scanner (b). 43 Open the roller cover. 3. Pull the roller lock lever down. 5. Remove the feed roller. 6. Slide the feed roller to the right, and then pull them towards you. 7. 2. Put the feed roller in place (a), and align the notch in the roller's axle with the shaft on the pin. 3 Maintenance 4.

Reference Guide
Page 53
Set the retard roller into place in the roller with your fingers, and pull it up (a) and move it . 5. Push the roller lock lever up to remove it to the left scanner, then slide the roller lock lever in the (b) to lock the retard roller in the 3 3. Maintenance 4. Pull the roller lock lever down to unlock the roller. Remove the retard roller. 7. Grasp the roller cover with the shaft pins in place. 45 direction indicated by the arrow. 2. Align the notches in the scanner. 6.
Set the retard roller into place in the roller with your fingers, and pull it up (a) and move it . 5. Push the roller lock lever up to remove it to the left scanner, then slide the roller lock lever in the (b) to lock the retard roller in the 3 3. Maintenance 4. Pull the roller lock lever down to unlock the roller. Remove the retard roller. 7. Grasp the roller cover with the shaft pins in place. 45 direction indicated by the arrow. 2. Align the notches in the scanner. 6.


