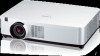
Multimedia Projector LV-8320 User's Manual
Page 3
...14 Installation 15 Positioning the Projector 15 Adjustable Feet 15 Connecting to a Computer 16 Connecting to VIDEO Equipment 17 Connecting to COMPONENT VIDEO and SCART Equipment 18 Connecting the AC Power Cord 19 Basic Operation 20 Turning On the Projector 20 Turning Off the Projector 22 How to Operate the... Computer Specifications 73 Technical Specifications 75 Optional Parts 76 PJ Link Notice 77 Attaching the Filter Cover to the Projector 77 Configurations of Terminals 78 List of Picture in Picture 79 PIN Code Protection 79 Dimensions 80 Trademarks Each ...
...14 Installation 15 Positioning the Projector 15 Adjustable Feet 15 Connecting to a Computer 16 Connecting to VIDEO Equipment 17 Connecting to COMPONENT VIDEO and SCART Equipment 18 Connecting the AC Power Cord 19 Basic Operation 20 Turning On the Projector 20 Turning Off the Projector 22 How to Operate the... Computer Specifications 73 Technical Specifications 75 Optional Parts 76 PJ Link Notice 77 Attaching the Filter Cover to the Projector 77 Configurations of Terminals 78 List of Picture in Picture 79 PIN Code Protection 79 Dimensions 80 Trademarks Each ...
Multimedia Projector LV-8320 User's Manual
Page 4
... oil or chemicals, IT may reduce the lamp life and result in severe accident or fire hazard. - To the Owner Before installing and operating this projector, read this manual again, check operations and cable connections and try the solutions in the "Troubleshooting" section on pages 67-69 of this manual thoroughly. This...
... oil or chemicals, IT may reduce the lamp life and result in severe accident or fire hazard. - To the Owner Before installing and operating this projector, read this manual again, check operations and cable connections and try the solutions in the "Troubleshooting" section on pages 67-69 of this manual thoroughly. This...

Multimedia Projector LV-8320 User's Manual
Page 6
... a damaged power cord. Otherwise, a fire, an electric shock, or injury may result. - Before moving the projector, turn the power off and disconnect the power cord and all equipment connected to rain, snow, or use near water. - Do not attempt to a grounded outlet. When the lamp breaks...smoke comes out from it may result in them into fire. - Be sure to connect the projector to disassemble the projector (including expendable parts) or remote controller. - Insert the power plug or connector into the projector through the air vents. - If the power cord itself is broken. Do not ...
... a damaged power cord. Otherwise, a fire, an electric shock, or injury may result. - Before moving the projector, turn the power off and disconnect the power cord and all equipment connected to rain, snow, or use near water. - Do not attempt to a grounded outlet. When the lamp breaks...smoke comes out from it may result in them into fire. - Be sure to connect the projector to disassemble the projector (including expendable parts) or remote controller. - Insert the power plug or connector into the projector through the air vents. - If the power cord itself is broken. Do not ...
Multimedia Projector LV-8320 User's Manual
Page 9
...reception, which the receiver is required to the equipment unless otherwise specified in Subpart B of Part 15 of the FCC Rules. Canon U.S.A., Inc. One Canon Plaza, Lake Success, NY 11042-1198, U.S.A. AC Power Cord for a Class B digital device, pursuant to provide reasonable protection... 9 AC Power Cord has a grounding-type AC line plug. Compliance Federal Communications Commission Notice Multimedia Projector, Model: LV-8320 This device complies with Canadian ICES-003. Connect the equipment into the power outlet. Consult the dealer or an experienced radio/TV technician for use ...
...reception, which the receiver is required to the equipment unless otherwise specified in Subpart B of Part 15 of the FCC Rules. Canon U.S.A., Inc. One Canon Plaza, Lake Success, NY 11042-1198, U.S.A. AC Power Cord for a Class B digital device, pursuant to provide reasonable protection... 9 AC Power Cord has a grounding-type AC line plug. Compliance Federal Communications Commission Notice Multimedia Projector, Model: LV-8320 This device complies with Canadian ICES-003. Connect the equipment into the power outlet. Consult the dealer or an experienced radio/TV technician for use ...

Multimedia Projector LV-8320 User's Manual
Page 10
... Kensington Security Slot This slot is for a Kensington lock used to deter theft of the projector. ⑮ *Kensington is for attaching.) CAUTION Do not turn on a projector with lens cap attached. High temperature from light beam may damage the lens. ⑤... Lens Cap (See page 64 for the Network function. Do not put heat-sensitive objects near this side. ⑧ Lamp Cover ⑨ Air Intake Vents ⑩ Terminals and Connectors ⑪ Top Controls and Indicators ⑫ LAN Connection...
... Kensington Security Slot This slot is for a Kensington lock used to deter theft of the projector. ⑮ *Kensington is for attaching.) CAUTION Do not turn on a projector with lens cap attached. High temperature from light beam may damage the lens. ⑤... Lens Cap (See page 64 for the Network function. Do not put heat-sensitive objects near this side. ⑧ Lamp Cover ⑨ Air Intake Vents ⑩ Terminals and Connectors ⑪ Top Controls and Indicators ⑫ LAN Connection...

Multimedia Projector LV-8320 User's Manual
Page 11
...from video equipment to this jack (p.17). ⑦ CONTROL PORT When controlling the projector with RS-232C, connect the control equipment to this connector with the serial control cable. ⑧ AUDIO IN Connect the audio output signal from a computer, RGB scart 21-pin video output or ...component video output to this terminal (pp.16,18). ④ COMPUTER IN 2 / MONITOR OUT - Or connect the MIC to the this jack. Part Names and Functions Rear Terminal ⑤ ④ ③ ② ① ⑪⑩ ⑨ ⑧ &#...
...from video equipment to this jack (p.17). ⑦ CONTROL PORT When controlling the projector with RS-232C, connect the control equipment to this connector with the serial control cable. ⑧ AUDIO IN Connect the audio output signal from a computer, RGB scart 21-pin video output or ...component video output to this terminal (pp.16,18). ④ COMPUTER IN 2 / MONITOR OUT - Or connect the MIC to the this jack. Part Names and Functions Rear Terminal ⑤ ④ ③ ② ① ⑪⑩ ⑨ ⑧ &#...

Multimedia Projector LV-8320 User's Manual
Page 16
...-in speaker is not available. • When the cable is of both the projector and external equipment from the AC outlet before connecting cables. Installation Connecting to a Computer Cables used for connection • VGA Cables (Mini D-sub 15 pin) * • Audio Cables • HDMI-DVI ...cable (*One cable is switchable. other cables are not supplied with the projector.) Note: Unplug the...
...-in speaker is not available. • When the cable is of both the projector and external equipment from the AC outlet before connecting cables. Installation Connecting to a Computer Cables used for connection • VGA Cables (Mini D-sub 15 pin) * • Audio Cables • HDMI-DVI ...cable (*One cable is switchable. other cables are not supplied with the projector.) Note: Unplug the...

Multimedia Projector LV-8320 User's Manual
Page 17
... cable AUDIO OUT (stereo) VIDEO AUDIO IN HDMI S-VIDEO Note: When the AUDIO OUT is plugged-in, the projector's built-in speaker is not available. 17 Connecting to VIDEO Equipment Cables used for connection • Video and Audio Cable (RCA x 3) • S-VIDEO Cable • Audio Cable • HDMI Cable (Cables are not...
... cable AUDIO OUT (stereo) VIDEO AUDIO IN HDMI S-VIDEO Note: When the AUDIO OUT is plugged-in, the projector's built-in speaker is not available. 17 Connecting to VIDEO Equipment Cables used for connection • Video and Audio Cable (RCA x 3) • S-VIDEO Cable • Audio Cable • HDMI Cable (Cables are not...

Multimedia Projector LV-8320 User's Manual
Page 18
...COMPONENT IN AUDIO OUT (stereo) Note: • When the AUDIO OUT is plugged-in, the projector's built-in speaker is not available. • See page 76 for connection • Audio Cables • Scart-VGA Cable • VGA Cable • Component Cable • Component-...VGA Cable (Cables are not supplied with this projector.) Note: Unplug the power cords of both the projector and external equipment from the AC outlet before connecting cables. Installation Connecting to COMPONENT VIDEO and SCART Equipment Cables used for ordering optional cables. ...
...COMPONENT IN AUDIO OUT (stereo) Note: • When the AUDIO OUT is plugged-in, the projector's built-in speaker is not available. • See page 76 for connection • Audio Cables • Scart-VGA Cable • VGA Cable • Component Cable • Component-...VGA Cable (Cables are not supplied with this projector.) Note: Unplug the power cords of both the projector and external equipment from the AC outlet before connecting cables. Installation Connecting to COMPONENT VIDEO and SCART Equipment Cables used for ordering optional cables. ...

Multimedia Projector LV-8320 User's Manual
Page 19
...power system. NOTE ON THE POWER CORD AC power cord must be near this projector is not in Stand-by mode and consumes a little electric power. Projector side AC outlet side For the U.S.A. Connect the projector with the chart below and proper AC power cord must be used. Confirm ...to work with the AC power cord, it automatically selects the correct input voltage. It is designed to the projector. Note: Unplug the AC power cord when the projector is connected to an outlet with single-phase power systems having a grounded neutral conductor. If supplied AC power cord does...
...power system. NOTE ON THE POWER CORD AC power cord must be near this projector is not in Stand-by mode and consumes a little electric power. Projector side AC outlet side For the U.S.A. Connect the projector with the chart below and proper AC power cord must be used. Confirm ...to work with the AC power cord, it automatically selects the correct input voltage. It is designed to the projector. Note: Unplug the AC power cord when the projector is connected to an outlet with single-phase power systems having a grounded neutral conductor. If supplied AC power cord does...

Multimedia Projector LV-8320 User's Manual
Page 20
...after 30 seconds. Selected Input Source and Lamp mode Lamp mode status (See page 56 for Video Input 20 Basic Operation Turning On the Projector 1 Complete peripheral connections (with a PIN code, PIN code input dialog box will appear. The preparation display appears on the screen and the countdown starts. 4... Guidance for Lamp mode status.) Note: The Filter warning and Lamp replacement icons may appear on the screen depending on the projector. 2 Connect the projector's AC power cord into an AC outlet. The POWER indicator lights green and the cooling fans start on the...
...after 30 seconds. Selected Input Source and Lamp mode Lamp mode status (See page 56 for Video Input 20 Basic Operation Turning On the Projector 1 Complete peripheral connections (with a PIN code, PIN code input dialog box will appear. The preparation display appears on the screen and the countdown starts. 4... Guidance for Lamp mode status.) Note: The Filter warning and Lamp replacement icons may appear on the screen depending on the projector. 2 Connect the projector's AC power cord into an AC outlet. The POWER indicator lights green and the cooling fans start on the...

Multimedia Projector LV-8320 User's Manual
Page 22
... 58.) At this time, you can select the level of cooling fans is changed according to turn off . CAUTION DO NOT OPERATE THE PROJECTOR CONTINUOUSLY WITHOUT REST. When disconnecting the AC plug from the wall outlet or turn off ? If the external power supply is being cooled down... RESULT IN SHORTENING THE LAMP LIFE. Power off , the fans stop immediately. The waiting time to restart will be turned on automatically by connecting the AC power cord to be shortened when the normal poweroff processing for fan cooling is completed, compared with a large capacitor. disappears after...
... 58.) At this time, you can select the level of cooling fans is changed according to turn off . CAUTION DO NOT OPERATE THE PROJECTOR CONTINUOUSLY WITHOUT REST. When disconnecting the AC plug from the wall outlet or turn off ? If the external power supply is being cooled down... RESULT IN SHORTENING THE LAMP LIFE. Power off , the fans stop immediately. The waiting time to restart will be turned on automatically by connecting the AC power cord to be shortened when the normal poweroff processing for fan cooling is completed, compared with a large capacitor. disappears after...

Multimedia Projector LV-8320 User's Manual
Page 30
... tunes to various types of the following messages may appear when: Auto - - - - When the projector cannot recognize the connected signal conforming to the provided PC systems, Auto is displayed on pp. 67-69) Mode 1 The preset system is chosen. PC System Menu ...selected manually. 1 Press the MENU button to select the desired system and then press the OK button. There is displayed. Check the connection between your computer and the projector. (See "Troubleshooting" on the System Menu box and the Auto PC Adjustment function works to project a proper image without any additional ...
... tunes to various types of the following messages may appear when: Auto - - - - When the projector cannot recognize the connected signal conforming to the provided PC systems, Auto is displayed on pp. 67-69) Mode 1 The preset system is chosen. PC System Menu ...selected manually. 1 Press the MENU button to select the desired system and then press the OK button. There is displayed. Check the connection between your computer and the projector. (See "Troubleshooting" on the System Menu box and the Auto PC Adjustment function works to project a proper image without any additional ...

Multimedia Projector LV-8320 User's Manual
Page 32
...computers employ special signal formats which may not be tuned by Multi-scan system of the connected computer. The projector has 10 independent memory areas to adjust the horizontal area displayed by this projector. Current mode Press the OK button to select PC adjust and then press the Point ...the Point ◄► buttons to adjust the value, eliminating a flicker from the image displayed (from 0 to adjust the clamp level. of this projector. 32 Clamp Use the Point ◄► buttons to 31). Display area H Use the Point ◄► buttons to store those signal formats...
...computers employ special signal formats which may not be tuned by Multi-scan system of the connected computer. The projector has 10 independent memory areas to adjust the horizontal area displayed by this projector. Current mode Press the OK button to select PC adjust and then press the Point ...the Point ◄► buttons to adjust the value, eliminating a flicker from the image displayed (from 0 to adjust the clamp level. of this projector. 32 Clamp Use the Point ◄► buttons to 31). Display area H Use the Point ◄► buttons to store those signal formats...

Multimedia Projector LV-8320 User's Manual
Page 36
...in initial mode. • True and Digital zoom +/- If your computer's screen resolution is higher than it, reset the resolution to the lower before connecting to the projector. • The image data in the PC System Menu (p. 30). • When True is fixed. Use the Point ▲▼ buttons .... To reset, press the OK button at Common to fit the screen size. are disabled and cannot be selected. Computer Input Aspect Setting This projector has the picture screen resize function, which enables you want to adjust. Aspect Menu 2 Use the Point ▲▼ buttons to pan the ...
...in initial mode. • True and Digital zoom +/- If your computer's screen resolution is higher than it, reset the resolution to the lower before connecting to the projector. • The image data in the PC System Menu (p. 30). • When True is fixed. Use the Point ▲▼ buttons .... To reset, press the OK button at Common to fit the screen size. are disabled and cannot be selected. Computer Input Aspect Setting This projector has the picture screen resize function, which enables you want to adjust. Aspect Menu 2 Use the Point ▲▼ buttons to pan the ...

Multimedia Projector LV-8320 User's Manual
Page 50
... PIN code caution: when you can no longer change Logo PIN code can be reset to the factory default setting (4321) according to operate the projector. Press the OK button so that you have changed THE LOGO PIn code, write down the NEW PIN CODE as well. 1. Press the OK button... POWER indicator lights. Logo PIN code change the Logo PIN code setting. Repeat this step to select Logo PIN code change it on the projector and connect the AC Power Cord into the outlet again. Change the Logo PIN code lock setting Change the Logo PIN code lock setting Use the Point...
... PIN code caution: when you can no longer change Logo PIN code can be reset to the factory default setting (4321) according to operate the projector. Press the OK button so that you have changed THE LOGO PIn code, write down the NEW PIN CODE as well. 1. Press the OK button... POWER indicator lights. Logo PIN code change the Logo PIN code setting. Repeat this step to select Logo PIN code change it on the projector and connect the AC Power Cord into the outlet again. Change the Logo PIN code lock setting Change the Logo PIN code lock setting Use the Point...

Multimedia Projector LV-8320 User's Manual
Page 51
... Enhanced, and then switch the output type of the terminal. HDMI setup Setting Terminal The COMPUTER IN 2/MONITOR OUT terminal on the back of the projector is only used , an adjustment of the resolution might be available. (pp. 27, 29, 39) Note: The input/output terminal ...[Computer 2] does not support EDID. Depending on ) so that the Terminal function will be necessary after connection of the HDMI Digital RGB output equipment. The names for the output setting of your HDMI Digital RGB equipment. For details, refer to the computer...
... Enhanced, and then switch the output type of the terminal. HDMI setup Setting Terminal The COMPUTER IN 2/MONITOR OUT terminal on the back of the projector is only used , an adjustment of the resolution might be available. (pp. 27, 29, 39) Note: The input/output terminal ...[Computer 2] does not support EDID. Depending on ) so that the Terminal function will be necessary after connection of the HDMI Digital RGB output equipment. The names for the output setting of your HDMI Digital RGB equipment. For details, refer to the computer...

Multimedia Projector LV-8320 User's Manual
Page 53
...management mode For reducing power consumption as well as maintaining the lamp life, the Power management mode function turns off the projection lamp when the projector is turned off. In this function is set the Timer (1~30 min). Note: Factory default is pressed. Off Power management mode ... interrupted and no button is turned off in the incorrect sequence, the Direct power on just by connecting the AC power cord to a wall outlet. Note: Be sure to set to On, the projector will not work properly. 53 Select one of the following options: Standby........ If the...
...management mode For reducing power consumption as well as maintaining the lamp life, the Power management mode function turns off the projection lamp when the projector is turned off. In this function is set the Timer (1~30 min). Note: Factory default is pressed. Off Power management mode ... interrupted and no button is turned off in the incorrect sequence, the Direct power on just by connecting the AC power cord to a wall outlet. Note: Be sure to set to On, the projector will not work properly. 53 Select one of the following options: Standby........ If the...

Multimedia Projector LV-8320 User's Manual
Page 57
... the OK button and the PIN code dialog box appears. PIN code lock When the projector is connected, the projector can be operated without a PIN code. Key lock Setting PIN code lock This function prevents the projector from being operated by unauthorized persons. If you want to change the PIN code lock setting... four-digit number), you are required to enter the PIN code. Enter the PIN code every time turning on the guide. 57 When the projector is set the security for security. Security (Key lock and PIN code lock) This function allows you to use the Key lock and PIN code...
... the OK button and the PIN code dialog box appears. PIN code lock When the projector is connected, the projector can be operated without a PIN code. Key lock Setting PIN code lock This function prevents the projector from being operated by unauthorized persons. If you want to change the PIN code lock setting... four-digit number), you are required to enter the PIN code. Enter the PIN code every time turning on the guide. 57 When the projector is set the security for security. Security (Key lock and PIN code lock) This function allows you to use the Key lock and PIN code...

Multimedia Projector LV-8320 User's Manual
Page 58
...you entered an incorrect PIN code, PIN code and the number will be changed THE LOGO PIn code, write down the OK button on the projector and connect the AC Power Cord into the outlet again. Unplug the AC Power Cord from the AC outlet. 2. L 1.... Slower, lower-sound and ...according to . If you forget your desired four-digit number. The number changes to the following options in the cooling fans' operation when the projector is turned off (p.22). Enter the correct PIN code all over again. When you want to make a choice. The PIN code returns to enter...
...you entered an incorrect PIN code, PIN code and the number will be changed THE LOGO PIn code, write down the OK button on the projector and connect the AC Power Cord into the outlet again. Unplug the AC Power Cord from the AC outlet. 2. L 1.... Slower, lower-sound and ...according to . If you forget your desired four-digit number. The number changes to the following options in the cooling fans' operation when the projector is turned off (p.22). Enter the correct PIN code all over again. When you want to make a choice. The PIN code returns to enter...


