
Owners Manual
Page 2
If something is missing, contact your camera. Camera Rechargeable Lithium Ion Battery (NP-20) Lithium Ion Battery Charger (BC-11L) AC Power Cord * * The shape of the AC power cord plug varies according to make sure that all of the items shown below are included with your dealer as soon as possible. Strap CD-ROM USB Cable AV Cable 2 Basic Reference INTRODUCTION INTRODUCTION Unpacking Check to country or geographic area.
If something is missing, contact your camera. Camera Rechargeable Lithium Ion Battery (NP-20) Lithium Ion Battery Charger (BC-11L) AC Power Cord * * The shape of the AC power cord plug varies according to make sure that all of the items shown below are included with your dealer as soon as possible. Strap CD-ROM USB Cable AV Cable 2 Basic Reference INTRODUCTION INTRODUCTION Unpacking Check to country or geographic area.

Owners Manual
Page 3
...view a recorded image 20 To delete an image 20 21 GETTING READY About This Manual 21 General Guide 22 Camera 22 Lithium Ion Battery Charger 24 Monitor Screen Contents 25 REC Mode 25 PLAY Mode 27 Changing the Contents of the Monitor Screen 29 Attaching the Strap 30... Power Requirements 31 To charge the battery 31 To load the battery 34 Low Battery Indicator 36 To replace the battery 37 Power Supply Precautions 38 Turning the Camera On and Off 41 Configuring Power Saving Settings 42 Using...
...view a recorded image 20 To delete an image 20 21 GETTING READY About This Manual 21 General Guide 22 Camera 22 Lithium Ion Battery Charger 24 Monitor Screen Contents 25 REC Mode 25 PLAY Mode 27 Changing the Contents of the Monitor Screen 29 Attaching the Strap 30... Power Requirements 31 To charge the battery 31 To load the battery 34 Low Battery Indicator 36 To replace the battery 37 Power Supply Precautions 38 Turning the Camera On and Off 41 Configuring Power Saving Settings 42 Using...

Owners Manual
Page 8
... Loader and Photohands are subject to CASIO COMPUTER CO., LTD. 8 assumes no responsibility for any ... of Photo Loader and/or Photohands. • CASIO COMPUTER CO., LTD. Be sure to back up... • CASIO COMPUTER CO., LTD. INTRODUCTION IMPORTANT! • The contents of this manual are the property of CASIO COMPUTER CO...., LTD. assumes no responsibility for any damage or loss resulting from the use of malfunction, repairs, or battery ... or trademarks of Adobe Systems Incorporated in this manual. • CASIO COMPUTER CO., LTD. Except as a result of this User's ...
... Loader and Photohands are subject to CASIO COMPUTER CO., LTD. 8 assumes no responsibility for any ... of Photo Loader and/or Photohands. • CASIO COMPUTER CO., LTD. Be sure to back up... • CASIO COMPUTER CO., LTD. INTRODUCTION IMPORTANT! • The contents of this manual are the property of CASIO COMPUTER CO...., LTD. assumes no responsibility for any damage or loss resulting from the use of malfunction, repairs, or battery ... or trademarks of Adobe Systems Incorporated in this manual. • CASIO COMPUTER CO., LTD. Except as a result of this User's ...

Owners Manual
Page 13
... never let it get into the camera, immediately turn it off . Next, remove the camera's battery and/or unplug the AC power cord from the power outlet, and contact your nearest CASIO authorized service center for repair. Dust build up around the prongs of this camera can cause eye ...damage if it is especially true with young children. Doing so will not only make storage of fire and electric shock. Next, remove the camera's battery and/or unplug...
... never let it get into the camera, immediately turn it off . Next, remove the camera's battery and/or unplug the AC power cord from the power outlet, and contact your nearest CASIO authorized service center for repair. Dust build up around the prongs of this camera can cause eye ...damage if it is especially true with young children. Doing so will not only make storage of fire and electric shock. Next, remove the camera's battery and/or unplug...

Owners Manual
Page 14
... is being performed - Other abnormal operations Any of test images and check the results to appear on the monitor screen (page 232). Low battery power - Before using the camera to record important images, make sure you turn off the camera - Disconnecting the USB cable while a data...operation is performing a record or memory access operation - Any of the following creates the risk of corruption of the error. 14 Removing the battery, removing the memory card while the operation lamp is still flashing green after you first record a number of the above conditions can cause ...
... is being performed - Other abnormal operations Any of test images and check the results to appear on the monitor screen (page 232). Low battery power - Before using the camera to record important images, make sure you turn off the camera - Disconnecting the USB cable while a data...operation is performing a record or memory access operation - Any of the following creates the risk of corruption of the error. 14 Removing the battery, removing the memory card while the operation lamp is still flashing green after you first record a number of the above conditions can cause ...

Owners Manual
Page 15
... power this camera. Be sure to reconfigure these settings after power is interrupted (page 163). • Never remove the battery from the camera and leave the battery cover open for a few hours. INTRODUCTION I Operating conditions • This camera is designed for use or keep condensation...whenever the camera is due to the characteristics of lens, and does not indicate malfunction of the camera, so you mistakenly remove the battery, immediately reinsert it to conditions that should avoid exposing it into a location that condensation can cause malfunction of the camera. 15 ...
... power this camera. Be sure to reconfigure these settings after power is interrupted (page 163). • Never remove the battery from the camera and leave the battery cover open for a few hours. INTRODUCTION I Operating conditions • This camera is designed for use or keep condensation...whenever the camera is due to the characteristics of lens, and does not indicate malfunction of the camera, so you mistakenly remove the battery, immediately reinsert it to conditions that should avoid exposing it into a location that condensation can cause malfunction of the camera. 15 ...

Owners Manual
Page 17
Load the battery into the camera. (page 34). 1 2 [CHARGE] lamp lights red during charging. [CHARGE] lamp goes out when charging is complete. -T+ 2 Stopper 3 17 QUICK START GUIDE QUICK START GUIDE First, charge the battery! 1. Charge the rechargeable litium ion battery (NP-20) that comes 1 with the camera (page 31). • It takes about 90 minutes to achieve a full charge. 2.
Load the battery into the camera. (page 34). 1 2 [CHARGE] lamp lights red during charging. [CHARGE] lamp goes out when charging is complete. -T+ 2 Stopper 3 17 QUICK START GUIDE QUICK START GUIDE First, charge the battery! 1. Charge the rechargeable litium ion battery (NP-20) that comes 1 with the camera (page 31). • It takes about 90 minutes to achieve a full charge. 2.

Owners Manual
Page 21
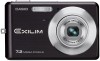
...screen Text On-screen text is currently storing images you record (page 51) The NP-20 Rechargeable Lithium Ion Battery Tiny flecks or "snow" in this : The CASIO EX-Z70 Digital Camera The location where the camera is always enclosed by the button name inside of brackets ([ ]).... I Terminology The following table defines the terminology used in this manual: "camera" "file memory" "battery" "digital noise" Means this manual. I...
...screen Text On-screen text is currently storing images you record (page 51) The NP-20 Rechargeable Lithium Ion Battery Tiny flecks or "snow" in this : The CASIO EX-Z70 Digital Camera The location where the camera is always enclosed by the button name inside of brackets ([ ]).... I Terminology The following table defines the terminology used in this manual: "camera" "file memory" "battery" "digital noise" Means this manual. I...

Owners Manual
Page 23
GETTING READY I Back 78 F E DC 9 : A [̆] B [̇] [̄] 7 Operation lamp 8 Zoom button 9 Strap ring 0 [ ] (PLAY mode) button A [ ] (REC mode) button B C [SET] button D [BS] (BEST SHOT) button E [MENU] button F Monitor Screen [̈] [SET] I Bottom G Memory card slot H Stopper I 23 M Speaker GH ML K J I Battery cover J Battery compartment K USB/AV connector L Tripod screw hole * Use this hole when attaching to a tripod.
GETTING READY I Back 78 F E DC 9 : A [̆] B [̇] [̄] 7 Operation lamp 8 Zoom button 9 Strap ring 0 [ ] (PLAY mode) button A [ ] (REC mode) button B C [SET] button D [BS] (BEST SHOT) button E [MENU] button F Monitor Screen [̈] [SET] I Bottom G Memory card slot H Stopper I 23 M Speaker GH ML K J I Battery cover J Battery compartment K USB/AV connector L Tripod screw hole * Use this hole when attaching to a tripod.

Owners Manual
Page 24
GETTING READY Lithium Ion Battery Charger 2 1 1 [CHARGE] lamp 2 Contacts 3 AC jack 3 24
GETTING READY Lithium Ion Battery Charger 2 1 1 [CHARGE] lamp 2 Contacts 3 AC jack 3 24

Owners Manual
Page 26
... sensitivity (page 117) B Aperture value (page 53) C Shutter speed value (page 53) D Date and time (page 166) E Timestamp indicator (page 122) F EV value (page 82) G Battery capacity (page 36) H Histogram (page 109) I Anti Shake indicator (page 94) J Focus frame (page 52) • Focusing complete: Green • Focusing failed: Red NOTE •...
... sensitivity (page 117) B Aperture value (page 53) C Shutter speed value (page 53) D Date and time (page 166) E Timestamp indicator (page 122) F EV value (page 82) G Battery capacity (page 36) H Histogram (page 109) I Anti Shake indicator (page 94) J Focus frame (page 52) • Focusing complete: Green • Focusing failed: Red NOTE •...

Owners Manual
Page 28
...) 0 Metering mode indicator (page 118) Multi Center Weighted Spot Flash On Flash Off Soft Flash Red-eye reduction C Recording types Auto recording, easy BEST SHOT D Battery capacity (page 36) E Histogram (page 109) F EV value (page 82) IMPORTANT! • Some information may not display properly if you display an image that was...
...) 0 Metering mode indicator (page 118) Multi Center Weighted Spot Flash On Flash Off Soft Flash Red-eye reduction C Recording types Auto recording, easy BEST SHOT D Battery capacity (page 36) E Histogram (page 109) F EV value (page 82) IMPORTANT! • Some information may not display properly if you display an image that was...

Owners Manual
Page 31
GETTING READY Power Requirements Your camera is not positioned correctly in the battery charger. 31 Correctly positioning the positive and negative terminals of the battery, load the lithium ion battery into the battery charger. To charge the battery 1. You need to charge the battery before using the camera for the first time after purchasing it is powered...
GETTING READY Power Requirements Your camera is not positioned correctly in the battery charger. 31 Correctly positioning the positive and negative terminals of the battery, load the lithium ion battery into the battery charger. To charge the battery 1. You need to charge the battery before using the camera for the first time after purchasing it is powered...

Owners Manual
Page 32
... can be sure to use the battery charger in another country, be used in certain geographic areas. Before trying to check with your travel agent concerning the local power supply. 32 B GETTING ... and with any power supply in the range of 100V to turn red. • Charging will take about 90 minutes. [CHARGE] lamp Battery Charger AC power cord NOTE • The bundled battery charger is designed for operation with the configuration of power outlet shapes in various countries around the world. Plug the...
... can be sure to use the battery charger in another country, be used in certain geographic areas. Before trying to check with your travel agent concerning the local power supply. 32 B GETTING ... and with any power supply in the range of 100V to turn red. • Charging will take about 90 minutes. [CHARGE] lamp Battery Charger AC power cord NOTE • The bundled battery charger is designed for operation with the configuration of power outlet shapes in various countries around the world. Plug the...

Owners Manual
Page 33
The [CHARGE] lamp goes out when charging is left without loading it . • Always unplug the battery charger from the camera can make proper charging impossible. Give the battery time to cool before you need to the allowable charging temperature range, which is indicated when its [CHARGE] ...when the temperature returns to use it from the power outlet and remove the battery whenever you are not charging. After charging is still warm immediately after removing it . • Charging the battery may cause interference with a dry cloth to wipe contacts and terminals occasionally with...
The [CHARGE] lamp goes out when charging is left without loading it . • Always unplug the battery charger from the camera can make proper charging impossible. Give the battery time to cool before you need to the allowable charging temperature range, which is indicated when its [CHARGE] ...when the temperature returns to use it from the power outlet and remove the battery whenever you are not charging. After charging is still warm immediately after removing it . • Charging the battery may cause interference with a dry cloth to wipe contacts and terminals occasionally with...

Owners Manual
Page 34
Slide the battery cover on the battery facing upwards (in the direction of the battery, and make sure that the stopper securely locks the battery in the direction indicated by the arrow as you slide the battery into the camera. Stopper NP-20 (-) marks • Push the bottom of the monitor screen), hold the stopper in the direction indicated by the arrow, and then swing it open. 2. With the EXILIM logo on the bottom of the camera in place. 34 GETTING READY To load the battery 1.
Slide the battery cover on the battery facing upwards (in the direction of the battery, and make sure that the stopper securely locks the battery in the direction indicated by the arrow as you slide the battery into the camera. Stopper NP-20 (-) marks • Push the bottom of the monitor screen), hold the stopper in the direction indicated by the arrow, and then swing it open. 2. With the EXILIM logo on the bottom of the camera in place. 34 GETTING READY To load the battery 1.

Owners Manual
Page 35
... the special NP-20 rechargeable lithium ion battery to the power outlet and battery charger. • If the same symptoms occur again after taking the above steps, contact a CASIO authorized service center. 35 Remove the battery from the camera and check the battery contacts for dirt. Use of any other... type of battery is loaded. Check to make sure that the AC power cord is a problem...
... the special NP-20 rechargeable lithium ion battery to the power outlet and battery charger. • If the same symptoms occur again after taking the above steps, contact a CASIO authorized service center. 35 Remove the battery from the camera and check the battery contacts for dirt. Use of any other... type of battery is loaded. Check to make sure that the AC power cord is a problem...

Owners Manual
Page 36
...for more information. • Enable the Auto Power Off and the Sleep features (page 42) to protect against wasting battery power when you forget to record images while the battery indicator is low. This is used. See page 63 for the flash mode. The indicator means that you do ...not need the flash while recording, select (flash off the camera. 36 Charge the battery immediately whenever either of each mode, the battery indicator may show a lower level in the PLAY mode than what it shows in the power requirements of these indicators appears...
...for more information. • Enable the Auto Power Off and the Sleep features (page 42) to protect against wasting battery power when you forget to record images while the battery indicator is low. This is used. See page 63 for the flash mode. The indicator means that you do ...not need the flash while recording, select (flash off the camera. 36 Charge the battery immediately whenever either of each mode, the battery indicator may show a lower level in the PLAY mode than what it shows in the power requirements of these indicators appears...

Owners Manual
Page 37
Release the stopper and pull the battery from the camera. • Take care so you do not drop the battery. 4. GETTING READY To replace the battery 1. Stopper 3. Open the battery cover. 2. Load a new battery into the camera (page 34). 37 Pull the stopper in the direction indicated by the arrow. • This will cause the battery to come part way out of the slot.
Release the stopper and pull the battery from the camera. • Take care so you do not drop the battery. 4. GETTING READY To replace the battery 1. Stopper 3. Open the battery cover. 2. Load a new battery into the camera (page 34). 37 Pull the stopper in the direction indicated by the arrow. • This will cause the battery to come part way out of the slot.

Owners Manual
Page 38
... items that comes with the camera or the optionally available USB cradle (CA-32) to intense heat. - I Battery Handling Precautions G SAFETY PRECAUTIONS Be sure to the CASIO NP-20 Rechargeable Lithium Ion Battery. • Use only the battery charger (BC-11L) that can conduct electricity (necklaces, pencil lead, etc.) - Never try to use any...
... items that comes with the camera or the optionally available USB cradle (CA-32) to intense heat. - I Battery Handling Precautions G SAFETY PRECAUTIONS Be sure to the CASIO NP-20 Rechargeable Lithium Ion Battery. • Use only the battery charger (BC-11L) that can conduct electricity (necklaces, pencil lead, etc.) - Never try to use any...


