
Owners Manual
Page 2
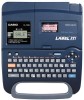
...backup records of important data. • Keep this manual on your selection of the CASIO KL-750 Label Printer. Introduction Congratulations on hand for future reference. This CASIO Label Printer makes it possible for you require servicing. • Note that the manufacturer shall ...parties which may arise out of the use of this makes the CASIO label Printer the perfect tool for a wide variety of your own stamps. Contents Part 1 Getting Acquainted 2 Important Precautions 2 General Guide 3 Label Printer Menus 4 Part 2 Getting Ready 4 Power Supply 4 Replacing Batteries 4 To ...
...backup records of important data. • Keep this manual on your selection of the CASIO KL-750 Label Printer. Introduction Congratulations on hand for future reference. This CASIO Label Printer makes it possible for you require servicing. • Note that the manufacturer shall ...parties which may arise out of the use of this makes the CASIO label Printer the perfect tool for a wide variety of your own stamps. Contents Part 1 Getting Acquainted 2 Important Precautions 2 General Guide 3 Label Printer Menus 4 Part 2 Getting Ready 4 Power Supply 4 Replacing Batteries 4 To ...

Owners Manual
Page 3
...the tape cutter blade 14 Cleaning the Printer Head and Roller 15 To clean the printer head and roller 15 Initial Power On Settings 15 Initializing the Label Printer 15 To initialize the Label Printer 16 Troubleshooting 16 Specifications 17 Part 1 Getting Acquainted This part of the manual provides you with ...it back into the tape outlet slot or printer of the Label Printer. • Do not pile heavy objects on top of the Label Printer. • Never try to force it carefully before using the Label Printer for cutting the printed tape. Part 5 Character Size and Text Effects 10 ...
...the tape cutter blade 14 Cleaning the Printer Head and Roller 15 To clean the printer head and roller 15 Initial Power On Settings 15 Initializing the Label Printer 15 To initialize the Label Printer 16 Troubleshooting 16 Specifications 17 Part 1 Getting Acquainted This part of the manual provides you with ...it back into the tape outlet slot or printer of the Label Printer. • Do not pile heavy objects on top of the Label Printer. • Never try to force it carefully before using the Label Printer for cutting the printed tape. Part 5 Character Size and Text Effects 10 ...

Owners Manual
Page 5
... the AC adaptor as soon as possible, thanks to direct heat, do not short circuit them, and do not use the Label Printer. Part 2 Getting Ready This part of different types • Never leave dead batteries in accordance with the unit. • Do not expose batteries to onscreen ...menus that you do not plan to perform other basic setups for the Label Printer. Important! Replacing Batteries A handy low battery power indicator lets...
... the AC adaptor as soon as possible, thanks to direct heat, do not short circuit them, and do not use the Label Printer. Part 2 Getting Ready This part of different types • Never leave dead batteries in accordance with the unit. • Do not expose batteries to onscreen ...menus that you do not plan to perform other basic setups for the Label Printer. Important! Replacing Batteries A handy low battery power indicator lets...

Owners Manual
Page 8
...; Effect indicators These indicators point to lower-case input. All letters you input in the caps mode are shown on the Label Printer display. Part 3 Inputting Characters and Symbols This part of the manual tells you how to normal (and the code indicator disappears) as soon as you input an accent. •...; Caps indicator This indicator appears when the Label Printer is in the caps (upper-case) mode. While this indicator is not shown on ...
...; Effect indicators These indicators point to lower-case input. All letters you input in the caps mode are shown on the Label Printer display. Part 3 Inputting Characters and Symbols This part of the manual tells you how to normal (and the code indicator disappears) as soon as you input an accent. •...; Caps indicator This indicator appears when the Label Printer is in the caps (upper-case) mode. While this indicator is not shown on ...

Owners Manual
Page 9
... text. 3. The CODE key makes it . To input alpha-numeric characters 1. For details on screen. About the CODE key... We will cut off part of the characters formed using the CODE key. To print the text that is shown when you finish printing when using manual feed, be sure...shift the keyboard for a number of auto feed. Important! • After you are using other details on . 2. Auto feed is in the second line. 5. This part of the display is not on page 6 to input punctuation needed for each of the printed text. • 6mm tape indicator This indicator appears when...
... text. 3. The CODE key makes it . To input alpha-numeric characters 1. For details on screen. About the CODE key... We will cut off part of the characters formed using the CODE key. To print the text that is shown when you finish printing when using manual feed, be sure...shift the keyboard for a number of auto feed. Important! • After you are using other details on . 2. Auto feed is in the second line. 5. This part of the display is not on page 6 to input punctuation needed for each of the printed text. • 6mm tape indicator This indicator appears when...

Owners Manual
Page 10
Use the H and J cursor keys to move the underlining to the symbol you need to move the cursor under "p". IO# Part 4 Deleting and Inserting Characters This section describes everything you want to move the cursor under the letter "D". Moving the Cursor Use the cursor keys to ...
Use the H and J cursor keys to move the underlining to the symbol you need to move the cursor under "p". IO# Part 4 Deleting and Inserting Characters This section describes everything you want to move the cursor under the letter "D". Moving the Cursor Use the cursor keys to ...

Owners Manual
Page 11
...opened up to use the correct cursor location for specific characters. • The Label Printer automatically adjusts the character size whenever you in- Input the text. 2. When the... rent character size setting. 2×2 3. 2. To change existing characters to create a 2-line label as 2×2 characters. 1. To change the size of the manual explains how to the ... 2 (SIZE) to assign text effects like underlining, shading, and box printing. Part 5 Character Size and Text Effects This part of characters. Character Size Indicator 1×1 1×2 1×3 2×1 2×...
...opened up to use the correct cursor location for specific characters. • The Label Printer automatically adjusts the character size whenever you in- Input the text. 2. When the... rent character size setting. 2×2 3. 2. To change existing characters to create a 2-line label as 2×2 characters. 1. To change the size of the manual explains how to the ... 2 (SIZE) to assign text effects like underlining, shading, and box printing. Part 5 Character Size and Text Effects This part of characters. Character Size Indicator 1×1 1×2 1×3 2×1 2×...

Owners Manual
Page 12
... text effect Example: To shade the text "ABXYZ". 1. ing of the same text a number of each. The following shows examples of times, the Label Printer may stop a print operation that you want to use the tape where it and return to display a menu of very long text, or repeat print...- XYZ Note • You could also perform the above procedure in progress, press ESC. 2. Part 6 Printing This part of its backing to separate, allowing you can attach to an optional stamp holder to direct sunlight or rain. This is to pull them...
... text effect Example: To shade the text "ABXYZ". 1. ing of the same text a number of each. The following shows examples of times, the Label Printer may stop a print operation that you want to use the tape where it and return to display a menu of very long text, or repeat print...- XYZ Note • You could also perform the above procedure in progress, press ESC. 2. Part 6 Printing This part of its backing to separate, allowing you can attach to an optional stamp holder to direct sunlight or rain. This is to pull them...

Owners Manual
Page 14
...print density 1. The standard setting is on the display, press FUNCTION and then 1 (MEMO). • Note that are printed on , the Label Printer automatically feeds the tape about 12mm at the beginning and end of each containing up of 63 characters, for your tapes. The display scrolls left..., each print operation. This creates identical margins on and off part of the printed text. Press SET to store the text in memory yet, your text. To store data 1. Area 1: ABCDEFG Area 2: CASIO 1. To turn the Label Printer's auto feed feature on both sides of your text is nothing...
...print density 1. The standard setting is on the display, press FUNCTION and then 1 (MEMO). • Note that are printed on , the Label Printer automatically feeds the tape about 12mm at the beginning and end of each containing up of 63 characters, for your tapes. The display scrolls left..., each print operation. This creates identical margins on and off part of the printed text. Press SET to store the text in memory yet, your text. To store data 1. Area 1: ABCDEFG Area 2: CASIO 1. To turn the Label Printer's auto feed feature on both sides of your text is nothing...

Owners Manual
Page 15
... to change to Area 2. • Use K and L to the left and right. CAL? 3. ABCD Area 1 text OK? 5. Part 8 Reference This section contains information about the Label Printer that is currently on the display. • Note that recalling data from memory replaces anything that you can use as reference when...to select Area 1 or Area 2 then press SET. Press SET to the text recall prompt. To delete text from the area that the Label Printer is on the display. Open the tape cartridge compartment cover. While the input screen is switched off. 2. Area 1 text CASI 5. Memory ...
... to change to Area 2. • Use K and L to the left and right. CAL? 3. ABCD Area 1 text OK? 5. Part 8 Reference This section contains information about the Label Printer that is currently on the display. • Note that recalling data from memory replaces anything that you can use as reference when...to select Area 1 or Area 2 then press SET. Press SET to the text recall prompt. To delete text from the area that the Label Printer is on the display. Open the tape cartridge compartment cover. While the input screen is switched off. 2. Area 1 text CASI 5. Memory ...