
Owners Manual
Page 2
... something is missing, contact your dealer as soon as possible. Memory card (8 MB CompactFlash card ) Loaded in the camera when you purchase it. Camera Soft case Lens cap/cap holder The lens cap should be affixed to make sure you read this manual carefully and keep it on ...hand for future reference. INTRODUCTION INTRODUCTION To get the most out of your new CASIO Digital Camera, make sure that all of the camera when you unpack it. Special video cable Alkaline batteries (4 AA-size batteries) Neck strap CD-ROM Special USB cable Data ...
... something is missing, contact your dealer as soon as possible. Memory card (8 MB CompactFlash card ) Loaded in the camera when you purchase it. Camera Soft case Lens cap/cap holder The lens cap should be affixed to make sure you read this manual carefully and keep it on ...hand for future reference. INTRODUCTION INTRODUCTION To get the most out of your new CASIO Digital Camera, make sure that all of the camera when you unpack it. Special video cable Alkaline batteries (4 AA-size batteries) Neck strap CD-ROM Special USB cable Data ...

Owners Manual
Page 3
... Battery Handling Precautions E-35 Low Battery Indicator E-35 Using AC Power E-36 Turning the Camera On and Off E-37 Power Save Settings E-37 Memory Cards E-39 Inserting a Memory Card into the Camera E-39 Removing a Memory Card from the Camera E-40 Formatting a Memory Card E-41 Memory Card Precautions E-42 IBM Microdrive Precautions E-42 INTRODUCTION...
... Battery Handling Precautions E-35 Low Battery Indicator E-35 Using AC Power E-36 Turning the Camera On and Off E-37 Power Save Settings E-37 Memory Cards E-39 Inserting a Memory Card into the Camera E-39 Removing a Memory Card from the Camera E-40 Formatting a Memory Card E-41 Memory Card Precautions E-42 IBM Microdrive Precautions E-42 INTRODUCTION...

Owners Manual
Page 4
... a Simple Snapshot E-48 About the REC Mode Monitor Screen E-50 About Auto Focus E-50 Recording Precautions E-50 Image Recording when the Battery is Low E-51 Camera Orientation Detection E-51 Previewing the Last Image Recorded E-52 Deleting the an Image in the REC Mode E-53 Using the Viewfinder for Recording E-53 Using...
... a Simple Snapshot E-48 About the REC Mode Monitor Screen E-50 About Auto Focus E-50 Recording Precautions E-50 Image Recording when the Battery is Low E-51 Camera Orientation Detection E-51 Previewing the Last Image Recorded E-52 Deleting the an Image in the REC Mode E-53 Using the Viewfinder for Recording E-53 Using...

Owners Manual
Page 5
... Sharpness E-92 Specifying Color Saturation E-92 Specifying Contrast E-93 Saving Uncompressed Images (TIFF Mode) ......... E-93 Specifying Power On Default Settings E-94 Resetting the Camera E-95 Using the Camera's Shortcut Features E-96 Changing REC mode FUNCTION Menu Settings Using the Shortcut Buttons E-96 To assign REC mode FUNCTION menu items to shortcut buttons...
... Sharpness E-92 Specifying Color Saturation E-92 Specifying Contrast E-93 Saving Uncompressed Images (TIFF Mode) ......... E-93 Specifying Power On Default Settings E-94 Resetting the Camera E-95 Using the Camera's Shortcut Features E-96 Changing REC mode FUNCTION Menu Settings Using the Shortcut Buttons E-96 To assign REC mode FUNCTION menu items to shortcut buttons...
Owners Manual
Page 6
...Browser E-134 Specifying the Card Browser Type E-134 Viewing Card Browser File Contents Saving Card Browser Files E-136 E-139 E-140 REFERENCE Camera Menus E-140 REC mode E-140 PLAY mode E-141 Mode Settings E-142 Settings in Each Mode E-142 Recording Mode + Exposure Mode...TO EXTERNAL EQUIPMENT Connecting to a Television E-124 Selecting the Video Output Signal Mode E-125 Connecting the Wired Remote Controller to the Camera E-126 Connecting to a Computer E-126 USB Port Connection (Windows, Macintosh) E-127 Using a Serial Port Connection E-128 Using a Memory Card ...
...Browser E-134 Specifying the Card Browser Type E-134 Viewing Card Browser File Contents Saving Card Browser Files E-136 E-139 E-140 REFERENCE Camera Menus E-140 REC mode E-140 PLAY mode E-141 Mode Settings E-142 Settings in Each Mode E-142 Recording Mode + Exposure Mode...TO EXTERNAL EQUIPMENT Connecting to a Television E-124 Selecting the Video Output Signal Mode E-125 Connecting the Wired Remote Controller to the Camera E-126 Connecting to a Computer E-126 USB Port Connection (Windows, Macintosh) E-127 Using a Serial Port Connection E-128 Using a Memory Card ...

Owners Manual
Page 8
... the view through the viewfinder to suit your particular eyesight. (page E-54) SET/ DISP REC RESIZ/ E / MF OFF PLAY BEST SHOT T SHIFT W PREVIEW 3 Point the camera at the subject, compose the image on the monitor screen, and press the shutter release button half way to record the image.
... the view through the viewfinder to suit your particular eyesight. (page E-54) SET/ DISP REC RESIZ/ E / MF OFF PLAY BEST SHOT T SHIFT W PREVIEW 3 Point the camera at the subject, compose the image on the monitor screen, and press the shutter release button half way to record the image.
Owners Manual
Page 12
...scenes. You also get a copy of image thumbnails on your computer screen. • Image management and manipulation software The QV-3500EX comes bundled with a CD-ROM that's packed with printers and other digital cameras. • VIDEO OUT terminal Connect to your TV for big-screen viewing of images to your computer, and Panorama... (DPOF) Images can be used when specifying images and quantities for printing by professional print services. • DCF Data Storage DCF (Design rule for Camera File system) data storage protocol provides image inter-compatibility with useful software.
...scenes. You also get a copy of image thumbnails on your computer screen. • Image management and manipulation software The QV-3500EX comes bundled with a CD-ROM that's packed with printers and other digital cameras. • VIDEO OUT terminal Connect to your TV for big-screen viewing of images to your computer, and Panorama... (DPOF) Images can be used when specifying images and quantities for printing by professional print services. • DCF Data Storage DCF (Design rule for Camera File system) data storage protocol provides image inter-compatibility with useful software.

Owners Manual
Page 15
... shock. Never use the built-in an accident. • Physical damage and malfunction of this camera" and "the camera" refer to the CASIO QV-3500EX Digital Camera. • Never try to authorized CASIO service providers. • Never fire the flash in the rain or snow, at least one ...otherwise subjecting it to the eyes, especially with the driver's vision and create the danger of the camera, immediately turn power off, unplug the AC adaptor from the power outlet. INTRODUCTION Precautions General Precautions Be sure to personal computer memory. When using the QV-3500EX.
... shock. Never use the built-in an accident. • Physical damage and malfunction of this camera" and "the camera" refer to the CASIO QV-3500EX Digital Camera. • Never try to authorized CASIO service providers. • Never fire the flash in the rain or snow, at least one ...otherwise subjecting it to the eyes, especially with the driver's vision and create the danger of the camera, immediately turn power off, unplug the AC adaptor from the power outlet. INTRODUCTION Precautions General Precautions Be sure to personal computer memory. When using the QV-3500EX.

Owners Manual
Page 16
... to reach the same temperature as the new location. Leave it in the following areas. - E-16 Operating conditions • This camera is much warmer or colder than your current location. In areas subject to strong vibration Condensation • When you should avoid exposing ...it to conditions that might cause condensation. • To keep condensation from forming, place the camera into a plastic bag before moving it into a location that is designed for a few hours. INTRODUCTION • Never open the battery compartment...
... to reach the same temperature as the new location. Leave it in the following areas. - E-16 Operating conditions • This camera is much warmer or colder than your current location. In areas subject to strong vibration Condensation • When you should avoid exposing ...it to conditions that might cause condensation. • To keep condensation from forming, place the camera into a plastic bag before moving it into a location that is designed for a few hours. INTRODUCTION • Never open the battery compartment...
Owners Manual
Page 17
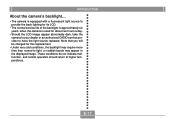
Note that you will be charged for about two hours a day. • Should the LCD image appear abnormally dark, take the camera to your dealer or an authorized CASIO service provider to light, or reddish bands may require more time than normal to have the light source replaced. These conditions do not indicate...
Note that you will be charged for about two hours a day. • Should the LCD image appear abnormally dark, take the camera to your dealer or an authorized CASIO service provider to light, or reddish bands may require more time than normal to have the light source replaced. These conditions do not indicate...

Owners Manual
Page 18
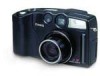
Front Self-timer lamp (page E-29) POWER/Function switch (page E-37, 48) Indicator display (page E-28) Viewfinder (page E-53) Shutter release button (page E-48) Exposure sensor (page E-58) E-18 Flash (page E-56) Terminal panel cover (page E-20) Lens (page E-21) GETTING ACQUAINTED GETTING ACQUAINTED This section contains important information you should know when trying to operate the camera. General Guide The following illustrations show the names of each component, button, and switch on the camera.
Front Self-timer lamp (page E-29) POWER/Function switch (page E-37, 48) Indicator display (page E-28) Viewfinder (page E-53) Shutter release button (page E-48) Exposure sensor (page E-58) E-18 Flash (page E-56) Terminal panel cover (page E-20) Lens (page E-21) GETTING ACQUAINTED GETTING ACQUAINTED This section contains important information you should know when trying to operate the camera. General Guide The following illustrations show the names of each component, button, and switch on the camera.

Owners Manual
Page 21
...the recommended close-up lens, or an optionally available filter. IMPORTANT! • The Canon Inc. Tele-Converter TC-DC58 Focal Distance: Digital camera focal distance x 1.5 Tele-Converter (TC-DC58) Conversion Lens Adaptor (LU-35A) • Canon Inc. Installing the close-up Lens Installing ... and close-up lenses listed following are provided in some geographic areas. • Canon Inc. Wide Converter WC-DC58 Focal Distance: Digital camera focal distance x 0.8 Wide Converter (WC-DC58) Conversion Lens Adaptor (LU-35A) E-21 Installing a Conversion Lens or Close-up lens provides...
...the recommended close-up lens, or an optionally available filter. IMPORTANT! • The Canon Inc. Tele-Converter TC-DC58 Focal Distance: Digital camera focal distance x 1.5 Tele-Converter (TC-DC58) Conversion Lens Adaptor (LU-35A) • Canon Inc. Installing the close-up Lens Installing ... and close-up lenses listed following are provided in some geographic areas. • Canon Inc. Wide Converter WC-DC58 Focal Distance: Digital camera focal distance x 0.8 Wide Converter (WC-DC58) Conversion Lens Adaptor (LU-35A) E-21 Installing a Conversion Lens or Close-up lens provides...

Owners Manual
Page 22
... being used . GETTING ACQUAINTED • Canon Inc. 58mm Close-up Lens 250D Focal Distance: In the Macro Mode, 5 cm to 14 cm from the camera, resulting in other modes Close-up Lens (250D) Conversion Lens Adaptor (LU-35A) IMPORTANT! • Be sure to use the Conversion Lens Adaptor (LU...; Due to certain characteristics of the wide converter lens, you may notice some slight distortion in images you record with it and mount the camera on the camera. Whenever you install a conversion lens or 58mm close-up lens. E-22 Do not use the viewfinder, because its W limit whenever you are ...
... being used . GETTING ACQUAINTED • Canon Inc. 58mm Close-up Lens 250D Focal Distance: In the Macro Mode, 5 cm to 14 cm from the camera, resulting in other modes Close-up Lens (250D) Conversion Lens Adaptor (LU-35A) IMPORTANT! • Be sure to use the Conversion Lens Adaptor (LU...; Due to certain characteristics of the wide converter lens, you may notice some slight distortion in images you record with it and mount the camera on the camera. Whenever you install a conversion lens or 58mm close-up lens. E-22 Do not use the viewfinder, because its W limit whenever you are ...
Owners Manual
Page 23
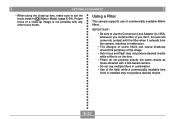
...use the Conversion Lens Adaptor (LU-35A) whenever you don't, the lens will come into contact with the filter when it extends from the camera, resulting in combination. • Use of the flash while a commercially available lens hood is installed may not produce desired results while a ...filter is not possible with a film-based camera. • Do not use of commercially available 58mm filters. Proper focus of a close -up image is on the lens. • Filters do not...
...use the Conversion Lens Adaptor (LU-35A) whenever you don't, the lens will come into contact with the filter when it extends from the camera, resulting in combination. • Use of the flash while a commercially available lens hood is installed may not produce desired results while a ...filter is not possible with a film-based camera. • Do not use of commercially available 58mm filters. Proper focus of a close -up image is on the lens. • Filters do not...
Owners Manual
Page 24
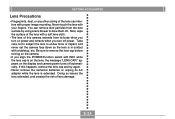
Never touch the lens with a soft lens cloth. • The lens of this happens, remove the lens cap and try again. • Never remove the camera's batteries or unplug its body when you turn off power. Doing so leaves the lens extended, and creates the risk of lens damage. E-24 appears ... of the lens can remove dust particles from its AC adaptor while the lens is extended. Be sure to blow them off automatically. If this camera extends from the lens surface by using a lens blower to remove the lens cap before turning on the lens, the message "LENS CAP!"
Never touch the lens with a soft lens cloth. • The lens of this happens, remove the lens cap and try again. • Never remove the camera's batteries or unplug its body when you turn off power. Doing so leaves the lens extended, and creates the risk of lens damage. E-24 appears ... of the lens can remove dust particles from its AC adaptor while the lens is extended. Be sure to blow them off automatically. If this camera extends from the lens surface by using a lens blower to remove the lens cap before turning on the lens, the message "LENS CAP!"

Owners Manual
Page 25
... Focus Macro Infinity Manual Focus Flash Mode indicator None Auto Flash Off Flash On Red-eye reduction • Flash indicator indicates that appear on the camera's monitor screen. Spot metering indicator Camera shake indicator Aperture value Shutter speed value • An out of images (P1 to turn yellow.
... Focus Macro Infinity Manual Focus Flash Mode indicator None Auto Flash Off Flash On Red-eye reduction • Flash indicator indicates that appear on the camera's monitor screen. Spot metering indicator Camera shake indicator Aperture value Shutter speed value • An out of images (P1 to turn yellow.

Owners Manual
Page 27
... indicators off Folder name File number Aperture value PLAY mode Metering Mode indicator Exposure Mode indicator Recording Mode indicator IMPORTANT! images recorded using a different digital camera model. • The histogram does not appear for movie images (page E-101).
... indicators off Folder name File number Aperture value PLAY mode Metering Mode indicator Exposure Mode indicator Recording Mode indicator IMPORTANT! images recorded using a different digital camera model. • The histogram does not appear for movie images (page E-101).

Owners Manual
Page 28
...mode indicator Battery capacity Infinity indicator Macro mode indicator Flash off indicator Self-timer time settings Flash on the top of the camera also shows various camera status indicators during image recording. E-28 The indicator display comes in progress: start up, save (multiple), movie recording (PAST) ...standby • The camera is ready to record when the lamp is turned off . GETTING ACQUAINTED Indicator display The indicator display located on indicator Remaining ...
...mode indicator Battery capacity Infinity indicator Macro mode indicator Flash off indicator Self-timer time settings Flash on the top of the camera also shows various camera status indicators during image recording. E-28 The indicator display comes in progress: start up, save (multiple), movie recording (PAST) ...standby • The camera is ready to record when the lamp is turned off . GETTING ACQUAINTED Indicator display The indicator display located on indicator Remaining ...
Owners Manual
Page 30
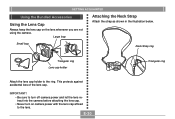
... attaching the lens cap. • Never turn on the lens whenever you are not using the camera. Small loop Neck Strap ring Triangular ring Lens cap holder Attach the lens cap holder to the ring. This protects against accidental loss of the ... Attach the strap as shown in the illustration below. GETTING ACQUAINTED Using the Bundled Accessories Using the Lens Cap Always keep the lens cap on camera power with the lens cap affixed to the lens.
... attaching the lens cap. • Never turn on the lens whenever you are not using the camera. Small loop Neck Strap ring Triangular ring Lens cap holder Attach the lens cap holder to the ring. This protects against accidental loss of the ... Attach the strap as shown in the illustration below. GETTING ACQUAINTED Using the Bundled Accessories Using the Lens Cap Always keep the lens cap on camera power with the lens cap affixed to the lens.
Owners Manual
Page 31
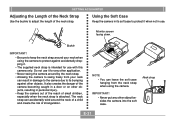
... the neck of a child and create the risk of strangulation. It also creates the danger of the camera becoming caught in use with this camera only. IMPORTANT! • Never put any other objects, resulting in its bumping against accidentally dropping it for use . Do not use it .... • You can accidentally wind around by the neck strap. • Allowing the camera to swing freely from the neck strap when using the camera to protect against other object besides the camera into the soft case. GETTING ACQUAINTED Adjusting the Length of the Neck Strap Use the buckle...
... the neck of a child and create the risk of strangulation. It also creates the danger of the camera becoming caught in use with this camera only. IMPORTANT! • Never put any other objects, resulting in its bumping against accidentally dropping it for use . Do not use it .... • You can accidentally wind around by the neck strap. • Allowing the camera to swing freely from the neck strap when using the camera to protect against other object besides the camera into the soft case. GETTING ACQUAINTED Adjusting the Length of the Neck Strap Use the buckle...


