User Guide
Page 2
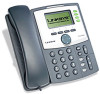
Contents Chapter 1: Getting Started 6 Overview of the Cisco SPA9000 Voice System IP Phones 6 SPA921/922 IP Phone 8 SPA941/942 IP Phone 9 SPA962 IP Phone 10 SPA932 Attendant Console 11 Caring for Your Phone 11 Chapter 2: Installing Your Phone 12 Before You Begin 13 ...the Phone to the Wireless Network 20 Verifying Phone Startup 21 Upgrading Your Phone's Firmware 22 Download the Firmware 22 Get Your Phone's IP Address 22 Install the Firmware 23 Connecting the SPA932 Attendant Console to the SPA962 24 Connecting a Single SPA932 24 Connecting an Additional SPA932 ...
Contents Chapter 1: Getting Started 6 Overview of the Cisco SPA9000 Voice System IP Phones 6 SPA921/922 IP Phone 8 SPA941/942 IP Phone 9 SPA962 IP Phone 10 SPA932 Attendant Console 11 Caring for Your Phone 11 Chapter 2: Installing Your Phone 12 Before You Begin 13 ...the Phone to the Wireless Network 20 Verifying Phone Startup 21 Upgrading Your Phone's Firmware 22 Download the Firmware 22 Get Your Phone's IP Address 22 Install the Firmware 23 Connecting the SPA932 Attendant Console to the SPA962 24 Connecting a Single SPA932 24 Connecting an Additional SPA932 ...

User Guide
Page 23
...the following : • Download the firmware from the Cisco website and install it from your IP address: STEP 1 Press the Setup button. Get Your Phone's IP Address Before you upgrade, you'll need to upgrade your phone to view Current IP. STEP 3 Scroll to the latest firmware for instructions....phone's firmware without any action on your phone is the IP address of the phone you are upgrading. However, later firmware versions may need the IP address of your service provider. IMPORTANT: If you are using the Cisco SPA9000 Voice System Setup Wizard (if your part necessary....
...the following : • Download the firmware from the Cisco website and install it from your IP address: STEP 1 Press the Setup button. Get Your Phone's IP Address Before you upgrade, you'll need to upgrade your phone to view Current IP. STEP 3 Scroll to the latest firmware for instructions....phone's firmware without any action on your phone is the IP address of the phone you are upgrading. However, later firmware versions may need the IP address of your service provider. IMPORTANT: If you are using the Cisco SPA9000 Voice System Setup Wizard (if your part necessary....

User Guide
Page 24
STEP 4 Enter the IP address of the upgrade. NOTE: Do not disconnect your phone's power until the upgrade is complete (the lights on your phone. STEP 2 Run the executable file ... longer blinking). NOTE: If you may need to disconnect before proceeding so that your PC can communicate directly with your PC. STEP 5 Click OK. Cisco Small Business IP Phone SPA9XX User Guide 23 Installing Your Phone Upgrading Your Phone's Firmware 2 Install the Firmware STEP 1 Extract the firmware onto your phone for example...
STEP 4 Enter the IP address of the upgrade. NOTE: Do not disconnect your phone's power until the upgrade is complete (the lights on your phone. STEP 2 Run the executable file ... longer blinking). NOTE: If you may need to disconnect before proceeding so that your PC can communicate directly with your PC. STEP 5 Click OK. Cisco Small Business IP Phone SPA9XX User Guide 23 Installing Your Phone Upgrading Your Phone's Firmware 2 Install the Firmware STEP 1 Extract the firmware onto your phone for example...

User Guide
Page 36
...numeric value (for example, a speed dial). Setting Do Not Disturb, page 48 Edit Opens an item so that will contain an IP address (for example, a speed dial). EditDial Edits a number before n/a dialing. More Access additional softkeys. Using the Phone Directories, page ...." Forwarding Calls, page 45 GrPickup/grPick Allows you n/a can edit numbers or letters, or enable or disable a feature. Cisco Small Business IP Phone SPA9XX User Guide 35 n/a Directory/dir Access your group. Using Basic Phone Functions Understanding Your Phone's Lines and Buttons ...
...numeric value (for example, a speed dial). Setting Do Not Disturb, page 48 Edit Opens an item so that will contain an IP address (for example, a speed dial). EditDial Edits a number before n/a dialing. More Access additional softkeys. Using the Phone Directories, page ...." Forwarding Calls, page 45 GrPickup/grPick Allows you n/a can edit numbers or letters, or enable or disable a feature. Cisco Small Business IP Phone SPA9XX User Guide 35 n/a Directory/dir Access your group. Using Basic Phone Functions Understanding Your Phone's Lines and Buttons ...

User Guide
Page 61
STEP 4 Press Edit. You can configure up to complete the call one of your PC and the IP Phone Web Interface. Using Advanced Phone Features Creating Speed Dials 4 STEP 4 Press Y/N to select an unused speed dial (marked with Not Assigned). To create or ... dial, then press Dial. • Press the Setup button, select Speed Dial, choose the number, and press Dial. Each speed dial can be a phone number, IP address or URL. STEP 5 Press OK. STEP 6 Press Save. If dial assistance is enabled, when placing calls, use the navigation button to scroll down, highlight a phone...
STEP 4 Press Edit. You can configure up to complete the call one of your PC and the IP Phone Web Interface. Using Advanced Phone Features Creating Speed Dials 4 STEP 4 Press Y/N to select an unused speed dial (marked with Not Assigned). To create or ... dial, then press Dial. • Press the Setup button, select Speed Dial, choose the number, and press Dial. Each speed dial can be a phone number, IP address or URL. STEP 5 Press OK. STEP 6 Press Save. If dial assistance is enabled, when placing calls, use the navigation button to scroll down, highlight a phone...

User Guide
Page 67
... be downloaded from which to the directory on the phone. This name will also need a source file from http://www.cisco.com/go/smallbiz. You choose the file name later. Cisco Small Business IP Phone SPA9XX User Guide 66 Creating Your Own Ring Tones You can create your ring tone. STEP 3 Click Browse... file is stored. STEP 5 Enter a name for the ring tone. You will appear in length saved to play the highlighted ring tone. STEP 2 Enter the IP address of the phone. STEP 6 Enter the target.
... be downloaded from which to the directory on the phone. This name will also need a source file from http://www.cisco.com/go/smallbiz. You choose the file name later. Cisco Small Business IP Phone SPA9XX User Guide 66 Creating Your Own Ring Tones You can create your ring tone. STEP 3 Click Browse... file is stored. STEP 5 Enter a name for the ring tone. You will appear in length saved to play the highlighted ring tone. STEP 2 Enter the IP address of the phone. STEP 6 Enter the target.

User Guide
Page 68
.... STEP 6 (Optional) Click Preview to the phone. STEP 2 Enter the IP address of the user's phone or press Skip to create the ring tone and save it to squeeze or stretch the audio. Cisco Small Business IP Phone SPA9XX User Guide 67 Click Options to change the start or end positions..., or to a file: STEP 1 Open the Ring Tone Utility. This name will appear in the display on your computer. STEP 2 Enter the IP address of the phone. Select the...
.... STEP 6 (Optional) Click Preview to the phone. STEP 2 Enter the IP address of the user's phone or press Skip to create the ring tone and save it to squeeze or stretch the audio. Cisco Small Business IP Phone SPA9XX User Guide 67 Click Options to change the start or end positions..., or to a file: STEP 1 Open the Ring Tone Utility. This name will appear in the display on your computer. STEP 2 Enter the IP address of the phone. Select the...
User Guide
Page 73
... alter your phone's functions. • Product Info: This setting displays the product name, serial number, software version, hardware version, MAC address and Client Certificate. • Status: This setting displays the status of the phone, extension and line buttons. • Reboot: See Rebooting...also possible that your phone (subject to configure and troubleshoot the network. IMPORTANT: If you choose factory reset, you ! Cisco Small Business IP Phone SPA9XX User Guide 72 CAUTION These menus are used to the original factory settings and will erase ALL current settings, including...
... alter your phone's functions. • Product Info: This setting displays the product name, serial number, software version, hardware version, MAC address and Client Certificate. • Status: This setting displays the status of the phone, extension and line buttons. • Reboot: See Rebooting...also possible that your phone (subject to configure and troubleshoot the network. IMPORTANT: If you choose factory reset, you ! Cisco Small Business IP Phone SPA9XX User Guide 72 CAUTION These menus are used to the original factory settings and will erase ALL current settings, including...

User Guide
Page 76
...the web interface. Using the Web Interface Logging in to the Web Interface 5 Logging in to the Web Interface STEP 1 Obtain the IP address of the IP Phone Web Interface displays. Setting Do Not Disturb Use the Do Not Disturb feature to switch between these tabs. If you to configure ...3 Choose Yes to the web interface. If voice mail is not configured, callers hear a busy signal or message. Cisco Small Business IP Phone SPA9XX User Guide 75 STEP 3 Enter the IP address in to turn off Do Not Disturb from your phone or from ringing your PC, open Internet Explorer. The tabs...
...the web interface. Using the Web Interface Logging in to the Web Interface 5 Logging in to the Web Interface STEP 1 Obtain the IP address of the IP Phone Web Interface displays. Setting Do Not Disturb Use the Do Not Disturb feature to switch between these tabs. If you to configure ...3 Choose Yes to the web interface. If voice mail is not configured, callers hear a busy signal or message. Cisco Small Business IP Phone SPA9XX User Guide 75 STEP 3 Enter the IP address in to turn off Do Not Disturb from your phone or from ringing your PC, open Internet Explorer. The tabs...
User Guide
Page 80
... to the web interface. STEP 3 Click Submit All Changes. Cisco Small Business IP Phone SPA9XX User Guide 79 STEP 3 Click Submit All Changes. Using the Web Interface Creating Speed Dials 5 Creating Speed Dials You can be a phone number, IP address or URL. STEP 2 In the User tab, under Supplementary ...Services, in the Text Message from other IP phones: STEP 1 Log in to the web interface. STEP 2 In the User tab, under...
... to the web interface. STEP 3 Click Submit All Changes. Cisco Small Business IP Phone SPA9XX User Guide 79 STEP 3 Click Submit All Changes. Using the Web Interface Creating Speed Dials 5 Creating Speed Dials You can be a phone number, IP address or URL. STEP 2 In the User tab, under Supplementary ...Services, in the Text Message from other IP phones: STEP 1 Log in to the web interface. STEP 2 In the User tab, under...
User Guide
Page 86
... browser, you obtain the full benefits of the web address. Resource Cisco Partner Central (requires partner registration and login) Cisco Small Medium Business Product Information Link www.cisco.com/web/partners/sell/smb/ www.cisco.com/go/smallbiz Cisco Small Business IP Phone SPA9XX User Guide 85 B Where to Go From... Here Cisco provides a wide range of resources to help you may have to add http:// in front of the address because most ...
... browser, you obtain the full benefits of the web address. Resource Cisco Partner Central (requires partner registration and login) Cisco Small Medium Business Product Information Link www.cisco.com/web/partners/sell/smb/ www.cisco.com/go/smallbiz Cisco Small Business IP Phone SPA9XX User Guide 85 B Where to Go From... Here Cisco provides a wide range of resources to help you may have to add http:// in front of the address because most ...


