Planning Guides
Page 1
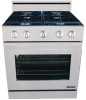
www.dacor.com Phone: (800) 793-0093 DR30GS, DR30GFS, DR30GIS, DR3GIFS Document # PG05-007 Distinctive™ 30" Wide All Gas Ranges Revised 09/13/12 Page 1/4 PLANNING ... and installation. Contact your local building department for compatibility 35" (88.9 cm) to change without notice. side view Part Number AER30GLBG AERB30G03 AERB30G06 AERB30G09 Description Low profile (1 3/4 inch) 3 Inch 6 Inch 9 Inch Compatibility Standard on models DR30GIS, DR30GIFS Optional on models DR30GS, DR30GFS Optional on models DR30GS, DR30GFS NOT compatible with models DR30GIS...
www.dacor.com Phone: (800) 793-0093 DR30GS, DR30GFS, DR30GIS, DR3GIFS Document # PG05-007 Distinctive™ 30" Wide All Gas Ranges Revised 09/13/12 Page 1/4 PLANNING ... and installation. Contact your local building department for compatibility 35" (88.9 cm) to change without notice. side view Part Number AER30GLBG AERB30G03 AERB30G06 AERB30G09 Description Low profile (1 3/4 inch) 3 Inch 6 Inch 9 Inch Compatibility Standard on models DR30GIS, DR30GIFS Optional on models DR30GS, DR30GFS Optional on models DR30GS, DR30GFS NOT compatible with models DR30GIS...

Installation Instructions
Page 1
A THIS APPLIANCE HAS BEEN TESTED IN ACCORDANCE WITH THE LATEST EDITION OF ANSI Z21.1a-2011 STANDARD FOR HOUSEHOLD GAS COOKING APPLIANCES. Installation Instructions Distinctive™ 30-Inch Gas Range For use with models DR30GS, DR30GFS, DR30GIS and DR30GIFS Part No. 105908 Rev.
A THIS APPLIANCE HAS BEEN TESTED IN ACCORDANCE WITH THE LATEST EDITION OF ANSI Z21.1a-2011 STANDARD FOR HOUSEHOLD GAS COOKING APPLIANCES. Installation Instructions Distinctive™ 30-Inch Gas Range For use with models DR30GS, DR30GFS, DR30GIS and DR30GIFS Part No. 105908 Rev.
Installation Instructions
Page 2
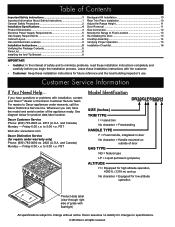
...Dacor, all rights reserved. Table of Contents Important Safety Instructions 1 Important Information About Safety Instructions 1 General Safety Precautions 2 Installation Specifications 4 Product Dimensions 4 Electrical Power Supply Requirements 5 Gas Supply Requirements 5 Cabinet Layout 6 Gas and Electrical Locations 8 Installation Instructions 8 Verifying the Package Contents 8 Parts...character = Handle mounted on outside of the appliance ready. PST Web site: www.dacor.com Dacor Distinctive Service (for low altitude operation Product data label (view through right side of ...
...Dacor, all rights reserved. Table of Contents Important Safety Instructions 1 Important Information About Safety Instructions 1 General Safety Precautions 2 Installation Specifications 4 Product Dimensions 4 Electrical Power Supply Requirements 5 Gas Supply Requirements 5 Cabinet Layout 6 Gas and Electrical Locations 8 Installation Instructions 8 Verifying the Package Contents 8 Parts...character = Handle mounted on outside of the appliance ready. PST Web site: www.dacor.com Dacor Distinctive Service (for low altitude operation Product data label (view through right side of ...

Installation Instructions
Page 4
...the cooktop without the supplied gas pressure regulator installed. • Before performing any slots, holes or passages anywhere inside the oven or on any part of the range unless specifically instructed to do not use the oven to come into contact with the controls. Remove birds to a separate, well...; Do not tamper with the interior of the oven or the cooktop and surrounding areas during cooking. 2 The installer should perform all the cooktop parts are off the gas supply and electric power to use . See the Getting to touch hot surfaces or gas burners. • Do not wear...
...the cooktop without the supplied gas pressure regulator installed. • Before performing any slots, holes or passages anywhere inside the oven or on any part of the range unless specifically instructed to do not use the oven to come into contact with the controls. Remove birds to a separate, well...; Do not tamper with the interior of the oven or the cooktop and surrounding areas during cooking. 2 The installer should perform all the cooktop parts are off the gas supply and electric power to use . See the Getting to touch hot surfaces or gas burners. • Do not wear...

Installation Instructions
Page 6
....0 cm) 1 1/8" (2.9 cm) Front of open door Front of knobs Front panel Rear of front panel Backguard thickness NOTE: Neither version is compatible with models DR30GIS, DR30GIFS 4 Side View Available Backguards Part Number AER30GLBG AERB30G03 AERB30G06 AERB30G09 Description Low profile (1 3/4 inch) 3 Inch 6 Inch 9 Inch Compatibility Standard on models DR30GIS...
....0 cm) 1 1/8" (2.9 cm) Front of open door Front of knobs Front panel Rear of front panel Backguard thickness NOTE: Neither version is compatible with models DR30GIS, DR30GIFS 4 Side View Available Backguards Part Number AER30GLBG AERB30G03 AERB30G06 AERB30G09 Description Low profile (1 3/4 inch) 3 Inch 6 Inch 9 Inch Compatibility Standard on models DR30GIS...
Installation Instructions
Page 7
... correct voltage, frequency and amperage must conform with the Manufactured Home Construction and Safety Standard, Title 24 CFR, Part 3280 [formerly the Federal Standard for Mobile Home Construction and Safety, Title 24, HUD (Part 280)] or with local codes where applicable. • This range is correct for testing the regulator setting shall...
... correct voltage, frequency and amperage must conform with the Manufactured Home Construction and Safety Standard, Title 24 CFR, Part 3280 [formerly the Federal Standard for Mobile Home Construction and Safety, Title 24, HUD (Part 280)] or with local codes where applicable. • This range is correct for testing the regulator setting shall...

Installation Instructions
Page 10
... burner caps (2 large, 1 small) • 3 standard burner rings (2 large, 1 small) • 2 oven racks • Rear self-rimming trim piece (DR30GIS/DR30GIFS only) • 2 #8 x 1/4 Torx screws (DR30GIS/DR30GIFS only only) 8 Installing the Anti-Tip Bracket Locate the anti-tip bracket included in an adjacent cabinet, as ceramic/asphalt tile or linoleum... bracket may be suitable. If the utilities are two ways to the dealer or builder. Installation Specifications Gas and Electrical Locations • Dacor recommends that utility access for all required parts have been provided.
... burner caps (2 large, 1 small) • 3 standard burner rings (2 large, 1 small) • 2 oven racks • Rear self-rimming trim piece (DR30GIS/DR30GIFS only) • 2 #8 x 1/4 Torx screws (DR30GIS/DR30GIFS only only) 8 Installing the Anti-Tip Bracket Locate the anti-tip bracket included in an adjacent cabinet, as ceramic/asphalt tile or linoleum... bracket may be suitable. If the utilities are two ways to the dealer or builder. Installation Specifications Gas and Electrical Locations • Dacor recommends that utility access for all required parts have been provided.

Installation Instructions
Page 12
... contact the base plate, or you contact metal stud mounting materials, the wall mounting method may not be used for available part numbers and compatibility. Rear Trim Piece Installation (Model DR30GIS/DR30GIFS only) To cover a countertop overhang in the diagram, upper right. Use the two (2) included #8 x 1/4 screws. 10 Wall Installation - c. Drill just...
... contact the base plate, or you contact metal stud mounting materials, the wall mounting method may not be used for available part numbers and compatibility. Rear Trim Piece Installation (Model DR30GIS/DR30GIFS only) To cover a countertop overhang in the diagram, upper right. Use the two (2) included #8 x 1/4 screws. 10 Wall Installation - c. Drill just...

Installation Instructions
Page 14
... to the regulator must never exceed 1/2 pounds per square inch (psi) or 3.5 kPa. • The range and its individual shutoff valve must have "LP" as a part of the range. 4. Connect the gas line to dissipate before use Teflon tape or plumber's putty on the range. The gas line needs to be...
... to the regulator must never exceed 1/2 pounds per square inch (psi) or 3.5 kPa. • The range and its individual shutoff valve must have "LP" as a part of the range. 4. Connect the gas line to dissipate before use Teflon tape or plumber's putty on the range. The gas line needs to be...

Installation Instructions
Page 18
... the unit level? Installation Instructions Installation Checklist WARNING To ensure a safe and proper installation, the installer must perform the following checklist to ensure that no part of the range?
... the unit level? Installation Instructions Installation Checklist WARNING To ensure a safe and proper installation, the installer must perform the following checklist to ensure that no part of the range?
Use & Care Manuals
Page 1
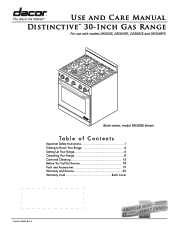
A Use and Care Manual Distinctive™ 30-Inch Gas Range For use with models DR30GS, DR30GFS, DR30GIS and DR30GIFS Style varies, model DR30GS shown Ta b l e o f Co nt e nt s Important Safety Instructions 1 Getting to Know Your Range 4 Setting Up Your Range 6 Operating Your Range 8 Care and Cleaning 14 Before You Call for Service 18 Parts and Accessories 19 Warranty and Service 20 Warranty Card Back Cover Part No. 105909 Rev.
A Use and Care Manual Distinctive™ 30-Inch Gas Range For use with models DR30GS, DR30GFS, DR30GIS and DR30GIFS Style varies, model DR30GS shown Ta b l e o f Co nt e nt s Important Safety Instructions 1 Getting to Know Your Range 4 Setting Up Your Range 6 Operating Your Range 8 Care and Cleaning 14 Before You Call for Service 18 Parts and Accessories 19 Warranty and Service 20 Warranty Card Back Cover Part No. 105909 Rev.

Use & Care Manuals
Page 4
...handles that are not suitable for commercial use . • Clean the range thoroughly before touching them. • NEVER block or cover any part of the range. Decorative covers may cause the container to be burned or injured while climbing on with the controls, pull on the handle... injury. • Keep flammable items, such as window treatment. Pressure build up may cause a fire hazard or damage to children on any part of the range unless specifically recommended in the area around the range. After use, make sure that you receive a damaged product, immediately contact ...
...handles that are not suitable for commercial use . • Clean the range thoroughly before touching them. • NEVER block or cover any part of the range. Decorative covers may cause the container to be burned or injured while climbing on with the controls, pull on the handle... injury. • Keep flammable items, such as window treatment. Pressure build up may cause a fire hazard or damage to children on any part of the range unless specifically recommended in the area around the range. After use, make sure that you receive a damaged product, immediately contact ...

Use & Care Manuals
Page 5
... adding water to food on a hot cooktop or oven. BE CAREFUL TO PREVENT BURNS. Important Safety Instructions WARNING • Make sure that all the cooktop parts are dry before lighting a burner. • Do not use towels or bulky cloth as a cutting board. • Do not expose plastic knobs to direct flame...
... adding water to food on a hot cooktop or oven. BE CAREFUL TO PREVENT BURNS. Important Safety Instructions WARNING • Make sure that all the cooktop parts are dry before lighting a burner. • Do not use towels or bulky cloth as a cutting board. • Do not expose plastic knobs to direct flame...
Use & Care Manuals
Page 6
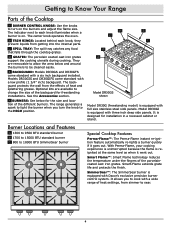
...;: The SimmerSear burner is equipped with a wide range of heat settings, from getting into the internal parts. It allows you turn on . Getting to Know Your Range Parts of the Cooktop A BURNER CONTROL KNOBS: Use the knobs to turn the knob to the HIGH position... the finish. The center knob operates the oven. It is equipped with Dacor's exclusive precision burner control system. D GRATES: The porcelain coated cast iron grates support the cooking utensils during cooking. Models DR30GIS and DR30GIFS come standard with a low profile (1 3/4" inch) backguard. Smart Flame™...
...;: The SimmerSear burner is equipped with a wide range of heat settings, from getting into the internal parts. It allows you turn on . Getting to Know Your Range Parts of the Cooktop A BURNER CONTROL KNOBS: Use the knobs to turn the knob to the HIGH position... the finish. The center knob operates the oven. It is equipped with Dacor's exclusive precision burner control system. D GRATES: The porcelain coated cast iron grates support the cooking utensils during cooking. Models DR30GIS and DR30GIFS come standard with a low profile (1 3/4" inch) backguard. Smart Flame™...

Use & Care Manuals
Page 7
... stops flashing. H BAKE BURNER: Located below the floor of bottom heat. J INTAKE/EXHAUST VENTS: The range draws air through the vents, cooling its internal parts. K OVEN RACKS: Your oven comes with flashlight) DE F G H J A OVEN CONTROL KNOB: Use the oven control knob to turn OVEN LIGHT L... starts up . It is maintaining a constant temperature. The bulb is mounted in to control both the bake and broil burners. Getting to Know Your Range Parts of the Oven A B P J MN L F K 7 6 5 4 32 1 C Model and serial number label (view through right side of grate with two chrome-plated ...
... stops flashing. H BAKE BURNER: Located below the floor of bottom heat. J INTAKE/EXHAUST VENTS: The range draws air through the vents, cooling its internal parts. K OVEN RACKS: Your oven comes with flashlight) DE F G H J A OVEN CONTROL KNOB: Use the oven control knob to turn OVEN LIGHT L... starts up . It is maintaining a constant temperature. The bulb is mounted in to control both the bake and broil burners. Getting to Know Your Range Parts of the Oven A B P J MN L F K 7 6 5 4 32 1 C Model and serial number label (view through right side of grate with two chrome-plated ...

Use & Care Manuals
Page 8
... ring STEP 1: Install SimmerSear burner ring on standard burner bases. Install the burners as shown below the burner ring is centered on top. All burner parts must surround top of SimmerSear burner base. Burner ring top view Igniter on burner base Standard Burner Assembly (left front burner only) Ridge on SimmerSear...
... ring STEP 1: Install SimmerSear burner ring on standard burner bases. Install the burners as shown below the burner ring is centered on top. All burner parts must surround top of SimmerSear burner base. Burner ring top view Igniter on burner base Standard Burner Assembly (left front burner only) Ridge on SimmerSear...

Use & Care Manuals
Page 10
...orange flame during initial operation. Improperly selected cooking utensils will ensure even heating and reduce the likelihood of burning or scorching the food. • Dacor's SimmerSear feature allows you are sparking. Foreign material in the gas line, especially in . Do not drop them on the grate. An ...electric shock could cause burns or damage to the surrounding area. • Do not touch any part of any of the burners while the igniters are finished cooking. • Do not turn the knob farther than necessary wastes energy and cooks...
...orange flame during initial operation. Improperly selected cooking utensils will ensure even heating and reduce the likelihood of burning or scorching the food. • Dacor's SimmerSear feature allows you are sparking. Foreign material in the gas line, especially in . Do not drop them on the grate. An ...electric shock could cause burns or damage to the surrounding area. • Do not touch any part of any of the burners while the igniters are finished cooking. • Do not turn the knob farther than necessary wastes energy and cooks...

Use & Care Manuals
Page 12
.... Open windows and turn off the oven. Temperatures may be set temperatu7 re, the oven ON indicator light will begin to another part of time may appear on the parts of burns or fire: • Broil only with the convection fan to the BROIL setting for 10 minutes. Broiling is normal. Leaving...
.... Open windows and turn off the oven. Temperatures may be set temperatu7 re, the oven ON indicator light will begin to another part of time may appear on the parts of burns or fire: • Broil only with the convection fan to the BROIL setting for 10 minutes. Broiling is normal. Leaving...

Use & Care Manuals
Page 15
...the center of the thickest portion of the meat. In general, no recipe adjustment is normal and necessary for successful recipes. Roasting Tips • Dacor's optional roasting pan works particularly well and two of the inner thigh. For poultry, insert the thermometer probe between the body and leg into ...the thickest part of them will result in bake mode and may also consult a cookbook on the first side for yeast-risen baked goods, although allowing the...
...the center of the thickest portion of the meat. In general, no recipe adjustment is normal and necessary for successful recipes. Roasting Tips • Dacor's optional roasting pan works particularly well and two of the inner thigh. For poultry, insert the thermometer probe between the body and leg into ...the thickest part of them will result in bake mode and may also consult a cookbook on the first side for yeast-risen baked goods, although allowing the...

Use & Care Manuals
Page 16
...not covered under high stress when hot utensils are coated with extreme care and only on your range. • Ensure that all of the porcelain parts. • If necessary, tough stains may be very difficult to your range's surfaces and accessories, use a soft cloth or non- If ...clean. The grates are under your range's surfaces. • To prevent damage, do so. These severe operating conditions cause the porcelain enamel parts on occasion. Disassemble the burners: Lift the burner caps and burner rings off the burners and oven and make sure that the anti-tip ...
...not covered under high stress when hot utensils are coated with extreme care and only on your range. • Ensure that all of the porcelain parts. • If necessary, tough stains may be very difficult to your range's surfaces and accessories, use a soft cloth or non- If ...clean. The grates are under your range's surfaces. • To prevent damage, do so. These severe operating conditions cause the porcelain enamel parts on occasion. Disassemble the burners: Lift the burner caps and burner rings off the burners and oven and make sure that the anti-tip ...