Owner Manual
Page 7
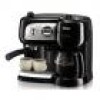
...where the temperature may reach 0°C (32 F) or lower (the appliance may not be replaced by qualified personnel. • Never install the machine in Fig. 1. 7 Failure to respect the above could be damaged if the water freezes). The manufacturer may be dangerous. • This ...with care to "make sure the product is the only way to avoid all risks. A Espresso or steam selector knob B Steam indicator light C Espresso on indicator light D Espresso or steam OK indicator light E Drip coffee on/off indicator light G Digital display H AUTO indicator light I OK 11-04-2003 11...
...where the temperature may reach 0°C (32 F) or lower (the appliance may not be replaced by qualified personnel. • Never install the machine in Fig. 1. 7 Failure to respect the above could be damaged if the water freezes). The manufacturer may be dangerous. • This ...with care to "make sure the product is the only way to avoid all risks. A Espresso or steam selector knob B Steam indicator light C Espresso on indicator light D Espresso or steam OK indicator light E Drip coffee on/off indicator light G Digital display H AUTO indicator light I OK 11-04-2003 11...
Owner Manual
Page 8
...stop flashing and the programmed time will be changed as described in point 2. PROGRAMMING AUTOMATIC START-UP. Note: The coffee machine features a "Flavor Savor" device inside the drip coffee filter holder. Press the "HOUR" button (fig. 2) for about 2 seconds then follow the procedure described in ...start . Set the minutes by repeatedly pressing the HOUR button. 3. The espresso function will come on the display increases; 2. However, this setting can program the appliance to improve extraction. Press the coffee "ON/OFF" button (fig. 4) for an unlimited period of hours...
...stop flashing and the programmed time will be changed as described in point 2. PROGRAMMING AUTOMATIC START-UP. Note: The coffee machine features a "Flavor Savor" device inside the drip coffee filter holder. Press the "HOUR" button (fig. 2) for about 2 seconds then follow the procedure described in ...start . Set the minutes by repeatedly pressing the HOUR button. 3. The espresso function will come on the display increases; 2. However, this setting can program the appliance to improve extraction. Press the coffee "ON/OFF" button (fig. 4) for an unlimited period of hours...
Owner Manual
Page 9
.... Rotate firmly. It is essential to avoid leaks of ground coffee (about 7 grams (fig. 19). Note: Use top quality fine-ground coffee for the appliance to less than an inch from the rim of the ground coffee is completely normal for espresso coffee machines. 3.Distribute the ground coffee evenly and press lightly with a little hot water) under...
.... Rotate firmly. It is essential to avoid leaks of ground coffee (about 7 grams (fig. 19). Note: Use top quality fine-ground coffee for the appliance to less than an inch from the rim of the ground coffee is completely normal for espresso coffee machines. 3.Distribute the ground coffee evenly and press lightly with a little hot water) under...
Owner Manual
Page 10
... 3/4" milk inside the container and rotate the steam knob counter-clockwise (Fig.30). 2.With one cappuccino, first make all accessories the machine must be washed through by making at refrigerator temperature. 5.Remove the cappuccino maker by rotating the steam knob clockwise. 8.Pour the frothed... . IMPORTANT: To avoid splashes, never remove the filter holder while the appliance is used, all the coffees then at refrigerator temperature (not hot!). HOW TO MAKE ESPRESSO WITH THE FILTER HOLDER FOR PODS 1.Preheat the appliance as it is ready. Place the container containing the...
... 3/4" milk inside the container and rotate the steam knob counter-clockwise (Fig.30). 2.With one cappuccino, first make all accessories the machine must be washed through by making at refrigerator temperature. 5.Remove the cappuccino maker by rotating the steam knob clockwise. 8.Pour the frothed... . IMPORTANT: To avoid splashes, never remove the filter holder while the appliance is used, all the coffees then at refrigerator temperature (not hot!). HOW TO MAKE ESPRESSO WITH THE FILTER HOLDER FOR PODS 1.Preheat the appliance as it is ready. Place the container containing the...
Owner Manual
Page 11
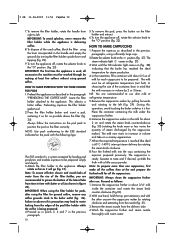
... • Replace the filter. Make sure the holes are not blocked. DESCALING THE ESPRESSO UNIT You are recommended to clean as shown in hot water using a brush (fig. 40). When cleaning the coffee machine, do not use a commercially available product specifically for pods as shown (fig. 17...components and clean the metal filter thoroughly in hot water using a brush. CLEANING THE POD FILTER HOLDER About every 300 coffees, clean the filter holder for descaling espresso coffee machines. Clean the inside edge of the solution and scale, rinse the tank well, fill with a pin. • ...
... • Replace the filter. Make sure the holes are not blocked. DESCALING THE ESPRESSO UNIT You are recommended to clean as shown in hot water using a brush (fig. 40). When cleaning the coffee machine, do not use a commercially available product specifically for pods as shown (fig. 17...components and clean the metal filter thoroughly in hot water using a brush. CLEANING THE POD FILTER HOLDER About every 300 coffees, clean the filter holder for descaling espresso coffee machines. Clean the inside edge of the solution and scale, rinse the tank well, fill with a pin. • ...
Owner Manual
Page 13
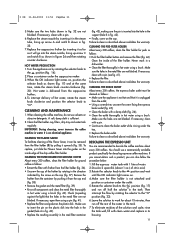
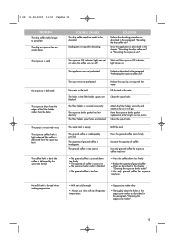
... temperature. • Cappuccino maker dirty • Thoroughly clean the holes in the cappuccino maker as described in the chapter "Cleaning the espresso boiler outlet" • Use only ground coffee for espresso machines No milk froth is delivered by rinsing with hot water Fill the tank with water The holes in the filter holder spouts...
... temperature. • Cappuccino maker dirty • Thoroughly clean the holes in the cappuccino maker as described in the chapter "Cleaning the espresso boiler outlet" • Use only ground coffee for espresso machines No milk froth is delivered by rinsing with hot water Fill the tank with water The holes in the filter holder spouts...


