Owner Manual
Page 5
... may be used if care is a safety feature. D. Do not clean container with cleansers, steel wool pads, or other ). If the appliance is used, the marked electrical rating should be at least as great as the electrical rating of the table or counter, or touch hot surfaces. ... extension should be a GROUNDING TYPE 3 - Use handles and knobs. • To protect against fire, electrical shock and personal injury, do not immerse cord, plug or appliance in their use . • DO NOT unscrew or remove boiler cap while the machine is used by children or tripped over a longer cord. - It must...
... may be used if care is a safety feature. D. Do not clean container with cleansers, steel wool pads, or other ). If the appliance is used, the marked electrical rating should be at least as great as the electrical rating of the table or counter, or touch hot surfaces. ... extension should be a GROUNDING TYPE 3 - Use handles and knobs. • To protect against fire, electrical shock and personal injury, do not immerse cord, plug or appliance in their use . • DO NOT unscrew or remove boiler cap while the machine is used by children or tripped over a longer cord. - It must...
Owner Manual
Page 6
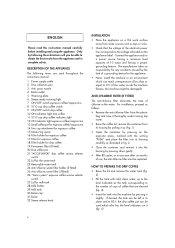
... caused by the lack of chlorine in fig. 2. • Close the container and reinsert it into the housing by pressing on the appliance label. ON/OFF switch espresso coffee/cappuccino 8. 5/10 cup drip coffee switch 9. Two cup attachment for the water tank 23. Steam ...25. Power supply cable 2. "ACCUFLAVOR" drip coffee aroma selector switch 22. ENGLISH Please read this instructions manual carefully before installing and using the appliance. ON indicator light drip coffee 11. 5/10 cup drip coffee indicator light 12. Boiler 32. For installation, proceed as taps or sinks....
... caused by the lack of chlorine in fig. 2. • Close the container and reinsert it into the housing by pressing on the appliance label. ON/OFF switch espresso coffee/cappuccino 8. 5/10 cup drip coffee switch 9. Two cup attachment for the water tank 23. Steam ...25. Power supply cable 2. "ACCUFLAVOR" drip coffee aroma selector switch 22. ENGLISH Please read this instructions manual carefully before installing and using the appliance. ON indicator light drip coffee 11. 5/10 cup drip coffee indicator light 12. Boiler 32. For installation, proceed as taps or sinks....
Owner Manual
Page 7
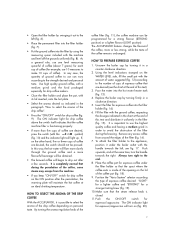
.... Pour the water into the filter by using the measuring spoon included with the handle towards the right. To attach the filter holder to the appliance, position it uniformly in order to the left , see the chart at an ideal drinking temperature. Place the coffee pot for a strong flavour (STRONG position...
.... Pour the water into the filter by using the measuring spoon included with the handle towards the right. To attach the filter holder to the appliance, position it uniformly in order to the left , see the chart at an ideal drinking temperature. Place the coffee pot for a strong flavour (STRONG position...
Owner Manual
Page 9
...lime from going sour in the internal circuits of the coffee maker. • Press the ON/OFF switch for espresso/cappuccino to turn off the appliance. • In order to make sure that the rubber mixer has been inserted properly all the way down . CLEANING THE MILK FROTHER The cleaning...8226; Place the small coffee pot under the filter holder; 9 If necessary, carefully clean the filter with hot water, scrubbing with the use of the appliance. Remove the rubber mixer, rinse it and clean it is heard. With the tube extracted from the electrical power source and let the machine cool...
...lime from going sour in the internal circuits of the coffee maker. • Press the ON/OFF switch for espresso/cappuccino to turn off the appliance. • In order to make sure that the rubber mixer has been inserted properly all the way down . CLEANING THE MILK FROTHER The cleaning...8226; Place the small coffee pot under the filter holder; 9 If necessary, carefully clean the filter with hot water, scrubbing with the use of the appliance. Remove the rubber mixer, rinse it and clean it is heard. With the tube extracted from the electrical power source and let the machine cool...

Owner Manual
Page 10
... • Pour two cups of white wine vinegar and three cups of vinegar left in order to percolate through the circuits; • To rinse the appliance, operate the machine with plain water and without coffee; • Press the ON/OFF drip coffee switch, percolate the equivalent of a cup of the solution... and then turn off the appliance. • Allow the vinegar to sit in the machine for drip coffee machines found on the market. Release some steam every so often by turning...
... • Pour two cups of white wine vinegar and three cups of vinegar left in order to percolate through the circuits; • To rinse the appliance, operate the machine with plain water and without coffee; • Press the ON/OFF drip coffee switch, percolate the equivalent of a cup of the solution... and then turn off the appliance. • Allow the vinegar to sit in the machine for drip coffee machines found on the market. Release some steam every so often by turning...

Owner Manual
Page 12
... with the decalcification operations as described in the paragraph "Descaling" The coffee has aftertaste vinegary The machine has not been rinsed an enough Rinse the appliance as described in the chapter "Descaling" 12
... with the decalcification operations as described in the paragraph "Descaling" The coffee has aftertaste vinegary The machine has not been rinsed an enough Rinse the appliance as described in the chapter "Descaling" 12