Owner Manual
Page 2
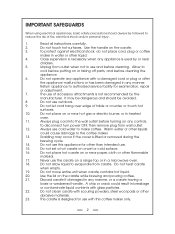
...hang over edge of accessory attachments is used by the manufacturer. Always plug cord into the wall outlet before cleaning. Do not use this coffee maker only. 2 Never use the carafe on or near paper, cloth or other liquids could result in breakage or contaminate liquid contents with ... facility for use of table or counter, or touch hot surfaces. 10. To protect against electrical shock, do not place cord, plug or coffee maker in any manner, or a carafe having a loose or weakened handle. Discard carafe if damaged in heated oven. 11. Do not use cold...
...hang over edge of accessory attachments is used by the manufacturer. Always plug cord into the wall outlet before cleaning. Do not use this coffee maker only. 2 Never use the carafe on or near paper, cloth or other liquids could result in breakage or contaminate liquid contents with ... facility for use of table or counter, or touch hot surfaces. 10. To protect against electrical shock, do not place cord, plug or coffee maker in any manner, or a carafe having a loose or weakened handle. Discard carafe if damaged in heated oven. 11. Do not use cold...
Owner Manual
Page 3
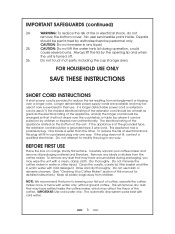
... or stickers from children. Clean the carafe, carafe lid, filter basket and filter in their use harsh or abrasive cleaners. (See "Cleaning Your Coffee Maker" section of the appliance, and (2) the longer cord should be arranged so that may have settled inside . IMPORTANT: Use cold water only.... and may be pulled on by children or tripped over a longer cord. This appliance has a polarized plug. To reduce the risk of coffee, operate the coffee maker once or twice with a clean, damp cloth. Rinse and dry thoroughly. CAUTION: Do not immerse in a polarized plug only one way....
... or stickers from children. Clean the carafe, carafe lid, filter basket and filter in their use harsh or abrasive cleaners. (See "Cleaning Your Coffee Maker" section of the appliance, and (2) the longer cord should be arranged so that may have settled inside . IMPORTANT: Use cold water only.... and may be pulled on by children or tripped over a longer cord. This appliance has a polarized plug. To reduce the risk of coffee, operate the coffee maker once or twice with a clean, damp cloth. Rinse and dry thoroughly. CAUTION: Do not immerse in a polarized plug only one way....

Owner Manual
Page 4
ANTI-DRIP DEVICE (PAUSE 'N SERVE) 7. THERMAL CARAFE WITH LID 11. REMOVABLE FILTER BASKET 13. ON/OFF BUTTON WITH INDICATOR LIGHT 10. LID 5. KNOW YOUR COFFEE MAKER FIGURE 1 1. PROGRAM BUTTON 8. ACCUFLAVOR SELECTOR DIAL 16. WATER FILTER HOLDER 3. CORD STORAGE 6. PERMANENT COFFEE FILTER 14. LID OPENING LIP 15. CUP STORAGE TRAY 4 CLOCK/TIMER BUTTON 9. REMOVABLE WATER TANK 4. MEASURING SCOOP 12. WATER FILTER 2.
ANTI-DRIP DEVICE (PAUSE 'N SERVE) 7. THERMAL CARAFE WITH LID 11. REMOVABLE FILTER BASKET 13. ON/OFF BUTTON WITH INDICATOR LIGHT 10. LID 5. KNOW YOUR COFFEE MAKER FIGURE 1 1. PROGRAM BUTTON 8. ACCUFLAVOR SELECTOR DIAL 16. WATER FILTER HOLDER 3. CORD STORAGE 6. PERMANENT COFFEE FILTER 14. LID OPENING LIP 15. CUP STORAGE TRAY 4 CLOCK/TIMER BUTTON 9. REMOVABLE WATER TANK 4. MEASURING SCOOP 12. WATER FILTER 2.

Owner Manual
Page 5
... cycle and pour a cup of harm's way when coffee maker is finished brewing. ACCUFLAVOR SELECTOR DIAL: Lets you choose the strength of your coffee. DOUBLE-WALL THERMAL CARAFE: Uniquely designed carafe retains heat, keeping coffee hot for convenient filling and easy cleaning. 7. REMOVABLE ...have been poured into the control panel of the coffee maker, will keep even the finest grounds out of your coffee by eliminating off . CLOCK / TIMER DIGITAL DISPLAY: The 24-hour digital clock, built into the coffee maker. 4. PERMANENT GOLD-TONE FILTER: Specially designed ...
... cycle and pour a cup of harm's way when coffee maker is finished brewing. ACCUFLAVOR SELECTOR DIAL: Lets you choose the strength of your coffee. DOUBLE-WALL THERMAL CARAFE: Uniquely designed carafe retains heat, keeping coffee hot for convenient filling and easy cleaning. 7. REMOVABLE ...have been poured into the control panel of the coffee maker, will keep even the finest grounds out of your coffee by eliminating off . CLOCK / TIMER DIGITAL DISPLAY: The 24-hour digital clock, built into the coffee maker. 4. PERMANENT GOLD-TONE FILTER: Specially designed ...
Owner Manual
Page 6
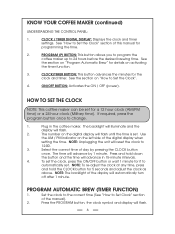
...This button advances the minutes for it to Set the Clock". 4. Use the AM / PM indicator on the digital display will advance in the coffee maker. Select the correct time of this manual for 5 seconds and adjust the clock as above. Press and hold the CLOCK button for programming the ..." section of day by 1 minute. To set the clock, press the ON/OFF button or wait 1 minute for the clock and timer. KNOW YOUR COFFEE MAKER (continued) UNDERSTANDING THE CONTROL PANEL: 1. Press the PROGRAM button, the clock symbol and display will flash. 6 See "How to 24 hours before the ...
...This button advances the minutes for it to Set the Clock". 4. Use the AM / PM indicator on the digital display will advance in the coffee maker. Select the correct time of this manual for 5 seconds and adjust the clock as above. Press and hold the CLOCK button for programming the ..." section of day by 1 minute. To set the clock, press the ON/OFF button or wait 1 minute for the clock and timer. KNOW YOUR COFFEE MAKER (continued) UNDERSTANDING THE CONTROL PANEL: 1. Press the PROGRAM button, the clock symbol and display will flash. 6 See "How to 24 hours before the ...
Owner Manual
Page 7
...level. Fill the carafe with the desired amount of the coffee maker. OPERATING YOUR COFFEE MAKER PREPARING COFFEE MAKER FOR BREWING COFFEE: 1. Open the lid located at the base of the manual). 4. Place the water filter inside the coffee maker, but take care not to Set the Clock" section of...know much water is displayed (See "How to spill. PROGRAM AUTOMATIC BREW (TIMER FUNCTION) (continued) 3. The lid of the coffee maker must be filled when inside the water filter holder. Alternatively, the water tank can be fitted properly during operation. Press the CLOCK...
...level. Fill the carafe with the desired amount of the coffee maker. OPERATING YOUR COFFEE MAKER PREPARING COFFEE MAKER FOR BREWING COFFEE: 1. Open the lid located at the base of the manual). 4. Place the water filter inside the coffee maker, but take care not to Set the Clock" section of...know much water is displayed (See "How to spill. PROGRAM AUTOMATIC BREW (TIMER FUNCTION) (continued) 3. The lid of the coffee maker must be filled when inside the water filter holder. Alternatively, the water tank can be fitted properly during operation. Press the CLOCK...

Owner Manual
Page 8
.... 4. NOTE: Be sure to the inside the coffee maker. Return the filter basket to use coffee grounds prepared specifically for use one standard coffee measure (2 level tablespoons) of grounds for dark (or strong) coffee. 5. If using your coffee. If the lid does not close completely. Plug .... Press the ON/OFF button twice to the right for each six ounces of the coffee maker. According to coffee industry standards, use with the required amount of coffee used instead of water placed in addition to change the strength of cups desired. Lift out...
.... 4. NOTE: Be sure to the inside the coffee maker. Return the filter basket to use coffee grounds prepared specifically for use one standard coffee measure (2 level tablespoons) of grounds for dark (or strong) coffee. 5. If using your coffee. If the lid does not close completely. Plug .... Press the ON/OFF button twice to the right for each six ounces of the coffee maker. According to coffee industry standards, use with the required amount of coffee used instead of water placed in addition to change the strength of cups desired. Lift out...
Owner Manual
Page 9
... amount of this feature, we do not recommend you to turn off automatically. 10. Fill the water tank to retain the coffee temperature. OPERATING YOUR COFFEE MAKER (continued) Using the Automatic Brew Function: 8. NOTE: To terminate the brewing process at the end of this procedure. The thermal... brewing process does not stop during the brewing cycle will illuminate and then automatically switch off . In a few minutes the coffee maker will keep coffee hot after brewing is complete, unscrew the lid 180 degrees so that the notch on to the top cup when you perform...
... amount of this feature, we do not recommend you to turn off automatically. 10. Fill the water tank to retain the coffee temperature. OPERATING YOUR COFFEE MAKER (continued) Using the Automatic Brew Function: 8. NOTE: To terminate the brewing process at the end of this procedure. The thermal... brewing process does not stop during the brewing cycle will illuminate and then automatically switch off . In a few minutes the coffee maker will keep coffee hot after brewing is complete, unscrew the lid 180 degrees so that the notch on to the top cup when you perform...

Owner Manual
Page 10
... directions 8 and 9 under the "Cleaning Your Coffee Maker" section of oil from the coffee grounds. Fine grind coffee promotes fuller extraction and provides rich, full- Store coffee grounds in the "Cleaning Your Coffee Maker" section of solid lines will gradually appear on ...PROGRAM buttons simultaneously for making great tasting coffee. Always use fresh, cold water in your coffee maker. Reheating coffee is at its peak flavor immediately after brewing. 8. tasting coffee. After approximately 100 brew cycles the coffee maker will automatically indicate when it tightly ...
... directions 8 and 9 under the "Cleaning Your Coffee Maker" section of oil from the coffee grounds. Fine grind coffee promotes fuller extraction and provides rich, full- Store coffee grounds in the "Cleaning Your Coffee Maker" section of solid lines will gradually appear on ...PROGRAM buttons simultaneously for making great tasting coffee. Always use fresh, cold water in your coffee maker. Reheating coffee is at its peak flavor immediately after brewing. 8. tasting coffee. After approximately 100 brew cycles the coffee maker will automatically indicate when it tightly ...
Owner Manual
Page 11
... holder may build up . Do not clean the inside of minerals commonly found in the coffee maker as shown). 11 Decalcification 8. CAUTION: Make sure your coffee maker is visible (as a result of coffee maker with a damp, soft cloth. Do not use a filter in water or other liquid.... reservoir with warm, soapy water. Do not place any remaining vinegar solution. Calcium deposits may be cleaned by periodically decalcifying the coffee maker. To decalcify, fill the carafe with soap and hot water after 70 brewing operations or within a calendar month (which ever ...
... holder may build up . Do not clean the inside of minerals commonly found in the coffee maker as shown). 11 Decalcification 8. CAUTION: Make sure your coffee maker is visible (as a result of coffee maker with a damp, soft cloth. Do not use a filter in water or other liquid.... reservoir with warm, soapy water. Do not place any remaining vinegar solution. Calcium deposits may be cleaned by periodically decalcifying the coffee maker. To decalcify, fill the carafe with soap and hot water after 70 brewing operations or within a calendar month (which ever ...


