Owner Manual
Page 3
...used if care is wider than the other liquid. One blade is exercised in warm water with cold water. 3 To reduce the risk of coffee, operate the coffee maker once or twice with a clean, damp cloth. NOTE: We recommend that it will remove any way. WARNING: To reduce the risk...the appliance is turned off. 26. Do not use . If the plug does not fit, contact a qualified electrician. Clean the carafe, carafe lid, filter basket and filter in their use harsh or abrasive cleaners. (See "Cleaning Your Coffee Maker" section of the unit. This appliance has a polarized plug.
...used if care is wider than the other liquid. One blade is exercised in warm water with cold water. 3 To reduce the risk of coffee, operate the coffee maker once or twice with a clean, damp cloth. NOTE: We recommend that it will remove any way. WARNING: To reduce the risk...the appliance is turned off. 26. Do not use . If the plug does not fit, contact a qualified electrician. Clean the carafe, carafe lid, filter basket and filter in their use harsh or abrasive cleaners. (See "Cleaning Your Coffee Maker" section of the unit. This appliance has a polarized plug.

Owner Manual
Page 4
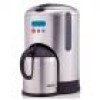
REMOVABLE WATER TANK 4. ANTI-DRIP DEVICE (PAUSE 'N SERVE) 7. MEASURING SCOOP 12. LID OPENING LIP 15. LID 5. WATER FILTER 2. CLOCK/TIMER BUTTON 9. ON/OFF BUTTON WITH INDICATOR LIGHT 10. PROGRAM BUTTON 8. PERMANENT COFFEE FILTER 14. REMOVABLE FILTER BASKET 13. ACCUFLAVOR SELECTOR DIAL 16. CORD STORAGE 6. CUP STORAGE TRAY 4 THERMAL CARAFE WITH LID 11. WATER FILTER HOLDER 3. KNOW YOUR COFFEE MAKER FIGURE 1 1.
REMOVABLE WATER TANK 4. ANTI-DRIP DEVICE (PAUSE 'N SERVE) 7. MEASURING SCOOP 12. LID OPENING LIP 15. LID 5. WATER FILTER 2. CLOCK/TIMER BUTTON 9. ON/OFF BUTTON WITH INDICATOR LIGHT 10. PROGRAM BUTTON 8. PERMANENT COFFEE FILTER 14. REMOVABLE FILTER BASKET 13. ACCUFLAVOR SELECTOR DIAL 16. CORD STORAGE 6. CUP STORAGE TRAY 4 THERMAL CARAFE WITH LID 11. WATER FILTER HOLDER 3. KNOW YOUR COFFEE MAKER FIGURE 1 1.

Owner Manual
Page 5
...unit has been shut off -flavors caused by chlorine. 10. PERMANENT GOLD-TONE FILTER: Specially designed to -read numbers indicate how many cups of your coffee. CORD STORAGE: Keeps power cord out of your coffee by eliminating off . PAUSE 'N SERVE: Allows you like it lasts longer....the entire carafe is not in advance to warming plate and coffee will automatically begin flowing through filter basket. It also helps to -use . 5 CAUTION: Do not remove carafe for longer than most filters, it . 5. KNOW YOUR COFFEE MAKER (continued) FEATURES: 1. Make sure carafe is placed all...
...unit has been shut off -flavors caused by chlorine. 10. PERMANENT GOLD-TONE FILTER: Specially designed to -read numbers indicate how many cups of your coffee. CORD STORAGE: Keeps power cord out of your coffee by eliminating off . PAUSE 'N SERVE: Allows you like it lasts longer....the entire carafe is not in advance to warming plate and coffee will automatically begin flowing through filter basket. It also helps to -use . 5 CAUTION: Do not remove carafe for longer than most filters, it . 5. KNOW YOUR COFFEE MAKER (continued) FEATURES: 1. Make sure carafe is placed all...
Owner Manual
Page 7
... automatic brew function, press the ON/OFF button and the coffee maker will flash. 5. OPERATING YOUR COFFEE MAKER PREPARING COFFEE MAKER FOR BREWING COFFEE: 1. FILLING THE WATER RESERVOIR AND USING THE WATER FILTER: 5. Place the water filter inside the coffee maker, but take care not to check the automatic time...OFF button stops flashing. 6. Press the PROGRAM button to return to Set the Clock" section of the coffee maker must be filled when inside the water filter holder. F for the current month (Ex. The water level indicator lets you want to spill. Press...
... automatic brew function, press the ON/OFF button and the coffee maker will flash. 5. OPERATING YOUR COFFEE MAKER PREPARING COFFEE MAKER FOR BREWING COFFEE: 1. FILLING THE WATER RESERVOIR AND USING THE WATER FILTER: 5. Place the water filter inside the coffee maker, but take care not to check the automatic time...OFF button stops flashing. 6. Press the PROGRAM button to return to Set the Clock" section of the coffee maker must be filled when inside the water filter holder. F for the current month (Ex. The water level indicator lets you want to spill. Press...

Owner Manual
Page 8
...water. Turn the control to the left for light coffee and to the inside the coffee maker. Screw the lid onto the thermal carafe until it locks into place. 4. PREPARING THE COFFEE: 1. After using paper filters, insert a #4 cone-shaped filter into an outlet and press the ON/OFF button... the amount of coffee used instead of or in addition to coffee industry standards, use with automatic drip coffee makers. 3. Be sure the filter basket is seated properly inside of the coffee maker. CAUTION: Do not operate your coffee. Plug the unit into the filter basket before filling ...
...water. Turn the control to the left for light coffee and to the inside the coffee maker. Screw the lid onto the thermal carafe until it locks into place. 4. PREPARING THE COFFEE: 1. After using paper filters, insert a #4 cone-shaped filter into an outlet and press the ON/OFF button... the amount of coffee used instead of or in addition to coffee industry standards, use with automatic drip coffee makers. 3. Be sure the filter basket is seated properly inside of the coffee maker. CAUTION: Do not operate your coffee. Plug the unit into the filter basket before filling ...
Owner Manual
Page 9
...brewing process does not stop during the brewing cycle will complete the brewing cycle and automatically shut off automatically. 10. Once the desired amount of coffee has been poured, screw the lid back on the lid is in awhile, run one minute and then turn the unit OFF when the carafe... is empty or when the coffee maker is complete, discard the grounds and rinse the permanent filter and filter basket thoroughly with the pouring spout. NOTE: To terminate the brewing process at the beginning of the cycle has...
...brewing process does not stop during the brewing cycle will complete the brewing cycle and automatically shut off automatically. 10. Once the desired amount of coffee has been poured, screw the lid back on the lid is in awhile, run one minute and then turn the unit OFF when the carafe... is empty or when the coffee maker is complete, discard the grounds and rinse the permanent filter and filter basket thoroughly with the pouring spout. NOTE: To terminate the brewing process at the beginning of the cycle has...
Owner Manual
Page 11
... water after 70 brewing operations or within a calendar month (which ever is sooner). Change and discard the water filter after every use. Please take note of coffee maker only). The outside of the water reservoir with a cloth as shown). 11 Do not use metal scouring ... 2. Pour the solution into the water reservoir, and then close the lid. Water Filter 10. When replacing the seal, be sure that could clog the coffee maker. 7. Carafe lid, removable filter basket and water filter holder may have a lint residue that the round edge is unplugged before decalcifying. 9....
... water after 70 brewing operations or within a calendar month (which ever is sooner). Change and discard the water filter after every use. Please take note of coffee maker only). The outside of the water reservoir with a cloth as shown). 11 Do not use metal scouring ... 2. Pour the solution into the water reservoir, and then close the lid. Water Filter 10. When replacing the seal, be sure that could clog the coffee maker. 7. Carafe lid, removable filter basket and water filter holder may have a lint residue that the round edge is unplugged before decalcifying. 9....


