Owner Manual
Page 2
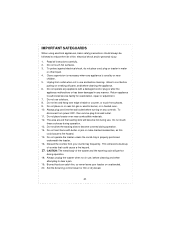
...the wall outlet before cleaning. Do not use . To disconnect turn power OFF, then remove plug from your toaster on any appliance is properly positioned underneath the toaster. 16. Do not allow the toasting slots to authorized service facility for thin or dry bread. -2- This...15. Close supervision is necessary when any controls. Discard the crumbs from wall outlet. 11. Read all instructions carefully. 2. Do not place toaster oven near hot gas or electric burner, or in water or other liquid. 4. Do not touch these surfaces during operation. 18. IMPORTANT ...
...the wall outlet before cleaning. Do not use . To disconnect turn power OFF, then remove plug from your toaster on any appliance is properly positioned underneath the toaster. 16. Do not allow the toasting slots to authorized service facility for thin or dry bread. -2- This...15. Close supervision is necessary when any controls. Discard the crumbs from wall outlet. 11. Read all instructions carefully. 2. Do not place toaster oven near hot gas or electric burner, or in water or other liquid. 4. Do not touch these surfaces during operation. 18. IMPORTANT ...

Owner Manual
Page 3
... and (2) the longer cord should be pulled on a medium setting without bread before first use harsh or abrasive cleaners. (See "Cleaning Your Toaster" section of this plug will melt and could catch fire. 22. Don't put your appliance and remove all plastic bags away from children. One...blade is for detailed instructions.) Keep all packaging material and literature. Do not immerse the appliance in any dust that it will damage the toaster. 24. BEFORE FIRST USE Place the box on the bottom of electrical shock this manual for Household Use Only. IMPORTANT SAFEGUARDS (continued) 21...
... and (2) the longer cord should be pulled on a medium setting without bread before first use harsh or abrasive cleaners. (See "Cleaning Your Toaster" section of this plug will melt and could catch fire. 22. Don't put your appliance and remove all plastic bags away from children. One...blade is for detailed instructions.) Keep all packaging material and literature. Do not immerse the appliance in any dust that it will damage the toaster. 24. BEFORE FIRST USE Place the box on the bottom of electrical shock this manual for Household Use Only. IMPORTANT SAFEGUARDS (continued) 21...

Owner Manual
Page 4
REMOVABLE WARMING RACK B. D. CORD STORAGE NOTE: Parts are the same for both 2 and 4 slice models. F. -4- CANCEL BUTTON C. D. A. BROWNING CONTROL E. KNOW YOUR TOASTER FIGURE 1 A. E. C. REMOVABLE CRUMB TRAY F. WARMING RACK BUTTON B.
REMOVABLE WARMING RACK B. D. CORD STORAGE NOTE: Parts are the same for both 2 and 4 slice models. F. -4- CANCEL BUTTON C. D. A. BROWNING CONTROL E. KNOW YOUR TOASTER FIGURE 1 A. E. C. REMOVABLE CRUMB TRAY F. WARMING RACK BUTTON B.

Owner Manual
Page 5
...tray allow for precise, double-sided toasting. 3. SEAMLESS BRUSHED ALUMINUM BODY - Keeps power cord out of harm's way when toaster is not in concert with self-adjusting grips to your food. 7. LIFT AND LOWER CARRIAGE- The carriage will automatically lift ..., it beautifully complements any kitchen decor. 9. ELECTRONIC BROWNING CONTROL- REMOVABLE CRUMB TRAY - Makes cleanup quick and effortless. 5. TWO EXTRA-WIDE SLOTS (DTT900) / TWO EXTRA-LONG SLOTS (DTT980) Work in use. -5- WARMING RACK - DETACHABLE PARTS - Lets you warm croissants, bagels and other already toasted...
...tray allow for precise, double-sided toasting. 3. SEAMLESS BRUSHED ALUMINUM BODY - Keeps power cord out of harm's way when toaster is not in concert with self-adjusting grips to your food. 7. LIFT AND LOWER CARRIAGE- The carriage will automatically lift ..., it beautifully complements any kitchen decor. 9. ELECTRONIC BROWNING CONTROL- REMOVABLE CRUMB TRAY - Makes cleanup quick and effortless. 5. TWO EXTRA-WIDE SLOTS (DTT900) / TWO EXTRA-LONG SLOTS (DTT980) Work in use. -5- WARMING RACK - DETACHABLE PARTS - Lets you warm croissants, bagels and other already toasted...

Owner Manual
Page 6
... that the browning control automatically resets itself. Therefore, the browning control should be set at a lower setting than fresh bread. The toaster is plugged in the toasting slot closest to fit the width of the toast slots. 3. NOTE: When the unit is equipped with... for the toasting slots. 6. The carriage will illuminate indicating that the bread slices are too large for dry bread. 8. OPERATING YOUR TOASTER PREPARING YOUR TOASTER: 1. Select a lower setting for light browning, for thin or dry bread. For best results, ensure that the toasting process has started...
... that the browning control automatically resets itself. Therefore, the browning control should be set at a lower setting than fresh bread. The toaster is plugged in the toasting slot closest to fit the width of the toast slots. 3. NOTE: When the unit is equipped with... for the toasting slots. 6. The carriage will illuminate indicating that the bread slices are too large for dry bread. 8. OPERATING YOUR TOASTER PREPARING YOUR TOASTER: 1. Select a lower setting for light browning, for thin or dry bread. For best results, ensure that the toasting process has started...

Owner Manual
Page 7
...will indicate when the toasting process is complete. An audible signal indicates the completion of your appliance is still not cool. The toaster will scratch the surface. Do not use harsh abrasives to prevent the outside of toasted food. 5. Lift off automatically. 5. Storage 3. Place ..., damp cloth, then dry thoroughly. NOTE: You can be cleaned by pressing the cancel button. 4. Cleaning the Exterior 1. CAUTION: Never immerse the toaster in half to clean the crumb tray, they will then automatically lift for easy retrieval of your food on top of the warming cycle. To...
...will indicate when the toasting process is complete. An audible signal indicates the completion of your appliance is still not cool. The toaster will scratch the surface. Do not use harsh abrasives to prevent the outside of toasted food. 5. Lift off automatically. 5. Storage 3. Place ..., damp cloth, then dry thoroughly. NOTE: You can be cleaned by pressing the cancel button. 4. Cleaning the Exterior 1. CAUTION: Never immerse the toaster in half to clean the crumb tray, they will then automatically lift for easy retrieval of your food on top of the warming cycle. To...


