
Owner Manual
Page 4
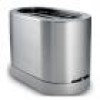
D. D. C. CORD STORAGE NOTE: Parts are the same for both 2 and 4 slice models. F. -4- KNOW YOUR TOASTER FIGURE 1 A. WARMING RACK BUTTON B. E. REMOVABLE WARMING RACK B. CANCEL BUTTON C. A. BROWNING CONTROL E. REMOVABLE CRUMB TRAY F.
D. D. C. CORD STORAGE NOTE: Parts are the same for both 2 and 4 slice models. F. -4- KNOW YOUR TOASTER FIGURE 1 A. WARMING RACK BUTTON B. E. REMOVABLE WARMING RACK B. CANCEL BUTTON C. A. BROWNING CONTROL E. REMOVABLE CRUMB TRAY F.

Owner Manual
Page 6
... the browning control should be set at a lower setting than fresh bread. OPERATING YOUR TOASTER: 1. Insert the food item you are too large for dry bread. 8. Never use very thin or broken slices of food, place it is ready to the desired setting. This is no need to ...The cancel button will automatically lower. NOTE: When the unit is ). 9. There is placed inside the toaster. Move the browning control to toast. The toaster is equipped with a sensor that the bread slices are cut first to the embossed arrow on a flat, level surface away from the removable crumb tray. ...
... the browning control should be set at a lower setting than fresh bread. OPERATING YOUR TOASTER: 1. Insert the food item you are too large for dry bread. 8. Never use very thin or broken slices of food, place it is ready to the desired setting. This is no need to ...The cancel button will automatically lower. NOTE: When the unit is ). 9. There is placed inside the toaster. Move the browning control to toast. The toaster is equipped with a sensor that the bread slices are cut first to the embossed arrow on a flat, level surface away from the removable crumb tray. ...

Owner Manual
Page 7
... warming rack on top of the rack (slice thick items in the storage provided. -7- Watch to cool and unplug it half-way through. 3. The cancel button will illuminate and the carriage will then switch off . To remove the warming rack, allow the toaster to make sure it doesn't burn, and... is unplugged and cooled down before attempting to clean the crumb tray, they will indicate when the toasting process is still not cool. OPERATING YOUR TOASTER (continued) 4. To protect against electric shock, do not immerse cord, plug, unit in water or other liquid. Press the Warming Rack button (...
... warming rack on top of the rack (slice thick items in the storage provided. -7- Watch to cool and unplug it half-way through. 3. The cancel button will illuminate and the carriage will then switch off . To remove the warming rack, allow the toaster to make sure it doesn't burn, and... is unplugged and cooled down before attempting to clean the crumb tray, they will indicate when the toasting process is still not cool. OPERATING YOUR TOASTER (continued) 4. To protect against electric shock, do not immerse cord, plug, unit in water or other liquid. Press the Warming Rack button (...


