Owner Manual
Page 4
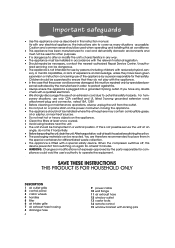
... THIS PRODUCT IS FOR HOUSEHOLD ONLY DESCRIPTION 1 air outlet grille 2 control panel 3 castor wheels 4 handles 5 filter 6 air intake grille 7 air exhaust hose housing 8 drainage hose 4 9 power cable 10 wall flange 11 air exhaust hose 12 window outlet 13 castor locks 14 remote control 15 window bracket with a special safety device. Important safeguards • Use this...
... THIS PRODUCT IS FOR HOUSEHOLD ONLY DESCRIPTION 1 air outlet grille 2 control panel 3 castor wheels 4 handles 5 filter 6 air intake grille 7 air exhaust hose housing 8 drainage hose 4 9 power cable 10 wall flange 11 air exhaust hose 12 window outlet 13 castor locks 14 remote control 15 window bracket with a special safety device. Important safeguards • Use this...
Owner Manual
Page 5
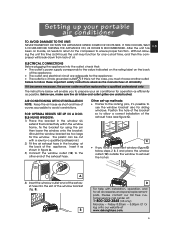
... 1) Place the bracket in the housing at the back of oil. B D For help with a saw by a qualified professional.) 2) Fit the air exhaust hose in the window sill, extend the bracket fully within the window frame, fix the bracket by a qualified professional only. ing the unit this is a 3-hole...it as shown in figure A. 3) Connect the window outlet (12) to avoid constrictions. After the unit has GB been on the back of the exhaust hose. Without allow a correct installation of the exhau- C • If you must be replaced by using the pin then lower the window onto the bracket...
... 1) Place the bracket in the housing at the back of oil. B D For help with a saw by a qualified professional.) 2) Fit the air exhaust hose in the window sill, extend the bracket fully within the window frame, fix the bracket by a qualified professional only. ing the unit this is a 3-hole...it as shown in figure A. 3) Connect the window outlet (12) to avoid constrictions. After the unit has GB been on the back of the exhaust hose. Without allow a correct installation of the exhau- C • If you must be replaced by using the pin then lower the window onto the bracket...
Owner Manual
Page 6
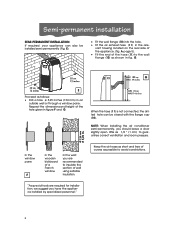
...correct ventilation and room pressure. E). • Fit the wall flange (10) into the hole. • Fit the air exhaust hose (11) in figure F and G. G E Proceed as possible to avoid constrictions. 6 Keep the air hoses as short and free of curves as follows: • Drill a hole ø 5,25 inches (134 mm) in fig... installed by specialized personnel." vant housing located on the rear side of wall using suitable insulation. Respect the dimensions and height of the hose (11) to the wall flange (10) as 1/2 " (1 cm) to insulate the section of the appliance. (fig. When the...
...correct ventilation and room pressure. E). • Fit the wall flange (10) into the hole. • Fit the air exhaust hose (11) in figure F and G. G E Proceed as possible to avoid constrictions. 6 Keep the air hoses as short and free of curves as follows: • Drill a hole ø 5,25 inches (134 mm) in fig... installed by specialized personnel." vant housing located on the rear side of wall using suitable insulation. Respect the dimensions and height of the hose (11) to the wall flange (10) as 1/2 " (1 cm) to insulate the section of the appliance. (fig. When the...
Owner Manual
Page 8
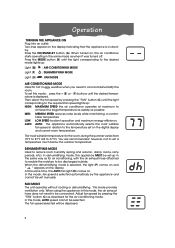
...starts operating in relation to cool and dehumidify the room. FAN MODE The unit operates without cooling or dehumidifying. In this mode, the air exhaust hose does not need to the temperature set this mode, fan speed is selected, the light (P) comes on and " " appears on the... for silent operation and maximum energy efficiency AUTO: AUTO: the appliance automatically selects the most suitable temperature for air conditioning, with the air exhaust hose attached to enable the moisture to be discharged outside. To set on the display. Adjust fan speed by pressing the "FAN" button (C)...
...starts operating in relation to cool and dehumidify the room. FAN MODE The unit operates without cooling or dehumidifying. In this mode, the air exhaust hose does not need to the temperature set this mode, fan speed is selected, the light (P) comes on and " " appears on the... for silent operation and maximum energy efficiency AUTO: AUTO: the appliance automatically selects the most suitable temperature for air conditioning, with the air exhaust hose attached to enable the moisture to be discharged outside. To set on the display. Adjust fan speed by pressing the "FAN" button (C)...
Owner Manual
Page 15
... time (6-24 hours) the unit may function for a short time only. • The air exhaust hose has a constriction. • The air exhaust hose is blocked. • Position the exhaust hose correctly. • Check there are no obstacles Obstructing air discharge. • There are heat sources... Wait. n g TROUBLESHOOTING PROBLEM The air conditioning unit does not start. Bad odor in the room (lamps, etc.). • The exhaust hose is clogged. • Clean or replace the filter. The air • The internal compressor safety device conditioner does prevents the appliance from...
... time (6-24 hours) the unit may function for a short time only. • The air exhaust hose has a constriction. • The air exhaust hose is blocked. • Position the exhaust hose correctly. • Check there are no obstacles Obstructing air discharge. • There are heat sources... Wait. n g TROUBLESHOOTING PROBLEM The air conditioning unit does not start. Bad odor in the room (lamps, etc.). • The exhaust hose is clogged. • Clean or replace the filter. The air • The internal compressor safety device conditioner does prevents the appliance from...

