
User Manual
Page 1
Mounting and Cable Routing Procedures for Dell™ Digital KVM's (1082DS, 2162DS, 4322DS) A Dell™ Technical White Paper Dell™ │ Datacenter Infrastructure Engineering By Daniel Whittaker and Jose L. Flores August 2010
Mounting and Cable Routing Procedures for Dell™ Digital KVM's (1082DS, 2162DS, 4322DS) A Dell™ Technical White Paper Dell™ │ Datacenter Infrastructure Engineering By Daniel Whittaker and Jose L. Flores August 2010

User Manual
Page 2
... in any manner whatsoever without the express written permission of Dell Inc. is strictly forbidden. For more information, contact Dell. All rights reserved. Dell, the DELL logo, the DELL badge, and PowerEdge are trademarks of Dell Inc. THE CONTENT IS PROVIDED AS IS, WITHOUT EXPRESS ...OR IMPLIED WARRANTIES OF ANY KIND. © 2010 Dell Inc. Mounting and Cable Routing Procedures for Dell™ Digital KVM's (1082DS...
... in any manner whatsoever without the express written permission of Dell Inc. is strictly forbidden. For more information, contact Dell. All rights reserved. Dell, the DELL logo, the DELL badge, and PowerEdge are trademarks of Dell Inc. THE CONTENT IS PROVIDED AS IS, WITHOUT EXPRESS ...OR IMPLIED WARRANTIES OF ANY KIND. © 2010 Dell Inc. Mounting and Cable Routing Procedures for Dell™ Digital KVM's (1082DS...

User Manual
Page 3
...Dell™ Digital KVM's (1082DS, 2162DS, 4322DS) Contents Introduction ...3 Section 1: 0U Mounting Locations...3 1.1 Supported Locations in the PowerEdge™ 4210 and 2410 3 1.2 Supported Locations in the PowerEdge™ 4820, 4220, and 2420 5 Section 2: 1U Mounting Locations...6 2.1 Mounting the KVM in the Front of the Rack 6 2.2 Mounting the KVM...: Routing Power and Data Cables (Optional Tie 10 Table 1: Rail Adjustment Range ...3 Table 2: Dell™ KVM Resolution by Model ...10 Table 3: Server Interface Pod Matrix 4:3 Resolutions 11 Table 4: Server Interface Pod Matrix 16:10...
...Dell™ Digital KVM's (1082DS, 2162DS, 4322DS) Contents Introduction ...3 Section 1: 0U Mounting Locations...3 1.1 Supported Locations in the PowerEdge™ 4210 and 2410 3 1.2 Supported Locations in the PowerEdge™ 4820, 4220, and 2420 5 Section 2: 1U Mounting Locations...6 2.1 Mounting the KVM in the Front of the Rack 6 2.2 Mounting the KVM...: Routing Power and Data Cables (Optional Tie 10 Table 1: Rail Adjustment Range ...3 Table 2: Dell™ KVM Resolution by Model ...10 Table 3: Server Interface Pod Matrix 4:3 Resolutions 11 Table 4: Server Interface Pod Matrix 16:10...

User Manual
Page 4
Mounting and Cable Routing Procedures for Dell™ Digital KVM's (1082DS, 2162DS, 4322DS) Page 2
Mounting and Cable Routing Procedures for Dell™ Digital KVM's (1082DS, 2162DS, 4322DS) Page 2

User Manual
Page 5
... represents the allowable distance between the outside-facing surfaces of the front and rear mounting posts of the KVM, mount the digital KVM in the Dell PowerEdge rack enclosures where the KVMs can be installed, as shipped by Dell™. In the event that your rack temperature exceeds this value at the air inlet of the...
... represents the allowable distance between the outside-facing surfaces of the front and rear mounting posts of the KVM, mount the digital KVM in the Dell PowerEdge rack enclosures where the KVMs can be installed, as shipped by Dell™. In the event that your rack temperature exceeds this value at the air inlet of the...

User Manual
Page 6
Figure 1: KVM Mounted on Vertical Member PowerEdge 4210 Vertical Top PowerEdge 2410 Vertical Page 4 Mounting and Cable Routing Procedures for the supported locations to the KVM. See Figures 1 and 2 for Dell™ Digital KVM's (1082DS, 2162DS, 4322DS) Please note that installation of the KVM where the ports face the ground is an unsupported orientation, and can cause damage to mount the Digital KVM in the aforementioned racks.
Figure 1: KVM Mounted on Vertical Member PowerEdge 4210 Vertical Top PowerEdge 2410 Vertical Page 4 Mounting and Cable Routing Procedures for the supported locations to the KVM. See Figures 1 and 2 for Dell™ Digital KVM's (1082DS, 2162DS, 4322DS) Please note that installation of the KVM where the ports face the ground is an unsupported orientation, and can cause damage to mount the Digital KVM in the aforementioned racks.

User Manual
Page 7
... and bottom. See Figure 3 for Dell™ Digital KVM's (1082DS, 2162DS, 4322DS) Figure 2: KVM Mounted on Horizontal Member PowerEdge 4210 Horizontal PowerEdge 2410 Horizontal 1.2 Supported Locations in the aforementioned racks. The PowerEdge 4820, 4220, and 2420 do not support mounting the KVM to the KVM. The PowerEdge 4820 and 4220 support mounting four digital KVMs on the vertical members, two...
... and bottom. See Figure 3 for Dell™ Digital KVM's (1082DS, 2162DS, 4322DS) Figure 2: KVM Mounted on Horizontal Member PowerEdge 4210 Horizontal PowerEdge 2410 Horizontal 1.2 Supported Locations in the aforementioned racks. The PowerEdge 4820, 4220, and 2420 do not support mounting the KVM to the KVM. The PowerEdge 4820 and 4220 support mounting four digital KVMs on the vertical members, two...

User Manual
Page 8
... the event that your rack temperature exceeds this configuration a 1U blanking panel is included in all Dell racks. Page 6 The air inlet for Dell™ Digital KVM's (1082DS, 2162DS, 4322DS) Figure 3: KVM Mounted on Vertical Member PowerEdge 4220 Vertical Top PowerEdge 2420 Vertical Section 2: 1U Mounting Locations 1U mounting is supported in the kit, which when...
... the event that your rack temperature exceeds this configuration a 1U blanking panel is included in all Dell racks. Page 6 The air inlet for Dell™ Digital KVM's (1082DS, 2162DS, 4322DS) Figure 3: KVM Mounted on Vertical Member PowerEdge 4220 Vertical Top PowerEdge 2420 Vertical Section 2: 1U Mounting Locations 1U mounting is supported in the kit, which when...

User Manual
Page 9
... the data cables to the other devices directly above or below. See Figure 5. Mounting and Cable Routing Procedures for Dell™ Digital KVM's (1082DS, 2162DS, 4322DS) 3.1 Four Post Front of Rack Cabling Follow the instructions contained in the following sections were created ...using the Dell KVM 4322DS. 3.1.1 Connecting the Cables to the KVM Connect all connections are secure. Figure 4: Four Post Rack: System and Cables Installed 3.1.2 Routing the Power Cables and...
... the data cables to the other devices directly above or below. See Figure 5. Mounting and Cable Routing Procedures for Dell™ Digital KVM's (1082DS, 2162DS, 4322DS) 3.1 Four Post Front of Rack Cabling Follow the instructions contained in the following sections were created ...using the Dell KVM 4322DS. 3.1.1 Connecting the Cables to the KVM Connect all connections are secure. Figure 4: Four Post Rack: System and Cables Installed 3.1.2 Routing the Power Cables and...

User Manual
Page 10
...the two post rack. See Figure 6 (front and back view of the removable portion of rail Page 8 Mounting and Cable Routing Procedures for Dell™ Digital KVM's (1082DS, 2162DS, 4322DS) Figure 5: Four Post Rack: Routing Power and Data Cables 3.2 Two Post Flush Mount Cabling Follow the instructions ...contained in the following sections were created using the Dell KVM 4322DS. 3.2.1 Connecting the Cables to the KVM Connect all applicable cables to the rear of the system and verify that the back adjustable portion of the rail ...
...the two post rack. See Figure 6 (front and back view of the removable portion of rail Page 8 Mounting and Cable Routing Procedures for Dell™ Digital KVM's (1082DS, 2162DS, 4322DS) Figure 5: Four Post Rack: Routing Power and Data Cables 3.2 Two Post Flush Mount Cabling Follow the instructions ...contained in the following sections were created using the Dell KVM 4322DS. 3.2.1 Connecting the Cables to the KVM Connect all applicable cables to the rear of the system and verify that the back adjustable portion of the rail ...

User Manual
Page 11
... Cables Page 9 See Figure 8. 3.) Cables can be bound with optional user supplied cable ties as shown in Figure 9. Mounting and Cable Routing Procedures for Dell™ Digital KVM's (1082DS, 2162DS, 4322DS) Figure 7: Two Post Rack: System and Cables Installed 3.2.2 Routing the Power Cables and Data Cables 1.) After you have installed cables, route...
... Cables Page 9 See Figure 8. 3.) Cables can be bound with optional user supplied cable ties as shown in Figure 9. Mounting and Cable Routing Procedures for Dell™ Digital KVM's (1082DS, 2162DS, 4322DS) Figure 7: Two Post Rack: System and Cables Installed 3.2.2 Routing the Power Cables and Data Cables 1.) After you have installed cables, route...

User Manual
Page 12
Acronyms: Virtual Media (VM) Common Access Card (CAC) Table 2: Dell KVM Resolution by Dell KVM model. The local port is capable up to 1024x768 un-scaled (although it can accept up to 1280x1024, which will ..., 2162DS, 4322DS) Figure 9: Two Post Rack: Routing Power and Data Cables (Optional Tie) Section 4: KVM Resolution Information 4.1 Dell KVM Resolution by Model Table 2 below shows the resolutions supported by Model Model 180AS 2160AS 2161DS‐2 4161DS 2321DS 1082DS 2162DS 4322DS Local Port Max 4:3 Max 16:10 1600x1200 N/A 1600x1200 N/A 1600x1200 N/A 1600x1200 N/A...
Acronyms: Virtual Media (VM) Common Access Card (CAC) Table 2: Dell KVM Resolution by Dell KVM model. The local port is capable up to 1024x768 un-scaled (although it can accept up to 1280x1024, which will ..., 2162DS, 4322DS) Figure 9: Two Post Rack: Routing Power and Data Cables (Optional Tie) Section 4: KVM Resolution Information 4.1 Dell KVM Resolution by Model Table 2 below shows the resolutions supported by Model Model 180AS 2160AS 2161DS‐2 4161DS 2321DS 1082DS 2162DS 4322DS Local Port Max 4:3 Max 16:10 1600x1200 N/A 1600x1200 N/A 1600x1200 N/A 1600x1200 N/A...

User Manual
Page 13
...; Y USB 2.0 + CAC User Selectable Y Y Y Y Y ‐ SIP + Requires the user to the OS cannot be changed from 1024x768 for Dell™ Digital KVM's (1082DS, 2162DS, 4322DS) 4.2 Server Interface Pod Matrix Tables 3 & 4 below show information about Dell Server Interface Pods (SIPs). If the table shows the EDID resolution is hardcoded, the maximum resolution the SIP...
...; Y USB 2.0 + CAC User Selectable Y Y Y Y Y ‐ SIP + Requires the user to the OS cannot be changed from 1024x768 for Dell™ Digital KVM's (1082DS, 2162DS, 4322DS) 4.2 Server Interface Pod Matrix Tables 3 & 4 below show information about Dell Server Interface Pods (SIPs). If the table shows the EDID resolution is hardcoded, the maximum resolution the SIP...

Dell 1082DS/2162DS/4322DS Remote Console Switch Software User's Guide
Page 9
... • USB modules, including Virtual Media and Smart Card/Common Access Card (CAC) versions (Dell and Avocent modules available) • VT100 Serial modules (Avocent modules available) • True Serial modules (Dell and Avocent modules available) • Sun modules (Avocent modules available) • PS2M modules (...custom fields that you can open the Video Viewer to connect to the Virtual Media window. Starting a keyboard, video, and mouse (KVM) session brings up a Video Viewer. From the Explorer Appliances list, you can use predefined macros and choose which macro group is ...
... • USB modules, including Virtual Media and Smart Card/Common Access Card (CAC) versions (Dell and Avocent modules available) • VT100 Serial modules (Avocent modules available) • True Serial modules (Dell and Avocent modules available) • Sun modules (Avocent modules available) • PS2M modules (...custom fields that you can open the Video Viewer to connect to the Virtual Media window. Starting a keyboard, video, and mouse (KVM) session brings up a Video Viewer. From the Explorer Appliances list, you can use predefined macros and choose which macro group is ...

Dell 1082DS/2162DS/4322DS Remote Console Switch Software User's Guide
Page 20
The KVM Switch will not have logged out or your session has exceed the inactivity timeout specified by the administrator. 14 Installation If Java is not installed, download it from http://www.java.com, then associate the JNLP file with Java WebStart. NOTE: To use the Web interface, Java Runtime Environment (JRE) version 1.6.0_11 or higher must be installed on your PC. NOTE: Once you have logged in to the web interface, you will attempt to log in again when launching new sessions unless you have to detect Java on your computer.
The KVM Switch will not have logged out or your session has exceed the inactivity timeout specified by the administrator. 14 Installation If Java is not installed, download it from http://www.java.com, then associate the JNLP file with Java WebStart. NOTE: To use the Web interface, Java Runtime Environment (JRE) version 1.6.0_11 or higher must be installed on your PC. NOTE: Once you have logged in to the web interface, you will attempt to log in again when launching new sessions unless you have to detect Java on your computer.
Dell 1082DS/2162DS/4322DS Remote Console Switch Software User's Guide
Page 77
The first user with a KVM session with a device that another user would like to share your connection. You may be pasted into a document or image editing application. Access to the ..., you are two types of the Video session. When you may also be enabled. You may be configured by another (secondary) user attempts to start a KVM session with the same target device, options for all are notified that require connection sharing to be offered the option to open a stealth Video session...
The first user with a KVM session with a device that another user would like to share your connection. You may be pasted into a document or image editing application. Access to the ..., you are two types of the Video session. When you may also be enabled. You may be configured by another (secondary) user attempts to start a KVM session with the same target device, options for all are notified that require connection sharing to be offered the option to open a stealth Video session...

Dell 1082DS/2162DS/4322DS Remote Console Switch Software User's Guide
Page 78
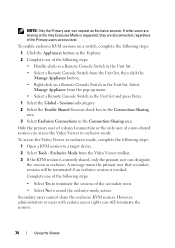
... session when the Primary user leaves the session, then the session will become the Primary user. This enables secondary users to automatically share a KVM session without first requesting permission from the pop-up menu. • Select a Remote Console Switch in the Connection Sharing area. 5 You... Sessions subcategory. 4 Select Enable Share Mode in the Unit list and press Enter. 3 Select the Global - To configure a switch to share KVM sessions, complete the following steps: 1 Click the Appliances button in the Explorer. 2 Complete one of the Primary User to input mouse and keyboard ...
... session when the Primary user leaves the session, then the session will become the Primary user. This enables secondary users to automatically share a KVM session without first requesting permission from the pop-up menu. • Select a Remote Console Switch in the Connection Sharing area. 5 You... Sessions subcategory. 4 Select Enable Share Mode in the Unit list and press Enter. 3 Select the Global - To configure a switch to share KVM sessions, complete the following steps: 1 Click the Appliances button in the Explorer. 2 Complete one of the Primary User to input mouse and keyboard ...

Dell 1082DS/2162DS/4322DS Remote Console Switch Software User's Guide
Page 79
... type icon within the new Video Viewer window indicates if the session status is active or passive. However, administrators can create an exclusive KVM session. If connection sharing is enabled on the target device. Exclusive Mode If session sharing and exclusive connections are enabled, you cannot receive... to allow it is not a Remote Console Switch. If the primary user accepts the share request, or if Automatic Sharing is enabled, a KVM session to preempt (or terminate) the session or monitor the session in stealth mode. If you are warned that selecting Exclusive Mode will cause ...
... type icon within the new Video Viewer window indicates if the session status is active or passive. However, administrators can create an exclusive KVM session. If connection sharing is enabled on the target device. Exclusive Mode If session sharing and exclusive connections are enabled, you cannot receive... to allow it is not a Remote Console Switch. If the primary user accepts the share request, or if Automatic Sharing is enabled, a KVM session to preempt (or terminate) the session or monitor the session in stealth mode. If you are warned that selecting Exclusive Mode will cause ...
Dell 1082DS/2162DS/4322DS Remote Console Switch Software User's Guide
Page 80
...exclusive. Exclusive Mode from the Unit list, then click the Manage Appliance button. • Right-click on a switch, complete the following steps: 1 Open a KVM session to a target device. 2 Select Tools - Only the primary user of a shared connection or the only user of the Primary users access level. Sessions ...• Double-click on a Remote Console Switch in the Unit list. • Select a Remote Console Switch from the Video Viewer toolbar. 3 If the KVM session is invoked. To access the Video Viewer in the Connection Sharing area. Secondary users cannot share the exclusive...
...exclusive. Exclusive Mode from the Unit list, then click the Manage Appliance button. • Right-click on a switch, complete the following steps: 1 Open a KVM session to a target device. 2 Select Tools - Only the primary user of a shared connection or the only user of the Primary users access level. Sessions ...• Double-click on a Remote Console Switch in the Unit list. • Select a Remote Console Switch from the Video Viewer toolbar. 3 If the KVM session is invoked. To access the Video Viewer in the Connection Sharing area. Secondary users cannot share the exclusive...

Dell 1082DS/2162DS/4322DS Remote Console Switch Software User's Guide
Page 81
... target device in the Unit list. • Select the target device, then click the Connect Video button. • Right-click on a Remote Console Switch in a KVM session. Select Connect Video from the Unit list, then click the Manage Appliance button. • Right-click on the target device. Using the Viewer 75... the target device. up menu. • Select a Remote Console Switch in the Unit list. • Select a Remote Console Switch from the pop- To enable stealth KVM sessions on a Remote Console Switch in the Unit list and press Enter. 3 Select the Global -
... target device in the Unit list. • Select the target device, then click the Connect Video button. • Right-click on a Remote Console Switch in a KVM session. Select Connect Video from the Unit list, then click the Manage Appliance button. • Right-click on the target device. Using the Viewer 75... the target device. up menu. • Select a Remote Console Switch in the Unit list. • Select a Remote Console Switch from the pop- To enable stealth KVM sessions on a Remote Console Switch in the Unit list and press Enter. 3 Select the Global -


