User Manual
Page 6
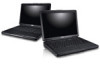
..., click Start → Help and Support and select the option to a docking device or other external device, such as a printer. System Information Chipset: Vostro 1450/Vostro 1550 Vostro 1440/Vostro 1540 Processor: Intel HM67 Intel HM57 Express Chipset • Intel Celeron • Intel Core i3 series • Intel Core i5 series Video Video type Data bus...
..., click Start → Help and Support and select the option to a docking device or other external device, such as a printer. System Information Chipset: Vostro 1450/Vostro 1550 Vostro 1440/Vostro 1540 Processor: Intel HM67 Intel HM57 Express Chipset • Intel Celeron • Intel Core i3 series • Intel Core i5 series Video Video type Data bus...

Owners Manual
Page 4
... Microphone 38 15 Removing The CPU Fan Assembly And The Heatsink 39 Installing The CPU Fan Assembly And The Heatsink 40 16 Removing The Processor 41 Installing The Processor 42 17 Removing The System Board 43 Installing The System Board 45 18 Removing The Speakers 47 Installing The Speakers 49 19 Removing...
... Microphone 38 15 Removing The CPU Fan Assembly And The Heatsink 39 Installing The CPU Fan Assembly And The Heatsink 40 16 Removing The Processor 41 Installing The Processor 42 17 Removing The System Board 43 Installing The System Board 45 18 Removing The Speakers 47 Installing The Speakers 49 19 Removing...
Owners Manual
Page 7
... connect a cable, ensure that both connectors are disconnecting this document assumes that is not authorized by Dell is not covered by its pins. Hold a component such as a processor by its edges, not by a certified service technician. CAUTION: Many repairs may only be replaced ...by the online or telephone service and support team. For additional safety best practices information, see the Regulatory Compliance Homepage at www.dell.com/regulatory_compliance. As you are correctly oriented and aligned. 7 Read and follow the safety instructions that shipped with your personal ...
... connect a cable, ensure that both connectors are disconnecting this document assumes that is not authorized by Dell is not covered by its pins. Hold a component such as a processor by its edges, not by a certified service technician. CAUTION: Many repairs may only be replaced ...by the online or telephone service and support team. For additional safety best practices information, see the Regulatory Compliance Homepage at www.dell.com/regulatory_compliance. As you are correctly oriented and aligned. 7 Read and follow the safety instructions that shipped with your personal ...

Owners Manual
Page 41
Remove the keyboard. 4. Rotate the processor-cam screw in Before Working On Your Computer. 2. Remove the palm rest. 5. Remove the battery. 3. Follow the procedures in a counter-clockwise direction. 7. Lift up the processor and remove it from the computer. 41 Remove the CPU fan assembly and the heatsink. 6. Removing The Processor 16 1.
Remove the keyboard. 4. Rotate the processor-cam screw in Before Working On Your Computer. 2. Remove the palm rest. 5. Remove the battery. 3. Follow the procedures in a counter-clockwise direction. 7. Lift up the processor and remove it from the computer. 41 Remove the CPU fan assembly and the heatsink. 6. Removing The Processor 16 1.

Owners Manual
Page 42
Tighten the cam-screw in After Working Inside Your Computer. 42 Install the keyboard. 6. Follow the procedures in a clockwise direction to the locked position. 3. Ensure the processor is properly seated. 2. Insert the processor into the processor socket. Install the battery. 7. Install the CPU fan assembly and the heatsink. 4. Installing The Processor 1. Install the palm rest. 5.
Tighten the cam-screw in After Working Inside Your Computer. 42 Install the keyboard. 6. Follow the procedures in a clockwise direction to the locked position. 3. Ensure the processor is properly seated. 2. Insert the processor into the processor socket. Install the battery. 7. Install the CPU fan assembly and the heatsink. 4. Installing The Processor 1. Install the palm rest. 5.

Owners Manual
Page 45
Install the processor. 5. Install the optical drive. 11. Install the SD memory card. 13. Insert the system board with the LAN, VGA, HDMI, and USB connectors into their ...
Install the processor. 5. Install the optical drive. 11. Install the SD memory card. 13. Insert the system board with the LAN, VGA, HDMI, and USB connectors into their ...

Owners Manual
Page 49
Install the processor. 5. Install the CPU fan assembly and the heatsink . 6. Install the palm rest. 9. Install the memory module. 10. Install the system board. 4. Install the WLAN card. 7. Install the hard drive. 8. Install the SD memory card. 13. Install the battery. 14. Follow the procedures in After Working Inside Your Computer. 49 Install the optical drive. 11. Install the keyboard. 12. Installing The Speakers 1. Align and route the speaker cable to the chassis. 3. Insert and attach the left and right speakers into their respective compartments. 2.
Install the processor. 5. Install the CPU fan assembly and the heatsink . 6. Install the palm rest. 9. Install the memory module. 10. Install the system board. 4. Install the WLAN card. 7. Install the hard drive. 8. Install the SD memory card. 13. Install the battery. 14. Follow the procedures in After Working Inside Your Computer. 49 Install the optical drive. 11. Install the keyboard. 12. Installing The Speakers 1. Align and route the speaker cable to the chassis. 3. Insert and attach the left and right speakers into their respective compartments. 2.

Owners Manual
Page 73
... SATA ODD AC Adapter Type Advanced Intel SpeedStep Virtualization Integrated NIC Re-sets the time on the computer. Displays the asset tag of processor. Enable or disable the Intel Default: Enabled SpeedStep feature. Displays the type of the optical drive. Displays the speed of the hard... drive. Displays the processor ID. Displays the processor L2 cache size. Displays the memory speed. Displays the model number and capacity of the processor. Displays the product name and the model number. Displays the type of your computer....
... SATA ODD AC Adapter Type Advanced Intel SpeedStep Virtualization Integrated NIC Re-sets the time on the computer. Displays the asset tag of processor. Enable or disable the Intel Default: Enabled SpeedStep feature. Displays the type of the optical drive. Displays the speed of the hard... drive. Displays the processor ID. Displays the processor L2 cache size. Displays the memory speed. Displays the model number and capacity of the processor. Displays the product name and the model number. Displays the type of your computer....

Owners Manual
Page 77
... failure System board failure 4 RAM Read/Write failure Memory failure 5 Real-time clock power fail CMOS battery failure 6 Video BIOS test failure Video card failure 7 Processor failure Processor failure 8 Display Display failure 77
... failure System board failure 4 RAM Read/Write failure Memory failure 5 Real-time clock power fail CMOS battery failure 6 Video BIOS test failure Video card failure 7 Processor failure Processor failure 8 Display Display failure 77

Owners Manual
Page 79
... to ship with your computer. The following specifications are only those required by region. System Information Chipset Vostro 1450/Vostro 1550 Vostro 1440/Vostro 1540 DRAM bus width Flash EPROM Intel HM67 Intel HM57 64-bit SPI 32 Mbits Processor Types L2 cache External bus frequency • Intel Celeron • Intel Core i3 series • Intel...
... to ship with your computer. The following specifications are only those required by region. System Information Chipset Vostro 1450/Vostro 1550 Vostro 1440/Vostro 1540 DRAM bus width Flash EPROM Intel HM67 Intel HM57 64-bit SPI 32 Mbits Processor Types L2 cache External bus frequency • Intel Celeron • Intel Core i3 series • Intel...


