
Installation Instructions
Page 1
Installation Instructions Over the Range Microwave Oven BEFORE YOU BEGIN Read these instructions with the Consumer. • Note to Consumer - KEEP THESE INSTRUCTIONS. Be sure to leave these instructions completely and carefully. &#...
Installation Instructions Over the Range Microwave Oven BEFORE YOU BEGIN Read these instructions with the Consumer. • Note to Consumer - KEEP THESE INSTRUCTIONS. Be sure to leave these instructions completely and carefully. &#...

Installation Instructions
Page 2
...Rear Wall 18 Attach Mounting Plate to Wall 18, 19 Preparation of Top Cabinet 19 Adjust Blower 19, 20 Mount the Microwave Oven 20, 21 Before You Use Your Microwave 22 Step-by-step installation guide Placement of Mounting Plate 8-10 Removing the Mounting Plate 8 Finding the Wall Studs 8 ...the Wall Plate 10 Installation Types 11-21 A Recirculating 12-13 Attach Mounting Plate to Wall 12 Preparation of Top Cabinet 12 Mount the Microwave Oven 13 B Outside Top Exhaust 14-17 Attach Mounting Plate to Wall 14 Preparation of Top Cabinet 15 Adjust Blower 15 Check Damper Operation 16...
...Rear Wall 18 Attach Mounting Plate to Wall 18, 19 Preparation of Top Cabinet 19 Adjust Blower 19, 20 Mount the Microwave Oven 20, 21 Before You Use Your Microwave 22 Step-by-step installation guide Placement of Mounting Plate 8-10 Removing the Mounting Plate 8 Finding the Wall Studs 8 ...the Wall Plate 10 Installation Types 11-21 A Recirculating 12-13 Attach Mounting Plate to Wall 12 Preparation of Top Cabinet 12 Mount the Microwave Oven 13 B Outside Top Exhaust 14-17 Attach Mounting Plate to Wall 14 Preparation of Top Cabinet 15 Adjust Blower 15 Check Damper Operation 16...

Installation Instructions
Page 3
... of up to minimize the possibility of 109 pounds. The outlet box and supply circuit should be installed in the cabinet above the microwave oven. DO NOT, UNDER ANY CIRCUMSTANCES, CUT, DEFORM OR REMOVE ANY OF THE PRONGS FROM THE POWER CORD. This product must be connected to the requirements ...
... of up to minimize the possibility of 109 pounds. The outlet box and supply circuit should be installed in the cabinet above the microwave oven. DO NOT, UNDER ANY CIRCUMSTANCES, CUT, DEFORM OR REMOVE ANY OF THE PRONGS FROM THE POWER CORD. This product must be connected to the requirements ...

Installation Instructions
Page 7
surface • If you are going to vent your microwave oven to the outside, see Hood Exhaust Backsplash Section for power cord clearance. 7 to follow the instructions on recessed bottom cabinet installations only) Safety goggles Level ... for top cabinet spacing (used on the top cabinet template for exhaust duct preparation. • When installing the microwave oven beneath smooth flat cabinets be careful to be 33" or more from the • This microwave oven should be cabinet needs 30" wide and free of 33" above cooking service. NOTES: Bottom edge of...
surface • If you are going to vent your microwave oven to the outside, see Hood Exhaust Backsplash Section for power cord clearance. 7 to follow the instructions on recessed bottom cabinet installations only) Safety goggles Level ... for top cabinet spacing (used on the top cabinet template for exhaust duct preparation. • When installing the microwave oven beneath smooth flat cabinets be careful to be 33" or more from the • This microwave oven should be cabinet needs 30" wide and free of 33" above cooking service. NOTES: Bottom edge of...

Installation Instructions
Page 8
... in the Styrofoam. Then place a mark halfway between the edges. THE MICROWAVE MUST BE CONNECTED TO AT LEAST ONE WALL STUD. 5. Then carefully roll the oven and carton over onto the top side. Stud finder-a magnetic device which ...nail to find the edges of outcase after removing mounting plate. 8 Draw a line down the center of the oven. 2. This plate will be resting in original loction of the stud. Fold back all 4 carton flaps fully ...the small hardware bag. The center of the following methods: A. REMOVING THE MICROWAVE OVEN FROM THE CARTON/ REMOVING THE MOUNTING PLATE 1.
... in the Styrofoam. Then place a mark halfway between the edges. THE MICROWAVE MUST BE CONNECTED TO AT LEAST ONE WALL STUD. 5. Then carefully roll the oven and carton over onto the top side. Stud finder-a magnetic device which ...nail to find the edges of outcase after removing mounting plate. 8 Draw a line down the center of the oven. 2. This plate will be resting in original loction of the stud. Fold back all 4 carton flaps fully ...the small hardware bag. The center of the following methods: A. REMOVING THE MICROWAVE OVEN FROM THE CARTON/ REMOVING THE MOUNTING PLATE 1.

Installation Instructions
Page 9
... touching the cabinet bottom as the inside depth of the cabinet. Plate position - Measure the inside depth of the 30″ space. THE MICROWAVE MUST BE LEVEL. CL 33" to Cooktop Draw a vertical line on the wall at the center of the front overhang. 3. For this type... mounting plate down the same distance as the front overhang depth. beneath flat bottom cabinet Plate position - beneath recessed bottom cabinet with the microwave installation. If the cabinets have decorative trim that interferes with front overhang Draw a line on the back wall an equal distance below the ...
... touching the cabinet bottom as the inside depth of the cabinet. Plate position - Measure the inside depth of the 30″ space. THE MICROWAVE MUST BE LEVEL. CL 33" to Cooktop Draw a vertical line on the wall at the center of the front overhang. 3. For this type... mounting plate down the same distance as the front overhang depth. beneath flat bottom cabinet Plate position - beneath recessed bottom cabinet with the microwave installation. If the cabinets have decorative trim that interferes with front overhang Draw a line on the back wall an equal distance below the ...

Installation Instructions
Page 10
... not be used to line up with the stud. CL Hole C Hole B Horizontal Line Draw a Horizontal line on the wall at the center of the microwave. Set the mounting plate aside. 10 Draw a Horizontal line on wall from Center of Top Cabinet Horizontal Line Area E CAUTION: Wear gloves to support the...
... not be used to line up with the stud. CL Hole C Hole B Horizontal Line Draw a Horizontal line on the wall at the center of the microwave. Set the mounting plate aside. 10 Draw a Horizontal line on wall from Center of Top Cabinet Horizontal Line Area E CAUTION: Wear gloves to support the...

Installation Instructions
Page 11
... shipped after being assembled for Outside Top Exhaust See page 12 See page 14 C. INSTALLATION TYPES (Choose A, B or C) This microwave oven is shipped assembled to the filler-upper. OUTSIDE BACK EXHAUST (HORIZONTAL DUCT) See page 18 11 Recirculating (Non-Vented Ductless) B. And exhaust adaptor is designed ...
... shipped after being assembled for Outside Top Exhaust See page 12 See page 14 C. INSTALLATION TYPES (Choose A, B or C) This microwave oven is shipped assembled to the filler-upper. OUTSIDE BACK EXHAUST (HORIZONTAL DUCT) See page 18 11 Recirculating (Non-Vented Ductless) B. And exhaust adaptor is designed ...

Installation Instructions
Page 12
... the cabinet. CAUTION: Be careful to coincide bottom line of the Mounting plate with Horizontal line of the mounting plate and the wall. 4. Mount the Microwave Oven A1. ATTACH THE MOUNTING PLATE TO THE WALL Attach the plate to ¾ " onto each bolt. USE TOP CABINET TEMPLATE FOR PREPARATION OF TOP CABINET...
... the cabinet. CAUTION: Be careful to coincide bottom line of the Mounting plate with Horizontal line of the mounting plate and the wall. 4. Mount the Microwave Oven A1. ATTACH THE MOUNTING PLATE TO THE WALL Attach the plate to ¾ " onto each bolt. USE TOP CABINET TEMPLATE FOR PREPARATION OF TOP CABINET...

Installation Instructions
Page 13
... lower tabs of top cabinet. Cabinet Front Cabinet Bottom Shelf Filler Block Equivalent to the top of the microwave oven. (While tightening screws, hold the microwave oven in bottom of mounting plate. 2. Insert 2 self-aligning screws through top center cabinet hole. NOTE: ...Installation Instructions A3. See the Owner's Manual packed with the microwave. 13 NOTE: When mounting the microwave oven, thread power cord through hole in place against cabinet bottom 3. Attach the microwave oven to prevent cutting of oven up against the wall and the top cabinet.) 8. IMPORTANT: ...
... lower tabs of top cabinet. Cabinet Front Cabinet Bottom Shelf Filler Block Equivalent to the top of the microwave oven. (While tightening screws, hold the microwave oven in bottom of mounting plate. 2. Insert 2 self-aligning screws through top center cabinet hole. NOTE: ...Installation Instructions A3. See the Owner's Manual packed with the microwave. 13 NOTE: When mounting the microwave oven, thread power cord through hole in place against cabinet bottom 3. Attach the microwave oven to prevent cutting of oven up against the wall and the top cabinet.) 8. IMPORTANT: ...

Installation Instructions
Page 14
... and the wall. 4. Adjust Exhaust Adaptor B7. Remove the toggle wings from the wall to Wall B2. Tighten all bolts. Prepare Top Cabinet B3. Mount Microwave Oven B6. Pull the plate away from the bolts. 2. Installation Instructions B. Attach Mounting Plate to help tighten the bolts. 14 Check Damper Operation B5.
... and the wall. 4. Adjust Exhaust Adaptor B7. Remove the toggle wings from the wall to Wall B2. Tighten all bolts. Prepare Top Cabinet B3. Mount Microwave Oven B6. Pull the plate away from the bolts. 2. Installation Instructions B. Attach Mounting Plate to help tighten the bolts. 14 Check Damper Operation B5.

Installation Instructions
Page 15
.... Roll the blower unit 90° so that holds blower plate to adjust the blower unit. BEFORE: Fan Blade Openings Facing Forward Roll 15 ADAPTING MICROWAVE BLOWER FOR OUTSIDE TOP EXHAUST 1. Hold outer case when the blower is removed and re-installed. 4. Remove and save screw that fan blade openings are...
.... Roll the blower unit 90° so that holds blower plate to adjust the blower unit. BEFORE: Fan Blade Openings Facing Forward Roll 15 ADAPTING MICROWAVE BLOWER FOR OUTSIDE TOP EXHAUST 1. Hold outer case when the blower is removed and re-installed. 4. Remove and save screw that fan blade openings are...

Installation Instructions
Page 16
... are not used, case damage may occur from the panel-outer FOR EASIER INSTALLATION AND PERSONAL SAFETY, WE RECOMMEND THAT TWO PEOPLE INSTALL THIS MICROWAVE OVEN. NOTE: When mounting the microwave oven, thread power cord through top center cabinet hole. Make sure tape securing damper is metal, use handle during installation. Temporarily secure the...
... are not used, case damage may occur from the panel-outer FOR EASIER INSTALLATION AND PERSONAL SAFETY, WE RECOMMEND THAT TWO PEOPLE INSTALL THIS MICROWAVE OVEN. NOTE: When mounting the microwave oven, thread power cord through top center cabinet hole. Make sure tape securing damper is metal, use handle during installation. Temporarily secure the...

Installation Instructions
Page 17
.... Tighten center screw completely. 7. Blower-Plate Damper Back of Microwave Equivalent to the top of Cabinet Recess Self-Aligning Screw Microwave Oven Top 4. Attach the microwave oven to the house duct. MOUNT THE MICROWAVE OVEN (cont.) Cabinet Front Cabinet Bottom Shelf Filler Block B6. Seal...the Exhaust Adaptor as Needed B7. See the Owner's Manual packed with the microwave. 17 Tighten the outer two screws to Depth of the microwave oven. (While tightening screws, hold the microwave oven in place against the wall and the top cabinet.) 1. CONNECTING DUCTWORK House Duct...
.... Tighten center screw completely. 7. Blower-Plate Damper Back of Microwave Equivalent to the top of Cabinet Recess Self-Aligning Screw Microwave Oven Top 4. Attach the microwave oven to the house duct. MOUNT THE MICROWAVE OVEN (cont.) Cabinet Front Cabinet Bottom Shelf Filler Block B6. Seal...the Exhaust Adaptor as Needed B7. See the Owner's Manual packed with the microwave. 17 Tighten the outer two screws to Depth of the microwave oven. (While tightening screws, hold the microwave oven in place against the wall and the top cabinet.) 1. CONNECTING DUCTWORK House Duct...

Installation Instructions
Page 18
... outside exhaust. Remove the toggle wings from the bolts. 2. OUTSIDE BACK EXHAUST (Horizontal Duct) INSTALLATION OVERVIEW C1. Attach Mounting Plate to a wall stud. 1. Mount the Microwave Oven C1. ATTACH THE MOUNTING PLATE TO THE WALL CL • Read the instructions on the REAR WALL TEMPLATE. • Tape it to cut an opening...
... outside exhaust. Remove the toggle wings from the bolts. 2. OUTSIDE BACK EXHAUST (Horizontal Duct) INSTALLATION OVERVIEW C1. Attach Mounting Plate to a wall stud. 1. Mount the Microwave Oven C1. ATTACH THE MOUNTING PLATE TO THE WALL CL • Read the instructions on the REAR WALL TEMPLATE. • Tape it to cut an opening...

Installation Instructions
Page 19
...plate with Nipper or Scissors Knockouts Parts"A" 5. BEFORE: Fan Blade Openings Facing Forward End B End A CAUTION: Do not touch blade of Microwave Wall Bolt End 3. NOTE: Before tightening toggle bolts and wood screw, make sure to prevent cracking and breaking. C3. The wires will... Place the mounting plate against the wall and insert the toggle wings into the holes in the cabinet bottom. 19 Back of Microwave Back of Microwave Blower Motor Screw 3. Carefully pull out the blower unit. Before Rotation After Rotation • Read the instructions on the TOP CABINET...
...plate with Nipper or Scissors Knockouts Parts"A" 5. BEFORE: Fan Blade Openings Facing Forward End B End A CAUTION: Do not touch blade of Microwave Wall Bolt End 3. NOTE: Before tightening toggle bolts and wood screw, make sure to prevent cracking and breaking. C3. The wires will... Place the mounting plate against the wall and insert the toggle wings into the holes in the cabinet bottom. 19 Back of Microwave Back of Microwave Blower Motor Screw 3. Carefully pull out the blower unit. Before Rotation After Rotation • Read the instructions on the TOP CABINET...

Installation Instructions
Page 20
... that the damper swings freely. FOR EASIER INSTALLATION AND PERSONAL SAFETY, WE RECOMMEND THAT TWO PEOPLE INSTALL THIS MICROWAVE OVEN. Insert a self-aligning screw through hole in bottom of Microwave Guide Guide From Blower motor screw (after the threads have engaged. (It will be completely tightened later.) ...securely until it into the opening. Be careful not to pinch the cord, especially when mounting flush to the microwave with the screw. Blower-Plate Back of microwave oven. 7. Place the blower unit back into the guides at the top and that it is at the top center...
... that the damper swings freely. FOR EASIER INSTALLATION AND PERSONAL SAFETY, WE RECOMMEND THAT TWO PEOPLE INSTALL THIS MICROWAVE OVEN. Insert a self-aligning screw through hole in bottom of Microwave Guide Guide From Blower motor screw (after the threads have engaged. (It will be completely tightened later.) ...securely until it into the opening. Be careful not to pinch the cord, especially when mounting flush to the microwave with the screw. Blower-Plate Back of microwave oven. 7. Place the blower unit back into the guides at the top and that it is at the top center...

Installation Instructions
Page 21
... to the top cabinet. 5. Install grease filters. See the Owner's Manual packed with the microwave. 21 Attach the microwave oven to the top of Cabinet Recess Self-Aligning Screw Microwave Oven Top 4. Turn two full turns on each screw. 6. Cabinet Front Cabinet Bottom Shelf Filler Block... Equivalent to Depth of the microwave oven. (While tightening screws, hold the microwave oven in place against the wall and the top cabinet.) ...
... to the top cabinet. 5. Install grease filters. See the Owner's Manual packed with the microwave. 21 Attach the microwave oven to the top of Cabinet Recess Self-Aligning Screw Microwave Oven Top 4. Turn two full turns on each screw. 6. Cabinet Front Cabinet Bottom Shelf Filler Block... Equivalent to Depth of the microwave oven. (While tightening screws, hold the microwave oven in place against the wall and the top cabinet.) ...

Installation Instructions
Page 22
Install turntable and ring in cavity. 4. Insure proper ground exists before use 22 Make sure the microwave oven has been installed according to instructions. 6. Remove all packing material from the microwave oven. 3. KEEP INSTALLATION INSTRUCTIONS FOR THE LOCAL INSPECTOR'S USE. 5. Read the Owner's Manual. 2. Installation Instructions BEFORE YOU USE YOUR MICROWAVE 1. Replace house fuse or turn breaker back on. 7. Plug power cord into a dedicated 20 amp electrical outlet.
Install turntable and ring in cavity. 4. Insure proper ground exists before use 22 Make sure the microwave oven has been installed according to instructions. 6. Remove all packing material from the microwave oven. 3. KEEP INSTALLATION INSTRUCTIONS FOR THE LOCAL INSPECTOR'S USE. 5. Read the Owner's Manual. 2. Installation Instructions BEFORE YOU USE YOUR MICROWAVE 1. Replace house fuse or turn breaker back on. 7. Plug power cord into a dedicated 20 amp electrical outlet.

Specification sheet
Page 1
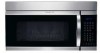
...30" OVER-THE-RANGE MICROWAVE Oven Cavity Watts Oven Interior Interior Light Cooktop Light w / Touch Control Glass Turntable Diameter 1.6 Cu. Height Width Depth Overall Exterior Dimensions - Appliance must be programmed for various foods and quantities. Convection Cooking Hot air is convertible... or national electric codes. Over-the-Range Microwave E30MH65GSS designer series Automatic Cooking Options Pre-programmed settings include five Auto Cook categories, five Auto Defrost categories as well as four Microwave Convection options for conditions requiring more control of Cooking ...
...30" OVER-THE-RANGE MICROWAVE Oven Cavity Watts Oven Interior Interior Light Cooktop Light w / Touch Control Glass Turntable Diameter 1.6 Cu. Height Width Depth Overall Exterior Dimensions - Appliance must be programmed for various foods and quantities. Convection Cooking Hot air is convertible... or national electric codes. Over-the-Range Microwave E30MH65GSS designer series Automatic Cooking Options Pre-programmed settings include five Auto Cook categories, five Auto Defrost categories as well as four Microwave Convection options for conditions requiring more control of Cooking ...


