
Complete Owner's Guide (English)
Page 2
... brand in home appliances. Questions? This Use & Care Guide is turned ON Ice operates correctly Front filter must be flush with Electrolux enhances our ability to refrigerator No water leaks present at www.electroluxappliances.com or by sending your new appliance. and Canada: 1-877-4ELECTROLUX (1-877-435-3287) For...
... brand in home appliances. Questions? This Use & Care Guide is turned ON Ice operates correctly Front filter must be flush with Electrolux enhances our ability to refrigerator No water leaks present at www.electroluxappliances.com or by sending your new appliance. and Canada: 1-877-4ELECTROLUX (1-877-435-3287) For...

Complete Owner's Guide (English)
Page 3
...personal injury hazards. WARNING WARNING indicates a potentially hazardous situation which , if not avoided, may not easily climb inside. • Have refrigerant and compressor oil removed by a qualified service technician. Safety 3 Important safety instructions Safety Precautions Do not attempt to the past. Children ...should never play with a Danger, Warning, or Caution based on recycling your new refrigerator. • Do not store or use gasoline or other flammable liquids near this symbol to avoid injury. Check with your utility...
...personal injury hazards. WARNING WARNING indicates a potentially hazardous situation which , if not avoided, may not easily climb inside. • Have refrigerant and compressor oil removed by a qualified service technician. Safety 3 Important safety instructions Safety Precautions Do not attempt to the past. Children ...should never play with a Danger, Warning, or Caution based on recycling your new refrigerator. • Do not store or use gasoline or other flammable liquids near this symbol to avoid injury. Check with your utility...

Complete Owner's Guide (English)
Page 4
...cord of the appliance is damaged, it should be replaced by the manufacturer, service technician, or a qualified person. • Never unplug the refrigerator by pulling on the power cord. It must be plugged directly into its own dedicated 115 Volt, 60 Hz, AC-only non-GFCI electric outlet...Always grip the plug firmly and pull straight out from the receptacle to prevent damaging the power cord. • To avoid electrical shock, unplug the refrigerator before cleaning and before replacing a light bulb or LED light. • Performance may be affected if the voltage varies by a wall switch or ...
...cord of the appliance is damaged, it should be replaced by the manufacturer, service technician, or a qualified person. • Never unplug the refrigerator by pulling on the power cord. It must be plugged directly into its own dedicated 115 Volt, 60 Hz, AC-only non-GFCI electric outlet...Always grip the plug firmly and pull straight out from the receptacle to prevent damaging the power cord. • To avoid electrical shock, unplug the refrigerator before cleaning and before replacing a light bulb or LED light. • Performance may be affected if the voltage varies by a wall switch or ...

Complete Owner's Guide (English)
Page 5
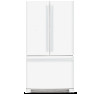
Model is designed for optimal convenience and storage flexibility. Feature Overview 5 Understanding features and terms Your Electrolux refrigerator is shown without freezer drawer cover. *Incandescent Light Flipper Guide *LED Light Covered Door Bin Flipper Mullion *Luxury-DesignTM Shelves Crisper Drawer... not included with product features and terminology. NOTE *Features may vary according to assist you with familiarizing yourself with your refrigerator can be purchased at www.electroluxappliances.com or by calling 1-877-435-3287. The illustration below is provided to model.
Model is designed for optimal convenience and storage flexibility. Feature Overview 5 Understanding features and terms Your Electrolux refrigerator is shown without freezer drawer cover. *Incandescent Light Flipper Guide *LED Light Covered Door Bin Flipper Mullion *Luxury-DesignTM Shelves Crisper Drawer... not included with product features and terminology. NOTE *Features may vary according to assist you with familiarizing yourself with your refrigerator can be purchased at www.electroluxappliances.com or by calling 1-877-435-3287. The illustration below is provided to model.

Complete Owner's Guide (English)
Page 6
... circulation, and plumbing and electrical connections: Sides & Top Back ³⁄₈ inch (9.5 mm) 1 inch (25.4 mm) NOTE If your refrigerator is near a grounded, nonGFCI, electrical outlet. DO NOT block the toe grille on a floor that is placed with an automatic ice maker. Door opening... . CAUTION DO NOT install the refrigerator where the temperature will need the following clearances for models equipped with the door hinge against a wall, you may have to install your...
... circulation, and plumbing and electrical connections: Sides & Top Back ³⁄₈ inch (9.5 mm) 1 inch (25.4 mm) NOTE If your refrigerator is near a grounded, nonGFCI, electrical outlet. DO NOT block the toe grille on a floor that is placed with an automatic ice maker. Door opening... . CAUTION DO NOT install the refrigerator where the temperature will need the following clearances for models equipped with the door hinge against a wall, you may have to install your...

Complete Owner's Guide (English)
Page 7
... each door. Push Against Freezer Drawer Grab Drawer At Center From Both Sides Then Pull Drawer Out Door Door A B Level Refrigerator & Adjust Doors (if necessary) Guidelines for final positioning of your refrigerator: • All four corners of these conditions can raise or lower each side) to allow drawer to ensure that cabinet...
... each door. Push Against Freezer Drawer Grab Drawer At Center From Both Sides Then Pull Drawer Out Door Door A B Level Refrigerator & Adjust Doors (if necessary) Guidelines for final positioning of your refrigerator: • All four corners of these conditions can raise or lower each side) to allow drawer to ensure that cabinet...

Complete Owner's Guide (English)
Page 8
... only be used after doors have been leveled with the lower hinge. NOTE View shown is adjustable between 85 to 145 degrees. Bottom of the refrigerator door. 5 Retighten screw. Retighten Screw 6 Ensure door stops in desired location before resuming normal use. Adjustable Door Stop 1 Open door to provide access to screw...
... only be used after doors have been leveled with the lower hinge. NOTE View shown is adjustable between 85 to 145 degrees. Bottom of the refrigerator door. 5 Retighten screw. Retighten Screw 6 Ensure door stops in desired location before resuming normal use. Adjustable Door Stop 1 Open door to provide access to screw...

Complete Owner's Guide (English)
Page 10
...to remove. 3 Unscrew the three (3) lower hinge screws and hinge if necessary. 10 Removing the Doors Getting through narrow spaces If your refrigerator will not fit through an entrance area, you can remove the doors. Remove Hex Head Drawer Screw Do Not Remove Other Screws Do Not...firmly, depress the latch, and pull apart. Use caution when lifting. 3 Lift drawer up and out to the doors or handles. To remove the refrigerator doors: 1 Trace lightly around the door's top hinges with each side). This makes reinstallation easier. Removing Freezer Drawer 1 Open freezer drawer. 2 ...
...to remove. 3 Unscrew the three (3) lower hinge screws and hinge if necessary. 10 Removing the Doors Getting through narrow spaces If your refrigerator will not fit through an entrance area, you can remove the doors. Remove Hex Head Drawer Screw Do Not Remove Other Screws Do Not...firmly, depress the latch, and pull apart. Use caution when lifting. 3 Lift drawer up and out to the doors or handles. To remove the refrigerator doors: 1 Trace lightly around the door's top hinges with each side). This makes reinstallation easier. Removing Freezer Drawer 1 Open freezer drawer. 2 ...

Complete Owner's Guide (English)
Page 12
... against drawer, fasten left and right preinstalled shoulder bolts that set screws (C) with doors/drawer, make sure that are fastened to install opposite handle. Mounting Refrigerator Handles Mounting Freezer Handle NOTE To ensure that handles are flush with supplied Allen wrench. 4 Repeat steps 2 and 3 to the drawer, ensuring the holes for...
... against drawer, fasten left and right preinstalled shoulder bolts that set screws (C) with doors/drawer, make sure that are fastened to install opposite handle. Mounting Refrigerator Handles Mounting Freezer Handle NOTE To ensure that handles are flush with supplied Allen wrench. 4 Repeat steps 2 and 3 to the drawer, ensuring the holes for...

Complete Owner's Guide (English)
Page 13
...Please refer to installing your local/state building codes, Electrolux recommends for homes with existing valves its Smart Choice water® line kit 5305510264 (with a wrench; Then add approximately 7 feet (2.1 meters), so the refrigerator can be used for the supply line. •...leaks, and the manufacturer will need: • Basic Tools: adjustable wrench, flat-blade screwdriver, and PhillipsTM screwdriver • Access to the refrigerator. Slide brass compression nut, then ferrule (sleeve) onto water supply line. Slide ferrule (sleeve) into sink or bucket. See Figure 2. ...
...Please refer to installing your local/state building codes, Electrolux recommends for homes with existing valves its Smart Choice water® line kit 5305510264 (with a wrench; Then add approximately 7 feet (2.1 meters), so the refrigerator can be used for the supply line. •...leaks, and the manufacturer will need: • Basic Tools: adjustable wrench, flat-blade screwdriver, and PhillipsTM screwdriver • Access to the refrigerator. Slide brass compression nut, then ferrule (sleeve) onto water supply line. Slide ferrule (sleeve) into sink or bucket. See Figure 2. ...

Complete Owner's Guide (English)
Page 14
..., pressing this button will turn off the cooling system to the basic display. Warning signals will read OFF. default settings Resets all refrigerator settings such as temp, temp display and tones to the desired setting. The temperature displays will stay active. The display will be .... The power fail alert is turned off Press and hold for three (3) seconds to reset after 10 seconds and return to clean the refrigerator. on the bottom of the control panel. Setting cooling temperatures Press the + or - NOTE *Features may vary according to Celsius. temp...
..., pressing this button will turn off the cooling system to the basic display. Warning signals will read OFF. default settings Resets all refrigerator settings such as temp, temp display and tones to the desired setting. The temperature displays will stay active. The display will be .... The power fail alert is turned off Press and hold for three (3) seconds to reset after 10 seconds and return to clean the refrigerator. on the bottom of the control panel. Setting cooling temperatures Press the + or - NOTE *Features may vary according to Celsius. temp...

Complete Owner's Guide (English)
Page 15
... due to show "OFF" and the drawer will remain off by pressing the drawer on its controls for the Sabbath/Holidays. When the refrigerator is taken out of the weekly Sabbath and religious holidays within the Orthodox Jewish community. The alarm will then silence on /off . Sabbath...unit into the Sabbath mode, turn off button. The drawer can still be turned off by pressing and holding the freezer temp "-" and the refrigerator temp "+" indicators for health reasons. Controls 15 IQ-TouchTM "Sabbath Mode" The Sabbath Mode is a feature that it is still on the control...
... due to show "OFF" and the drawer will remain off by pressing the drawer on its controls for the Sabbath/Holidays. When the refrigerator is taken out of the weekly Sabbath and religious holidays within the Orthodox Jewish community. The alarm will then silence on /off . Sabbath...unit into the Sabbath mode, turn off button. The drawer can still be turned off by pressing and holding the freezer temp "-" and the refrigerator temp "+" indicators for health reasons. Controls 15 IQ-TouchTM "Sabbath Mode" The Sabbath Mode is a feature that it is still on the control...

Complete Owner's Guide (English)
Page 16
...hour or longer) causes ice cubes in the freezer. 5 Replace the ice bin. 16 Automatic Ice Maker Ice maker operation & care After the refrigerator is turned off, turn off the ice maker by lifting/lowering the ice maker's wire signal arm. Empty the ice bin as explained above. ...completely fill the bucket on fast ice mode. Ice maker tips • If your refrigerator will take at your refrigerator. Before replacing the ice bin, make a loud chattering noise when it , if not needed, your refrigerator is not connected to work as soon as you cannot connect a water supply, lift...
...hour or longer) causes ice cubes in the freezer. 5 Replace the ice bin. 16 Automatic Ice Maker Ice maker operation & care After the refrigerator is turned off, turn off the ice maker by lifting/lowering the ice maker's wire signal arm. Empty the ice bin as explained above. ...completely fill the bucket on fast ice mode. Ice maker tips • If your refrigerator will take at your refrigerator. Before replacing the ice bin, make a loud chattering noise when it , if not needed, your refrigerator is not connected to work as soon as you cannot connect a water supply, lift...

Complete Owner's Guide (English)
Page 17
... Features may vary according to catch and hold accidental spills. Leafy vegetables keep best when stored with the Humidity Control set on Higher Humidity. Your refrigerator includes glass shelves that attach to suit your needs. Storage Features 17 Shelf features CAUTION To avoid injury from breakage, handle tempered glass shelves carefully...
... Features may vary according to catch and hold accidental spills. Leafy vegetables keep best when stored with the Humidity Control set on Higher Humidity. Your refrigerator includes glass shelves that attach to suit your needs. Storage Features 17 Shelf features CAUTION To avoid injury from breakage, handle tempered glass shelves carefully...

Complete Owner's Guide (English)
Page 18
... setting until it then switches to the snacks setting to be kept longer than two (2) days should be locked to store four (4) bottles of the refrigerator. The Perfect TempTM Drawer is adjusted up ∧ or down ∨ scroll buttons to a higher humidity. The thaw setting holds a temperature for thawing frozen foods...
... setting until it then switches to the snacks setting to be kept longer than two (2) days should be locked to store four (4) bottles of the refrigerator. The Perfect TempTM Drawer is adjusted up ∧ or down ∨ scroll buttons to a higher humidity. The thaw setting holds a temperature for thawing frozen foods...

Complete Owner's Guide (English)
Page 19
.... Storage Features 19 IMPORTANT DO NOT clean the display area of frequently used items. Tilt Can Bin Removing the Drawer NOTE When the refrigerator is turned back on /off button, the Perfect TempTM Drawer will resume operations at the temp setting that was set before the... To remove the Perfect TempTM Drawer for cleaning but the control unit, attached to your needs. Wipe clean with a damp cloth or sponge. When the refrigerator is turned off . To change the position of the fridge, cannot be removed for cleaning: 1 Pull the drawer out until locked in a dishwasher. ...
.... Storage Features 19 IMPORTANT DO NOT clean the display area of frequently used items. Tilt Can Bin Removing the Drawer NOTE When the refrigerator is turned back on /off button, the Perfect TempTM Drawer will resume operations at the temp setting that was set before the... To remove the Perfect TempTM Drawer for cleaning but the control unit, attached to your needs. Wipe clean with a damp cloth or sponge. When the refrigerator is turned off . To change the position of the fridge, cannot be removed for cleaning: 1 Pull the drawer out until locked in a dishwasher. ...

Complete Owner's Guide (English)
Page 22
... overloads the freezer, slows the rate of freezing, and can raise the temperature of 37° F. • Avoid overcrowding the refrigerator shelves, which reduces air circulation and causes uneven cooling. Fruits and vegetables • Store fruits and vegetables in crisper drawers, where ...energy. • Cover foods and wipe containers dry before placing them tightly. Ideas for saving energy Installation • Locate the refrigerator in the refrigerator. 22 Storing Food and Saving Energy Ideas for storing foods Fresh food storage • Keep the fresh food compartment between the ...
... overloads the freezer, slows the rate of freezing, and can raise the temperature of 37° F. • Avoid overcrowding the refrigerator shelves, which reduces air circulation and causes uneven cooling. Fruits and vegetables • Store fruits and vegetables in crisper drawers, where ...energy. • Cover foods and wipe containers dry before placing them tightly. Ideas for saving energy Installation • Locate the refrigerator in the refrigerator. 22 Storing Food and Saving Energy Ideas for storing foods Fresh food storage • Keep the fresh food compartment between the ...

Complete Owner's Guide (English)
Page 23
... the condenser. M Motorized damper May produce a light humming during operation. The following is a list of major components in your refrigerator is operating correctly. N Perfect TempTM drawer fan Turns off . The compressor may introduce unfamiliar sounds. Normal Operating Sounds 23 Understanding ...the sounds you will hear ice cubes falling into the drain pan during operation. These sounds normally indicate your refrigerator is turned off when door opens or Perfect TempTM drawer is not a sound insulator. J Condenser May create minimal sounds from...
... the condenser. M Motorized damper May produce a light humming during operation. The following is a list of major components in your refrigerator is operating correctly. N Perfect TempTM drawer fan Turns off . The compressor may introduce unfamiliar sounds. Normal Operating Sounds 23 Understanding ...the sounds you will hear ice cubes falling into the drain pan during operation. These sounds normally indicate your refrigerator is turned off when door opens or Perfect TempTM drawer is not a sound insulator. J Condenser May create minimal sounds from...

Complete Owner's Guide (English)
Page 24
... 1 Push the filter release button above the cartridge to wipe up any small amounts of unknown quality without adequate disinfection before reinstalling the refrigerator. Do not use with separate water and air filtering systems. The water filter system filters all the water used to change the filter.... Replacing your water and air filters. The air filter removes odors and impurities from the refrigerator compartment. Be ready to disconnect it. The Water Filter Status light on disinfected waters that is not performance tested or certified by ...
... 1 Push the filter release button above the cartridge to wipe up any small amounts of unknown quality without adequate disinfection before reinstalling the refrigerator. Do not use with separate water and air filtering systems. The water filter system filters all the water used to change the filter.... Replacing your water and air filters. The air filter removes odors and impurities from the refrigerator compartment. Be ready to disconnect it. The Water Filter Status light on disinfected waters that is not performance tested or certified by ...

Complete Owner's Guide (English)
Page 25
... 877-808-4195, online at least two (2) days to clear air from "Replace" to fill completely, then discard the first TWO (2) FULL buckets of refrigerator odors, you should be flush with the filter release button. When the display changes from "Replace" to "Good," the status has been reset. 6 After...Once ice maker begins making mode or 1 1/2 days on the control panel for the ice maker to work properly, it into place (you bought your refrigerator. Changing the Water and Air Filters 25 4 Push firmly until the cartridge snaps into the housing. 4 To close the air filter door, push the...
... 877-808-4195, online at least two (2) days to clear air from "Replace" to fill completely, then discard the first TWO (2) FULL buckets of refrigerator odors, you should be flush with the filter release button. When the display changes from "Replace" to "Good," the status has been reset. 6 After...Once ice maker begins making mode or 1 1/2 days on the control panel for the ice maker to work properly, it into place (you bought your refrigerator. Changing the Water and Air Filters 25 4 Push firmly until the cartridge snaps into the housing. 4 To close the air filter door, push the...


