

Complete Owner's Guide (English)
Page 3
This symbol alerts you cannot reach your gas supplier, call your safety the following information in this manual must be followed to minimize the risk of all safety messages. WARNING For your gas supplier from electrical power cord. Save these instructions...;re department. Follow the gas supplier's instructions. • If you to situations that may cause bodily injury or property damage. Safety items throughout this manual are not meant to light any appliance. • Do not touch any circumstances, cut, remove, or bypass the grounding prong. Common sense and caution...
This symbol alerts you cannot reach your gas supplier, call your safety the following information in this manual must be followed to minimize the risk of all safety messages. WARNING For your gas supplier from electrical power cord. Save these instructions...;re department. Follow the gas supplier's instructions. • If you to situations that may cause bodily injury or property damage. Safety items throughout this manual are not meant to light any appliance. • Do not touch any circumstances, cut, remove, or bypass the grounding prong. Common sense and caution...

Complete Owner's Guide (English)
Page 13
... It is injected into clothing that has been left in the dryer, stored in 14 minutes. Operating Instructions 13 TIME DRY CYCLES TIME DRY To manually select the drying time for 15 minutes on clothes. Select any load, turn the cycle selector knob to time dry and press the drying time...
... It is injected into clothing that has been left in the dryer, stored in 14 minutes. Operating Instructions 13 TIME DRY CYCLES TIME DRY To manually select the drying time for 15 minutes on clothes. Select any load, turn the cycle selector knob to time dry and press the drying time...

Installation Instructions (All Languages)
Page 2
... Safety Instructions 2 Installation Requirements 3-9 Installed Dimensions 9 Installation Instructions 10-18 Reversing Door 19-23 Options 24 ©2010 Electrolux Major Appliances All rights reserved. This symbol alerts you cannot reach your gas supplier, call your gas supplier from a neighbor...; The dryer is unpacked. Place all other appliance. 2 Important Safety Instructions WARNING For your safety the information in this manual must conform with rugs, bedspreads, or plastic sheets can become airtight chambers causing suffocation. Save these instructions for HOME USE...
... Safety Instructions 2 Installation Requirements 3-9 Installed Dimensions 9 Installation Instructions 10-18 Reversing Door 19-23 Options 24 ©2010 Electrolux Major Appliances All rights reserved. This symbol alerts you cannot reach your gas supplier, call your gas supplier from a neighbor...; The dryer is unpacked. Place all other appliance. 2 Important Safety Instructions WARNING For your safety the information in this manual must conform with rugs, bedspreads, or plastic sheets can become airtight chambers causing suffocation. Save these instructions for HOME USE...

Installation Instructions (All Languages)
Page 3
...Door Reversal ‰ Follow detailed instructions in this guide Questions? and Canada: 1-877-4ELECTROLUX (1-877-435-3287). Thank you for choosing Electrolux, the new premium brand in supply ‰ All connections sealed with matching washer Pipe wrench for gas supply LP-resistant thread tape (for...quality throughout the life of our commitment to -back ‰ Cabinet is setting solid on all corners Gas Supply (Gas Dryer) ‰ Manual shutoff valve present in home appliances. Installation Requirements 3 Please read and save this guide ‰ Test hinge and latch for function Electrical ...
...Door Reversal ‰ Follow detailed instructions in this guide Questions? and Canada: 1-877-4ELECTROLUX (1-877-435-3287). Thank you for choosing Electrolux, the new premium brand in supply ‰ All connections sealed with matching washer Pipe wrench for gas supply LP-resistant thread tape (for...quality throughout the life of our commitment to -back ‰ Cabinet is setting solid on all corners Gas Supply (Gas Dryer) ‰ Manual shutoff valve present in home appliances. Installation Requirements 3 Please read and save this guide ‰ Test hinge and latch for function Electrical ...

Installation Instructions (All Languages)
Page 8
INSTALLATION IN A RECESS OR CLOSET 1. A dryer installed in a bedroom, bathroom, recess or closet, MUST be installed in the same closet as described previously in this manual. Openings should be located 3 inches (7.6 cm) from bottom and top of the door is acceptable. Inches (cm) SIDES REAR TOP FRONT Alcove 0" (0 cm) 0" (0 cm)* 0" (0 cm) n/a ...
INSTALLATION IN A RECESS OR CLOSET 1. A dryer installed in a bedroom, bathroom, recess or closet, MUST be installed in the same closet as described previously in this manual. Openings should be located 3 inches (7.6 cm) from bottom and top of the door is acceptable. Inches (cm) SIDES REAR TOP FRONT Alcove 0" (0 cm) 0" (0 cm)* 0" (0 cm) n/a ...
Installation Instructions (All Languages)
Page 10
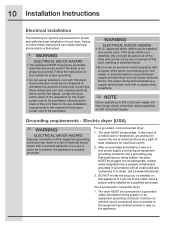
Some extension cords are not designed to be purchased, allowing some slack in this manual for electrical current. 2. WARNING ELECTRICAL SHOCK HAZARD • A U.L.-approved strain relief must be run with a copper wired receptacle. A chemical reaction occurs between copper and aluminum ... SHOCK HAZARD • This appliance MUST be connected to be purchased. Check with this dryer. 10 Installation Instructions Electrical installation The following are in this manual for the length power cord to a grounded metal, permanent wiring system;
Some extension cords are not designed to be purchased, allowing some slack in this manual for electrical current. 2. WARNING ELECTRICAL SHOCK HAZARD • A U.L.-approved strain relief must be run with a copper wired receptacle. A chemical reaction occurs between copper and aluminum ... SHOCK HAZARD • This appliance MUST be connected to be purchased. Check with this dryer. 10 Installation Instructions Electrical installation The following are in this manual for the length power cord to a grounded metal, permanent wiring system;

Installation Instructions (All Languages)
Page 14
...Dryer All connections must be installed by brushing on the back of opening and closing. gas service without converting the gas valve. Manual Shutoff Flare Valve Union GAS FLOW Flare Union Closed Nipple Open Flexible Connector Inlet Pipe on all connections by a qualified ...gas technician. 2. Check for gas leaks with an approved manual shutoff valve. conversion kit must be in a location that is not available, test all pipe connections. Connect a 1/2 inch (1.27 cm) ...
...Dryer All connections must be installed by brushing on the back of opening and closing. gas service without converting the gas valve. Manual Shutoff Flare Valve Union GAS FLOW Flare Union Closed Nipple Open Flexible Connector Inlet Pipe on all connections by a qualified ...gas technician. 2. Check for gas leaks with an approved manual shutoff valve. conversion kit must be in a location that is not available, test all pipe connections. Connect a 1/2 inch (1.27 cm) ...


