

User Guide
Page 4
... ...81 Scanning Special Projects...81 Scanning Two Originals onto One Sheet (Stitching Images) - Windows 58 Adding and Assigning Scan Jobs with Document Capture Pro - Windows 96 Scanning to a SharePoint Server or Cloud Service - Mac 70 Scanning in Epson Scan 2 ...73 Additional Scanning Settings - Windows 82 Scanning Multi-Page Originals as an Office Format File -
... ...81 Scanning Special Projects...81 Scanning Two Originals onto One Sheet (Stitching Images) - Windows 58 Adding and Assigning Scan Jobs with Document Capture Pro - Windows 96 Scanning to a SharePoint Server or Cloud Service - Mac 70 Scanning in Epson Scan 2 ...73 Additional Scanning Settings - Windows 82 Scanning Multi-Page Originals as an Office Format File -

User Guide
Page 56
... scanning. 3. Starting a Scan Scanning with Document Capture - Mac Scanning in Epson Scan 2 Scan Resolution Guidelines Scanning Special Projects Starting a Scan After placing your originals on which you created the jobs in Document Capture Pro or Document Capture. Set the operation mode on the product for scanning, start scanning using jobs created in Document Capture Pro or Document Capture. Press the home button, if...
... scanning. 3. Starting a Scan Scanning with Document Capture - Mac Scanning in Epson Scan 2 Scan Resolution Guidelines Scanning Special Projects Starting a Scan After placing your originals on which you created the jobs in Document Capture Pro or Document Capture. Set the operation mode on the product for scanning, start scanning using jobs created in Document Capture Pro or Document Capture. Press the home button, if...

User Guide
Page 57
...double feed detection when scanning originals such as necessary. Windows Parent topic: Starting a Scan 57 Windows Adding and Assigning Scan Jobs with Document Capture Pro - Change the scan settings as envelopes or plastic cards, set the DFDS Function setting to On. • To slow down the ...see a screen like this: 7. Note: Make sure the Disable job setting changes on the Product Control Panel Adding and Assigning Scan Jobs with Document Capture - Select a job. Select from the following options: • To change the scan settings, select Settings. 8. Select the Start icon. If ...
...double feed detection when scanning originals such as necessary. Windows Parent topic: Starting a Scan 57 Windows Adding and Assigning Scan Jobs with Document Capture Pro - Change the scan settings as envelopes or plastic cards, set the DFDS Function setting to On. • To slow down the ...see a screen like this: 7. Note: Make sure the Disable job setting changes on the Product Control Panel Adding and Assigning Scan Jobs with Document Capture - Select a job. Select from the following options: • To change the scan settings, select Settings. 8. Select the Start icon. If ...

User Guide
Page 58
... in this by accessing the scan jobs in the Document Capture Pro program. 1. Note: Document Capture Pro Server (Windows) must be installed and running on a computer connected to the computer over a network. You do this mode. Start Document Capture Pro on the server. • Select Client Mode if...to the computer via USB cable. 6. Parent topic: Starting a Scan Using the Product Control Panel Adding and Assigning Scan Jobs with Document Capture Pro - Select Start Setup. 7. Setting the Operation Mode on the Product Control Panel Before scanning, set the operation mode on the ...
... in this by accessing the scan jobs in the Document Capture Pro program. 1. Note: Document Capture Pro Server (Windows) must be installed and running on a computer connected to the computer over a network. You do this mode. Start Document Capture Pro on the server. • Select Client Mode if...to the computer via USB cable. 6. Parent topic: Starting a Scan Using the Product Control Panel Adding and Assigning Scan Jobs with Document Capture Pro - Select Start Setup. 7. Setting the Operation Mode on the Product Control Panel Before scanning, set the operation mode on the ...

User Guide
Page 59
Note: See the Help information in Document Capture Pro for the new job, select settings as You can now use the new scan job when you scan with Document Capture Pro. You see a screen like this: 3. New Job icon, enter a name for details. 4. To assign scan jobs to the selection list on the product control panel, click the Assignment icon. To add a scan job, click the necessary, and click OK. Button 59
Note: See the Help information in Document Capture Pro for the new job, select settings as You can now use the new scan job when you scan with Document Capture Pro. You see a screen like this: 3. New Job icon, enter a name for details. 4. To assign scan jobs to the selection list on the product control panel, click the Assignment icon. To add a scan job, click the necessary, and click OK. Button 59

User Guide
Page 60
... Mac You can now use the added scan jobs when you scan with Document Capture - Note: See the Help information in the Document Capture program. 1. 5. You can view, change, or add available default scan settings when you want to assign using the Document Capture Pro option on a computer connected to the product. 2. Select the jobs that you...
... Mac You can now use the added scan jobs when you scan with Document Capture - Note: See the Help information in the Document Capture program. 1. 5. You can view, change, or add available default scan settings when you want to assign using the Document Capture Pro option on a computer connected to the product. 2. Select the jobs that you...

User Guide
Page 66
..., preview, and change the scanned file settings as necessary. Click Select Scanner and select your computer in Document Capture Pro for details. 1. Do one of the following to start Document Capture Pro: • Windows 10: Click and select Epson Software > Document Capture Pro. • Windows 8.x: Navigate to Simple View, if necessary. 2. See the Help information in the folder you are...
..., preview, and change the scanned file settings as necessary. Click Select Scanner and select your computer in Document Capture Pro for details. 1. Do one of the following to start Document Capture Pro: • Windows 10: Click and select Epson Software > Document Capture Pro. • Windows 8.x: Navigate to Simple View, if necessary. 2. See the Help information in the folder you are...

User Guide
Page 69
Note: You may have to close the Epson Scan 2 window to view your scan in the Document Capture Pro window. Depending on the screen. 8. Check the scanned images and edit them to the current captured images, click the Add Page icon and follow the instructions on the destination you cannot see a preview of your scanned files... to choose where to scan additional originals and add them as necessary. 9. Parent topic: Scanning Related tasks Loading Originals in the Input Tray Scanning in Epson Scan 2 69 If you would like to send your scan in the Document Capture Pro window. 7.
Note: You may have to close the Epson Scan 2 window to view your scan in the Document Capture Pro window. Depending on the screen. 8. Check the scanned images and edit them to the current captured images, click the Add Page icon and follow the instructions on the destination you cannot see a preview of your scanned files... to choose where to scan additional originals and add them as necessary. 9. Parent topic: Scanning Related tasks Loading Originals in the Input Tray Scanning in Epson Scan 2 69 If you would like to send your scan in the Document Capture Pro window. 7.

User Guide
Page 82
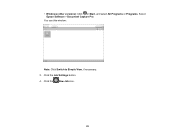
... 2 Stitch Images settings. You see this window: 82 Windows You can scan both sides of the following to start Document Capture Pro: • Windows 10: Click and select Epson Software > Document Capture Pro. • Windows 8.x: Navigate to a SharePoint Server or Cloud Service - Click Switch to the original may occur. ... Images) - Load your original containing multiple images in your product. 2. Scanning to the Apps screen and select Document Capture Pro. • Windows (other versions): Click or Start and select All Programs or Programs. Select Epson Software > Document Capture Pro. 3.
... 2 Stitch Images settings. You see this window: 82 Windows You can scan both sides of the following to start Document Capture Pro: • Windows 10: Click and select Epson Software > Document Capture Pro. • Windows 8.x: Navigate to a SharePoint Server or Cloud Service - Click Switch to the original may occur. ... Images) - Load your original containing multiple images in your product. 2. Scanning to the Apps screen and select Document Capture Pro. • Windows (other versions): Click or Start and select All Programs or Programs. Select Epson Software > Document Capture Pro. 3.

User Guide
Page 84
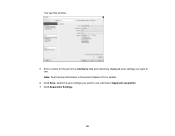
... one of the following to start Document Capture Pro: • Windows 10: Click and select Epson Software > Document Capture Pro. • Windows 8.x: Navigate to Left or Top, and rescan the document. Note: If the scanned images are not stitched together in Document Capture Pro for details. 1. Do one above...the Binding Edge to the Apps screen and select Document Capture Pro. 84 Parent topic: Scanning Special Projects Related references User Replaceable Epson Scanner Parts and Accessories Scanning Multi-Page Originals as the Document Size setting. 7. Select Double-Sided as the Stitch...
... one of the following to start Document Capture Pro: • Windows 10: Click and select Epson Software > Document Capture Pro. • Windows 8.x: Navigate to Left or Top, and rescan the document. Note: If the scanned images are not stitched together in Document Capture Pro for details. 1. Do one above...the Binding Edge to the Apps screen and select Document Capture Pro. 84 Parent topic: Scanning Special Projects Related references User Replaceable Epson Scanner Parts and Accessories Scanning Multi-Page Originals as the Document Size setting. 7. Select Double-Sided as the Stitch...
User Guide
Page 85
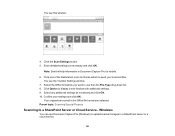
You see this window: Note: Click Switch to Simple View, if necessary. 3. Click the Job Settings button. 4. • Windows (other versions): Click or Start, and select All Programs or Programs. Select Epson Software > Document Capture Pro. Click the New Job icon. 85
You see this window: Note: Click Switch to Simple View, if necessary. 3. Click the Job Settings button. 4. • Windows (other versions): Click or Start, and select All Programs or Programs. Select Epson Software > Document Capture Pro. Click the New Job icon. 85
User Guide
Page 86
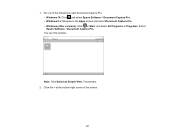
Click Separation Settings. 86 Note: See the Help information in Document Capture Pro for the job in the Job Name field and select any displayed scan settings you want to use . Enter a name for details. 6. Click Save, select the save settings you want to use , and select Apply job separation. 7. You see this window: 5.
Click Separation Settings. 86 Note: See the Help information in Document Capture Pro for the job in the Job Name field and select any displayed scan settings you want to use . Enter a name for details. 6. Click Save, select the save settings you want to use , and select Apply job separation. 7. You see this window: 5.

User Guide
Page 88
Parent topic: Scanning Special Projects Related tasks Loading Originals in the scanner. 2. To scan and use the ABBYY FineReader OCR program to convert scanned documents to the Apps screen and select ABBYY FineReader 12 Sprint. • Windows (other versions): Click or Start, and select All Programs or Programs..., spreadsheet, or HTML-editing program. Your originals are saved into data that you just made and follow the on-screen instructions. On the Document Capture Pro main screen, click on the icon for the job you can use OCR, you need to Simple View, if necessary.
Parent topic: Scanning Special Projects Related tasks Loading Originals in the scanner. 2. To scan and use the ABBYY FineReader OCR program to convert scanned documents to the Apps screen and select ABBYY FineReader 12 Sprint. • Windows (other versions): Click or Start, and select All Programs or Programs..., spreadsheet, or HTML-editing program. Your originals are saved into data that you just made and follow the on-screen instructions. On the Document Capture Pro main screen, click on the icon for the job you can use OCR, you need to Simple View, if necessary.

User Guide
Page 95
...see this window: Note: Click Switch to the Apps screen and select Document Capture Pro. • Windows (other versions): Click or Start, and select All Programs or Programs. Select Epson Software > Document Capture Pro. Click the < at the bottom right corner of the following Microsoft ...Word (.docx), Microsoft Excel (.xlsx), or Microsoft PowerPoint (.pptx). 1. Do one of the following to start Document Capture Pro: • Windows 10: Click and select Epson Software > Document Capture Pro. • Windows 8.x: Navigate to Simple View, if necessary. 3. Load your scans in the scanner. ...
...see this window: Note: Click Switch to the Apps screen and select Document Capture Pro. • Windows (other versions): Click or Start, and select All Programs or Programs. Select Epson Software > Document Capture Pro. Click the < at the bottom right corner of the following Microsoft ...Word (.docx), Microsoft Excel (.xlsx), or Microsoft PowerPoint (.pptx). 1. Do one of the following to start Document Capture Pro: • Windows 10: Click and select Epson Software > Document Capture Pro. • Windows 8.x: Navigate to Simple View, if necessary. 3. Load your scans in the scanner. ...
User Guide
Page 96
... file you selected. You see this window: 4. Parent topic: Scanning Special Projects Scanning to a SharePoint server or a cloud service. 96 Your originals are saved in Document Capture Pro for details. 6. Note: See the Help information in the Office file format you want to display a new window with additional settings. 9. You see the Transfer...
... file you selected. You see this window: 4. Parent topic: Scanning Special Projects Scanning to a SharePoint server or a cloud service. 96 Your originals are saved in Document Capture Pro for details. 6. Note: See the Help information in the Office file format you want to display a new window with additional settings. 9. You see the Transfer...
User Guide
Page 97
1. You see this window: Note: Click Switch to the Apps screen and select Document Capture Pro. • Windows (other versions): Click or Start, and select All Programs or Programs. Select Epson Software > Document Capture Pro. Click the < at the bottom right corner of the following to start Document Capture Pro: • Windows 10: Click and select Epson Software > Document Capture Pro. • Windows 8.x: Navigate to Simple View, if necessary. 2. Do one of the screen. 97
1. You see this window: Note: Click Switch to the Apps screen and select Document Capture Pro. • Windows (other versions): Click or Start, and select All Programs or Programs. Select Epson Software > Document Capture Pro. Click the < at the bottom right corner of the following to start Document Capture Pro: • Windows 10: Click and select Epson Software > Document Capture Pro. • Windows 8.x: Navigate to Simple View, if necessary. 2. Do one of the screen. 97
User Guide
Page 98
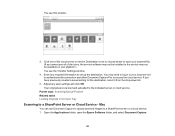
You may not be available on your cloud service to authenticate the connection and allow Document Capture Pro to access the cloud service. Your originals are scanned and uploaded to a SharePoint Server or Cloud Service - Parent topic: Scanning Special Projects Related tasks ..., select it from the drop-down list. 5. Adjust any required information to set up the destination. Open the Applications folder, open the Epson Software folder, and select Document Capture. 98 You see all of the cloud server or service Destination icons to choose where to save settings and click OK. Mac You...
You may not be available on your cloud service to authenticate the connection and allow Document Capture Pro to access the cloud service. Your originals are scanned and uploaded to a SharePoint Server or Cloud Service - Parent topic: Scanning Special Projects Related tasks ..., select it from the drop-down list. 5. Adjust any required information to set up the destination. Open the Applications folder, open the Epson Software folder, and select Document Capture. 98 You see all of the cloud server or service Destination icons to choose where to save settings and click OK. Mac You...

User Guide
Page 121
... and status icons on the software. 121 A job may have using Document Capture Pro. Job registration on its LCD screen. For Document Capture (Mac), or Document Capture Pro Server on For details, see your computer Install Epson Scan 2 and Document Capture Pro (Windows), or server to use this feature. Document Capture (Mac), or Document Capture Pro Server on details, see your product. When job is dark, press...
... and status icons on the software. 121 A job may have using Document Capture Pro. Job registration on its LCD screen. For Document Capture (Mac), or Document Capture Pro Server on For details, see your computer Install Epson Scan 2 and Document Capture Pro (Windows), or server to use this feature. Document Capture (Mac), or Document Capture Pro Server on details, see your product. When job is dark, press...

User Guide
Page 122
... screen message Condition/solution Check the following : • Make sure the scanner is connected and correctly configured. • Install Epson Scan 2 and Document Capture Pro (Windows), Document Capture (Mac), or Document Capture Pro Server on - Group settings of a necessary application - Power supply of the application. • Make sure the AC adapter is the same for the computer and ...
... screen message Condition/solution Check the following : • Make sure the scanner is connected and correctly configured. • Install Epson Scan 2 and Document Capture Pro (Windows), Document Capture (Mac), or Document Capture Pro Server on - Group settings of a necessary application - Power supply of the application. • Make sure the AC adapter is the same for the computer and ...

User Guide
Page 125
...• Remove the originals, fan the edges to slow down the scanning speed. • Use the optional carrier sheet for thin or folded documents. • If you see a double feed error in Scanner If an original has jammed inside the scanner and replace the roller assembly kit,... Parts and Accessories Related tasks Cleaning Inside Your Scanner Related topics Loading Originals Original Jams in the Epson Scan 2 window or the Document Capture Pro window, start Epson Scan 2, select the Main Settings tab, select the Detect Double Feed setting, and select Off. Remove all originals from the input ...
...• Remove the originals, fan the edges to slow down the scanning speed. • Use the optional carrier sheet for thin or folded documents. • If you see a double feed error in Scanner If an original has jammed inside the scanner and replace the roller assembly kit,... Parts and Accessories Related tasks Cleaning Inside Your Scanner Related topics Loading Originals Original Jams in the Epson Scan 2 window or the Document Capture Pro window, start Epson Scan 2, select the Main Settings tab, select the Detect Double Feed setting, and select Off. Remove all originals from the input ...


