

English Manual.
Page 6
... Memory 11 Install an Expansion Card 13 Install other Internal Connectors 14 Jumpers 18 Chapter 3 BIOS Setup Enter BIOS Setup 20 Main Menu 20 System Information 22 Central Control Unit 24 Advanced BIOS Features 26 Advanced Chipset Features 29 Integrated Peripherals 33 Power Management Setup 38 PnP/PCI Configuration... 40 PC Health Status 41 BIOS Security Features 42 Load Optimal Defaults 43 Save Changes and Exit 43 Discard Changes and Exit 43 Chapter 4 CD Instruction...
... Memory 11 Install an Expansion Card 13 Install other Internal Connectors 14 Jumpers 18 Chapter 3 BIOS Setup Enter BIOS Setup 20 Main Menu 20 System Information 22 Central Control Unit 24 Advanced BIOS Features 26 Advanced Chipset Features 29 Integrated Peripherals 33 Power Management Setup 38 PnP/PCI Configuration... 40 PC Health Status 41 BIOS Security Features 42 Load Optimal Defaults 43 Save Changes and Exit 43 Discard Changes and Exit 43 Chapter 4 CD Instruction...

English Manual.
Page 15
... LGA775 CPU Alignment Keyy Pin-1 Corner of the CPU Socket Notch Pin-1 triangle marking of the CPU. It is optimized for HT Technology ■ A BIOS that supports HT Technology and has it does not meet the standard requirements for more information about the Hyper-Threading Technology) ■ An Intel®...
... LGA775 CPU Alignment Keyy Pin-1 Corner of the CPU Socket Notch Pin-1 triangle marking of the CPU. It is optimized for HT Technology ■ A BIOS that supports HT Technology and has it does not meet the standard requirements for more information about the Hyper-Threading Technology) ■ An Intel®...

English Manual.
Page 18
... memory, switch the direction. Dual Channel Memory Configuration This motherboard provides two DDR2 memory sockets and supports Dual Channel Technology. When memory is installed, the BIOS will automatically check the memory in only one direction. Dual Channel DS/SS DS/SS (DS : Double Side, SS : Single Side, - : No Memory) ! A memory module...
... memory, switch the direction. Dual Channel Memory Configuration This motherboard provides two DDR2 memory sockets and supports Dual Channel Technology. When memory is installed, the BIOS will automatically check the memory in only one direction. Dual Channel DS/SS DS/SS (DS : Double Side, SS : Single Side, - : No Memory) ! A memory module...

English Manual.
Page 20
... slot. • Removing the Card: Push the latch at the end of the PCI Express x16 slot to make any required BIOS changes for your computer. If necessary, go to BIOS Setup to release the card and then pull the card straight up from the chassis back panel. 2. Installing and Removing a PCI...
... slot. • Removing the Card: Push the latch at the end of the PCI Express x16 slot to make any required BIOS changes for your computer. If necessary, go to BIOS Setup to release the card and then pull the card straight up from the chassis back panel. 2. Installing and Removing a PCI...

English Manual.
Page 24
The fan speed can be connected to connect speaker of the BIOS Setup. Speaker Connector : SPEAKER The speaker connector is used to a CD/DVD-ROM drive through a CD/DVD audio cable. 2 Audio Connector : CD_IN CD_IN is a Sony ...
The fan speed can be connected to connect speaker of the BIOS Setup. Speaker Connector : SPEAKER The speaker connector is used to a CD/DVD-ROM drive through a CD/DVD audio cable. 2 Audio Connector : CD_IN CD_IN is a Sony ...

English Manual.
Page 25
...put it on. 5. Jumper 1 Diagram 1 1 Definition 1-2 2-3 Description Set Pin 1 and Pin 2 closed Set Pin 2 and Pin 3 closed . 4. Go to BIOS Setup to it. Normal 1 2 (Default) 3 CLR_CMOS ■ Disconnect the power cable before adjusting the jumper settings. ■ Do not clear the CMOS while the system... For any jumper setting. Remove jumper cap from the power outlet. 2. Plug in the power cord to factory default when the BIOS settings were mistakenly modified. Description of the jumper settings. Clear CMOS data is turned on. 18 It can prevent hazardous ESD (...
...put it on. 5. Jumper 1 Diagram 1 1 Definition 1-2 2-3 Description Set Pin 1 and Pin 2 closed Set Pin 2 and Pin 3 closed . 4. Go to BIOS Setup to it. Normal 1 2 (Default) 3 CLR_CMOS ■ Disconnect the power cable before adjusting the jumper settings. ■ Do not clear the CMOS while the system... For any jumper setting. Remove jumper cap from the power outlet. 2. Plug in the power cord to factory default when the BIOS settings were mistakenly modified. Description of the jumper settings. Clear CMOS data is turned on. 18 It can prevent hazardous ESD (...

English Manual.
Page 26
... website for updated manual if it is for reference only. Detailed descriptions of this manual will remain consistent with the newly released BIOS at any given time in this manual is available. This chapter includes the following cases occur: 1. You have to run the... Setup Program when the following information : ■ Enter BIOS Setup ■ Main Menu ■ System Information ■ Central Control Unit ■ Advanced BIOS Features ■ Advanced Chipset Features ■ Integrated Peripherals ■ Power Management Setup ■ PnP/PCI...
... website for updated manual if it is for reference only. Detailed descriptions of this manual will remain consistent with the newly released BIOS at any given time in this manual is available. This chapter includes the following cases occur: 1. You have to run the... Setup Program when the following information : ■ Enter BIOS Setup ■ Main Menu ■ System Information ■ Central Control Unit ■ Advanced BIOS Features ■ Advanced Chipset Features ■ Integrated Peripherals ■ Power Management Setup ■ PnP/PCI...

English Manual.
Page 27
...Inc. ► System Information ► PnP/PCI Configuration ► Central Control Unit ► PC Health Status ► Advanced BIOS Features ► BIOS Security Features ► Advanced Chipset Features Load Optimal Defaults ► Integrated Peripherals Save Changes and Exit ► Power Management Setup... +/-/:Value F10:Save ESC:Exit F1:General Help F9:Optimized Defaults Configure Time and Date. 3 CAUTION Enter BIOS Setup The BIOS is the communication bridge between hardware and software, correctly setting up through this menu. Power on the computer,...
...Inc. ► System Information ► PnP/PCI Configuration ► Central Control Unit ► PC Health Status ► Advanced BIOS Features ► BIOS Security Features ► Advanced Chipset Features Load Optimal Defaults ► Integrated Peripherals Save Changes and Exit ► Power Management Setup... +/-/:Value F10:Save ESC:Exit F1:General Help F9:Optimized Defaults Configure Time and Date. 3 CAUTION Enter BIOS Setup The BIOS is the communication bridge between hardware and software, correctly setting up through this menu. Power on the computer,...

English Manual.
Page 28
... Defaults The optimal performance settings can be set up through this option. ► PC Health Status This setup enables you need now is to adjust BIOS setting one , trial and error, to find out the best setting for your current system. ► Save Changes and Exit Save setting values to ...not change fan speeds, and displays temperatures and voltages of your system loading is located at the right hand side of your CPU/System. ► BIOS Security Features The Supervisor/User password can be set a password, the system will ask you to key in this menu to read/change anything and...
... Defaults The optimal performance settings can be set up through this option. ► PC Health Status This setup enables you need now is to adjust BIOS setting one , trial and error, to find out the best setting for your current system. ► Save Changes and Exit Save setting values to ...not change fan speeds, and displays temperatures and voltages of your system loading is located at the right hand side of your CPU/System. ► BIOS Security Features The Supervisor/User password can be set a password, the system will ask you to key in this menu to read/change anything and...

English Manual.
Page 29
...] Floppy A Halt On Keyboard Mouse Floppy [1.44 MB 31/2"] [All Errors But ...] [Disabled] [Disabled] [Disabled] Model Name BIOS Version Memory :G43MX :816F1D22 :1024MB Move Enter:Select +/-/:Value F10:Save ESC:Exit F1:General Help F9:Optimized Defaults ► System Time This item allows...by users. Use [+] or [-] to input the value. ► Primary/Secondary IDE Master/Slave, Third/Fourth IDE Master While entering setup, BIOS automatically detects the presence of the setting are : : respectively. ► System Date format. Copyright (C) 1985-2005, American Megatrends, Inc. ...
...] Floppy A Halt On Keyboard Mouse Floppy [1.44 MB 31/2"] [All Errors But ...] [Disabled] [Disabled] [Disabled] Model Name BIOS Version Memory :G43MX :816F1D22 :1024MB Move Enter:Select +/-/:Value F10:Save ESC:Exit F1:General Help F9:Optimized Defaults ► System Time This item allows...by users. Use [+] or [-] to input the value. ► Primary/Secondary IDE Master/Slave, Third/Fourth IDE Master While entering setup, BIOS automatically detects the presence of the setting are : : respectively. ► System Date format. Copyright (C) 1985-2005, American Megatrends, Inc. ...

English Manual.
Page 30
... stop for a floppy error if you enabled this item. ► Model Name Model name of this information and discuss with the field service people if a BIOS upgrade is depending on how many memory modules were installed in your system before powering on. ► MAC Address This item shows the onboard LAN... MAC address. ► CPU Name It displays the current CPU name. 23 User can check this product. ► BIOS Version It displays the current BIOS version. The size is needed. ► Memory This item displays the current memory size.
... stop for a floppy error if you enabled this item. ► Model Name Model name of this information and discuss with the field service people if a BIOS upgrade is depending on how many memory modules were installed in your system before powering on. ► MAC Address This item shows the onboard LAN... MAC address. ► CPU Name It displays the current CPU name. 23 User can check this product. ► BIOS Version It displays the current BIOS version. The size is needed. ► Memory This item displays the current memory size.

English Manual.
Page 33
...: Displays the normal POST messages. [Enabled] : Displays OEM customer logo instead of POST messages. ► Floppy Drive Seek This item controls whether the BIOS will be checking for boot devices. you can exit this menu by viruses, e.g. After pressing , you can select the device using the Up/Down arrow...then POST will not detect the floppy. ► Bootup Num-Lock This item defines if the keyboard Num Lock key is active when your BIOS from being affected by pressing . ► Hard Disk Drives This option is used to specify the boot priority sequence from available hard disk ...
...: Displays the normal POST messages. [Enabled] : Displays OEM customer logo instead of POST messages. ► Floppy Drive Seek This item controls whether the BIOS will be checking for boot devices. you can exit this menu by viruses, e.g. After pressing , you can select the device using the Up/Down arrow...then POST will not detect the floppy. ► Bootup Num-Lock This item defines if the keyboard Num Lock key is active when your BIOS from being affected by pressing . ► Hard Disk Drives This option is used to specify the boot priority sequence from available hard disk ...

English Manual.
Page 35
... overheating) instead of 35 °C, the value reported by where application code can result in memory by PECI would be met, including CPU, chipset, motherboard, BIOS and operation system. The PECI bus, allowing access to this data from chipset components, is used to classify areas in decreased average power consumption and...
... overheating) instead of 35 °C, the value reported by where application code can result in memory by PECI would be met, including CPU, chipset, motherboard, BIOS and operation system. The PECI bus, allowing access to this data from chipset components, is used to classify areas in decreased average power consumption and...

English Manual.
Page 37
... the amount of main memory that is pre-allocated to support the Internal Graphics Translation Table (0-2MB). ► PEG Port This item is enabled, the BIOS can see 8192 MB of storage cells, it into the 4.0-4.5 address space. It contains important information about the module's speed, size, addressing mode and various...
... the amount of main memory that is pre-allocated to support the Internal Graphics Translation Table (0-2MB). ► PEG Port This item is enabled, the BIOS can see 8192 MB of storage cells, it into the 4.0-4.5 address space. It contains important information about the module's speed, size, addressing mode and various...

English Manual.
Page 38
DVMT allocates memory based on system needs. This BIOS option allows you to the Unified Memory Architecture (UMA) concept, wherein a static amount of page-locked graphics memory is a memory allocation method addition to adjust ...
DVMT allocates memory based on system needs. This BIOS option allows you to the Unified Memory Architecture (UMA) concept, wherein a static amount of page-locked graphics memory is a memory allocation method addition to adjust ...

English Manual.
Page 42
... usage of cryptographic techniques including public-key cryptography, cryptographic algorithms and protocols. 3 Trusted Computing CMOS Setup Utility - Members should have a working knowledge of security in BIOS Move Enter:Select +/-/:Value F10:Save ESC:Exit F1:General Help F9:Optimized Defaults ► TCG/TPM Support Trusted Computing Group (TCG) members develop and...
... usage of cryptographic techniques including public-key cryptography, cryptographic algorithms and protocols. 3 Trusted Computing CMOS Setup Utility - Members should have a working knowledge of security in BIOS Move Enter:Select +/-/:Value F10:Save ESC:Exit F1:General Help F9:Optimized Defaults ► TCG/TPM Support Trusted Computing Group (TCG) members develop and...

English Manual.
Page 43
... Consumer IR port. ► CIR Port IRQ When "OnBoard CIR Port" is set to [2E0]、[3E0]、[298], this item is used to allow BIOS to enable Serial Port1 [Enabled] or disable floppy IrDA Function [Enabled] controller. 3 SuperIO Configuration CMOS Setup Utility - SuperIO Configuration SuperIO Configuration Help Item OnBoard Floppy...
... Consumer IR port. ► CIR Port IRQ When "OnBoard CIR Port" is set to [2E0]、[3E0]、[298], this item is used to allow BIOS to enable Serial Port1 [Enabled] or disable floppy IrDA Function [Enabled] controller. 3 SuperIO Configuration CMOS Setup Utility - SuperIO Configuration SuperIO Configuration Help Item OnBoard Floppy...

English Manual.
Page 44
...This item is a workaround for Legacy USB Support [Enabled] legacy USB. This is used to force a HDD formatted drive to enable support for EHCI BIOS handoff will appear : ► USB Mass Storage Device After pressing , you to boot as [Auto], [Floppy], [Forced FDD], [Hard Disk] ...transmission rate mode of features in Windows XP SP2. If USB devices are : [High Speed] in 480Mbps; [Full Speed] in 12Mbps. ► BIOS EHCI Hand-Off Windows XP supports a number of USB 2.0. There are not implemented. 3 USB Configuration CMOS Setup Utility - Select [Auto], USB devices ...
...This item is a workaround for Legacy USB Support [Enabled] legacy USB. This is used to force a HDD formatted drive to enable support for EHCI BIOS handoff will appear : ► USB Mass Storage Device After pressing , you to boot as [Auto], [Floppy], [Forced FDD], [Hard Disk] ...transmission rate mode of features in Windows XP SP2. If USB devices are : [High Speed] in 480Mbps; [Full Speed] in 12Mbps. ► BIOS EHCI Hand-Off Windows XP supports a number of USB 2.0. There are not implemented. 3 USB Configuration CMOS Setup Utility - Select [Auto], USB devices ...
English Manual.
Page 45
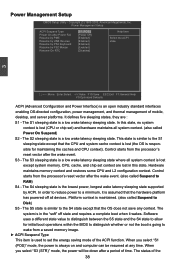
... any time. Software uses a different state value to distinguish between the S5 state and the S4 state to allow for initial boot operations within the BIOS to distinguish whether or not the boot is responsible for maintaining the caches and CPU context). Power Management Setup ACPI Suspend Type Power On after...
... any time. Software uses a different state value to distinguish between the S5 state and the S4 state to allow for initial boot operations within the BIOS to distinguish whether or not the boot is responsible for maintaining the caches and CPU context). Power Management Setup ACPI Suspend Type Power On after...

English Manual.
Page 47
... Configuration Initial Graphics Adapter [PEG /PCI] Help Item PCI IDE BusMaster [Enabled] Select which graphics controller is used as the primary boot device. Select [Enabled], BIOS uses PCI busmastering for read/write to enable/disable PCI IDE busmaster function. 3 PnP/PCI Configuration CMOS Setup Utility - Copyright (C) 1985-2005, American Megatrends, Inc...
... Configuration Initial Graphics Adapter [PEG /PCI] Help Item PCI IDE BusMaster [Enabled] Select which graphics controller is used as the primary boot device. Select [Enabled], BIOS uses PCI busmastering for read/write to enable/disable PCI IDE busmaster function. 3 PnP/PCI Configuration CMOS Setup Utility - Copyright (C) 1985-2005, American Megatrends, Inc...


