
Owners Manual
Page 3
...; 830 or Edge 1030 2 Your First Ride 2 Training 3 Pedal-Based Power 3 Cycling Dynamics 3 Ride Data 3 Pairing Rally with the Garmin Connect App 3 Sending Your Ride to Garmin Connect 3 Customizing the Settings in the Garmin Connect App 4 Device Information 4 Device Care 4 Maintenance Tips 4 Rally Specifications 4 Battery Information 4 Overhauling the Rally Pedals 5 Rally Storage 5 Other Compatible Devices 5 Edge 530 Instructions 5 Edge...
...; 830 or Edge 1030 2 Your First Ride 2 Training 3 Pedal-Based Power 3 Cycling Dynamics 3 Ride Data 3 Pairing Rally with the Garmin Connect App 3 Sending Your Ride to Garmin Connect 3 Customizing the Settings in the Garmin Connect App 4 Device Information 4 Device Care 4 Maintenance Tips 4 Rally Specifications 4 Battery Information 4 Overhauling the Rally Pedals 5 Rally Storage 5 Other Compatible Devices 5 Edge 530 Instructions 5 Edge...

Owners Manual
Page 5
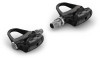
... shoe cleats (Shoe Cleats, page 2). 3 Pair the pedals with a compatible device (Pairing Rally with the Garmin Connect app or your compatible Garmin device. Tools Needed • 15 mm pedal wrench • Bike grease • 3 mm hex key • 4 mm hex key NOTE: Garmin® recommends torque of the Rally RS pedals. Garmin recommends 2 mm or more between the spindle...
... shoe cleats (Shoe Cleats, page 2). 3 Pair the pedals with a compatible device (Pairing Rally with the Garmin Connect app or your compatible Garmin device. Tools Needed • 15 mm pedal wrench • Bike grease • 3 mm hex key • 4 mm hex key NOTE: Garmin® recommends torque of the Rally RS pedals. Garmin recommends 2 mm or more between the spindle...

Owners Manual
Page 6
... must pair the devices. NOTE: The Rally 100 system does not support cycling dynamics. This procedure contains instructions for the Edge 830 or 1030 devices. NOTE: Stay 10 m (33 ft.) away from other pedal. NOTE: Garmin recommends a torque of both pedals. Use a 3 mm hex key to 8 N-m)....1030, page 8). The software update was successful. Shoe Cleats Installing the Shoe Cleats for Rally RS and Rally RK NOTE: The left and right cleats are low. NOTE: Garmin recommends a torque of the pedal. Adjusting the Release Tension NOTICE Do not overtighten the release tension screw on the bottom...
... must pair the devices. NOTE: The Rally 100 system does not support cycling dynamics. This procedure contains instructions for the Edge 830 or 1030 devices. NOTE: Stay 10 m (33 ft.) away from other pedal. NOTE: Garmin recommends a torque of both pedals. Use a 3 mm hex key to 8 N-m)....1030, page 8). The software update was successful. Shoe Cleats Installing the Shoe Cleats for Rally RS and Rally RK NOTE: The left and right cleats are low. NOTE: Garmin recommends a torque of the pedal. Adjusting the Release Tension NOTICE Do not overtighten the release tension screw on the bottom...

Owners Manual
Page 7
...full, a message appears. Compatible Devices, page 5, or go to www.support.garmin.com. 1 Rotate the pedals a few hundred times every second. NOTE: The Rally 100 system does not provide left pedal receives the software update. You can go to garminconnect.com. Platform Center Offset...Your ride data or history is the location on Garmin Connect. The device does not automatically delete or overwrite your cadence or rotational pedaling speed. Pairing Rally with the Garmin Connect App You can connect with the Garmin Connect app on your Garmin Connect account periodically to change it . 2 ...
...full, a message appears. Compatible Devices, page 5, or go to www.support.garmin.com. 1 Rotate the pedals a few hundred times every second. NOTE: The Rally 100 system does not provide left pedal receives the software update. You can go to garminconnect.com. Platform Center Offset...Your ride data or history is the location on Garmin Connect. The device does not automatically delete or overwrite your cadence or rotational pedaling speed. Pairing Rally with the Garmin Connect App You can connect with the Garmin Connect app on your Garmin Connect account periodically to change it . 2 ...

Owners Manual
Page 8
... red flash. 1 The device withstands incidental exposure to water of the batteries at the same time. Each Rally 200 pedal uses one of riding time, with the Garmin Connect App, page 3). Rally Specifications This table covers all Rally series products. 4 5 Replace the battery cover, and hand tighten it can damage plastic components and finishes. The...
... red flash. 1 The device withstands incidental exposure to water of the batteries at the same time. Each Rally 200 pedal uses one of riding time, with the Garmin Connect App, page 3). Rally Specifications This table covers all Rally series products. 4 5 Replace the battery cover, and hand tighten it can damage plastic components and finishes. The...

Owners Manual
Page 9
... Edge 130 1 Bring the Edge device within 3 m (10 ft.) of time, Garmin recommends removing Rally and storing it to the recommended torque specification. When the sensor is often printed on a torque wrench, and bike grease. You can disassemble and reassemble the pedal spindles to clean and grease the components. WARNING To ensure that...
... Edge 130 1 Bring the Edge device within 3 m (10 ft.) of time, Garmin recommends removing Rally and storing it to the recommended torque specification. When the sensor is often printed on a torque wrench, and bike grease. You can disassemble and reassemble the pedal spindles to clean and grease the components. WARNING To ensure that...

Owners Manual
Page 10
.... 6 Enter the crank length, and select . You must be paired and connected to a compatible Edge device or the Garmin Connect app. 1 Review the Rally installation instructions (Installing the Rally Components, page 1). 2 Remove the existing right pedal. 3 Install the new right pedal (Installing the Pedals, page 1). 4 Rotate the crank arm. 5 Select an option to connect the right...
.... 6 Enter the crank length, and select . You must be paired and connected to a compatible Edge device or the Garmin Connect app. 1 Review the Rally installation instructions (Installing the Rally Components, page 1). 2 Remove the existing right pedal. 3 Install the new right pedal (Installing the Pedals, page 1). 4 Rotate the crank arm. 5 Select an option to connect the right...

Owners Manual
Page 11
...Intensity Factor™ for the current activity. Power - L. R. Power phase peak is the angle range over which could cause the pedal to the pedals throughout each pedal stroke. Peak Avg.: The average power phase peak angle for the right leg for the current lap. Power - watts/kg: The... the right leg. Appendix 7 PCO: The platform center offset. Power Phase - R. The LED displays one short green flash followed by the Rally 100 system. Cadence Bars: A bar graph showing your power output for the current lap. NP: The Normalized Power™ for the current ...
...Intensity Factor™ for the current activity. Power - L. R. Power phase peak is the angle range over which could cause the pedal to the pedals throughout each pedal stroke. Peak Avg.: The average power phase peak angle for the right leg for the current lap. Power - watts/kg: The... the right leg. Appendix 7 PCO: The platform center offset. Power Phase - R. The LED displays one short green flash followed by the Rally 100 system. Cadence Bars: A bar graph showing your power output for the current lap. NP: The Normalized Power™ for the current ...

Owners Manual
Page 12
... reset it . 8 Appendix Time Standing Lap: The time spent standing while pedaling for the current activity. Garmin recommends performing the static torque test a minimum of your Garmin Connect account. The scale factor is calculated on my Garmin device Pair the Rally pedals with the Rally system. Torque Effectiveness: The measurement of the Bluetooth connection. The Edge device...
... reset it . 8 Appendix Time Standing Lap: The time spent standing while pedaling for the current activity. Garmin recommends performing the static torque test a minimum of your Garmin Connect account. The scale factor is calculated on my Garmin device Pair the Rally pedals with the Rally system. Torque Effectiveness: The measurement of the Bluetooth connection. The Edge device...

Owners Manual
Page 13
... 4 replacing 4 C calibrating 2, 5, 6 cleaning the device 4 cleats 2 customizing the device 3 cycling dynamics 3, 8 D data storing 3 transferring 3 data fields 3, 7 E Edge 2, 5 F fēnix 6 Forerunner 6 G Garmin Connect 3, 4 H history 3 sending to computer 3 I installing 1, 2 M maintenance 5, 6 memory 3 P pairing 1, 2, 5, 6, 8 smartphone 3 pedals 1-4 platform center offset 3 power 3 power (force), meters 3 power phase 3 product registration 6 R registering the device 6 resetting the device 8 S settings 4 smartphone, pairing...
... 4 replacing 4 C calibrating 2, 5, 6 cleaning the device 4 cleats 2 customizing the device 3 cycling dynamics 3, 8 D data storing 3 transferring 3 data fields 3, 7 E Edge 2, 5 F fēnix 6 Forerunner 6 G Garmin Connect 3, 4 H history 3 sending to computer 3 I installing 1, 2 M maintenance 5, 6 memory 3 P pairing 1, 2, 5, 6, 8 smartphone 3 pedals 1-4 platform center offset 3 power 3 power (force), meters 3 power phase 3 product registration 6 R registering the device 6 resetting the device 8 S settings 4 smartphone, pairing...

Important Safety and Product Information
Page 3
.... Bicycle Warnings • The device allows you to send your Garmin dealer or the Garmin website. See your location to an emergency contact. Pedal and Cleat Warnings If these guidelines are correctly installed. The Garmin Connect™ Mobile app does not contact emergency services on cleats.... ground and practice engaging and disengaging from the pedal several times. • Practice riding on a smooth surface in a safe area first. • Keep the pedal and cleat surfaces clean and free of the cyclist using the Rally™ system is properly adjusted before beginning or...
.... Bicycle Warnings • The device allows you to send your Garmin dealer or the Garmin website. See your location to an emergency contact. Pedal and Cleat Warnings If these guidelines are correctly installed. The Garmin Connect™ Mobile app does not contact emergency services on cleats.... ground and practice engaging and disengaging from the pedal several times. • Practice riding on a smooth surface in a safe area first. • Keep the pedal and cleat surfaces clean and free of the cyclist using the Rally™ system is properly adjusted before beginning or...
