
8512778 - Gateway Notebook User Guide for Windows Vista R2
Page 53
... on the DSL or cable modem. Wireless Ethernet networking Wireless Ethernet networking is made up a network using a router: 1 Plug one end of the power adapter into the AC connector on the router and the other end into a grounded, 110V electrical outlet. 2 Turn on your wireless computers. The WAN... is connected to the router, the corresponding green indicator should light on the front of the cable into the network jack on the computer. www.gateway.com In addition to a router, you need a straight-through cable for each computer on the network. 5 For an Internet connection, plug a straight-...
... on the DSL or cable modem. Wireless Ethernet networking Wireless Ethernet networking is made up a network using a router: 1 Plug one end of the power adapter into the AC connector on the router and the other end into a grounded, 110V electrical outlet. 2 Turn on your wireless computers. The WAN... is connected to the router, the corresponding green indicator should light on the front of the cable into the network jack on the computer. www.gateway.com In addition to a router, you need a straight-through cable for each computer on the network. 5 For an Internet connection, plug a straight-...
8512778 - Gateway Notebook User Guide for Windows Vista R2
Page 58
... suggested. • If you can share drives (for example hard drives and DVD drives) and printers among the network computers, each of the devices, then power them back on the front of the window. For information about wireless network security methods, click Start, then click Help and Support.
... suggested. • If you can share drives (for example hard drives and DVD drives) and printers among the network computers, each of the devices, then power them back on the front of the window. For information about wireless network security methods, click Start, then click Help and Support.

8512778 - Gateway Notebook User Guide for Windows Vista R2
Page 82
... opens. 76 CHAPTER 7: Customizing Windows To switch between user accounts: 1 Save any programs that were running may be closed, and unsaved document changes may be a powerful tool, but does not log off the current user, and any open documents that are difficult to see, or if the mouse is difficult to...
... opens. 76 CHAPTER 7: Customizing Windows To switch between user accounts: 1 Save any programs that were running may be closed, and unsaved document changes may be a powerful tool, but does not log off the current user, and any open documents that are difficult to see, or if the mouse is difficult to...

8512778 - Gateway Notebook User Guide for Windows Vista R2
Page 84
...the Change settings for the plan dialog box and modify the display and sleep settings for your notebook. For more information about selecting a power plan, see your notebook Reference Guide. ■ Click the arrow to adjust many of these controls may not be available. Important ... Customizing Windows Using the Windows Mobility Center The Windows Mobility Center is the single place you need to go to open the power plan list box and select a new power plan. 78 To access the Windows Mobility Center: • Click (Start), All Programs, Accessories, then click Windows Mobility ...
...the Change settings for the plan dialog box and modify the display and sleep settings for your notebook. For more information about selecting a power plan, see your notebook Reference Guide. ■ Click the arrow to adjust many of these controls may not be available. Important ... Customizing Windows Using the Windows Mobility Center The Windows Mobility Center is the single place you need to go to open the power plan list box and select a new power plan. 78 To access the Windows Mobility Center: • Click (Start), All Programs, Accessories, then click Windows Mobility ...

8512564 - Component Replacement Manual R0
Page 1
...legal information. © 2007 Gateway, Inc. Warning Do not attempt to your notebook. Gateway and eMachines are trademarks or registered trademarks of Gateway, Inc. All rights reserved. Technical Support See the label on the bottom of your notebook's power connector. 1 3 Plug the power cord into a different wall outlet...turn on and off. • Make sure the power cord is firmly attached to the AC adapter. Power indicator If the battery charge indicator does not turn blue after three hours, contact Gateway Customer Care at the Web address or telephone number ...
...legal information. © 2007 Gateway, Inc. Warning Do not attempt to your notebook. Gateway and eMachines are trademarks or registered trademarks of Gateway, Inc. All rights reserved. Technical Support See the label on the bottom of your notebook's power connector. 1 3 Plug the power cord into a different wall outlet...turn on and off. • Make sure the power cord is firmly attached to the AC adapter. Power indicator If the battery charge indicator does not turn blue after three hours, contact Gateway Customer Care at the Web address or telephone number ...

8512564 - Component Replacement Manual R0
Page 2
... notebook. 6 Slide the replacement battery into the notebook until it snaps into an AC outlet. 10 Open the LCD panel and press the power button. Recycle or dispose of Gateway, Inc. To replace the battery: 1 If your notebook is on and is facing up. 4 Slide the battery lock to the unlock ... for your reference guide for Customer Care Information. OR If your notebook is on and is not connected to AC power, save your work and turn blue after three hours, contact Gateway Customer Care at the Web address or telephone number shown on the label on . See your notebook. All rights ...
... notebook. 6 Slide the replacement battery into the notebook until it snaps into an AC outlet. 10 Open the LCD panel and press the power button. Recycle or dispose of Gateway, Inc. To replace the battery: 1 If your notebook is on and is facing up. 4 Slide the battery lock to the unlock ... for your reference guide for Customer Care Information. OR If your notebook is on and is not connected to AC power, save your work and turn blue after three hours, contact Gateway Customer Care at the Web address or telephone number shown on the label on . See your notebook. All rights ...

8512564 - Component Replacement Manual R0
Page 4
...the new DVD drive into the drive bay. See your notebook. 18 Reconnect all peripheral devices and replace any Express, PC, or memory cards. Gateway and eMachines are trademarks or registered trademarks of their respective companies. in Step 10. 14 Replace the memory bay cover, then tighten the six ...cover screws. 15 Replace the keyboard screw. 16 Insert the battery, then turn your notebook over. 17 Connect the power adapter, modem cable, and network cable, then turn on your reference guide for Customer Care Information. Replacing the DVD Drive 11 Slide the DVD ...
...the new DVD drive into the drive bay. See your notebook. 18 Reconnect all peripheral devices and replace any Express, PC, or memory cards. Gateway and eMachines are trademarks or registered trademarks of their respective companies. in Step 10. 14 Replace the memory bay cover, then tighten the six ...cover screws. 15 Replace the keyboard screw. 16 Insert the battery, then turn your notebook over. 17 Connect the power adapter, modem cable, and network cable, then turn on your reference guide for Customer Care Information. Replacing the DVD Drive 11 Slide the DVD ...

8512564 - Component Replacement Manual R0
Page 6
...the process, you see the Windows startup screen. in the United States and other brands and product names are trademarks or registered trademarks of Gateway, Inc. See your reference guide for Customer Care Information. All other countries. Replacing the Hard Drive Kit 2 13 Insert the battery, then... turn your notebook over. 14 Connect the power adapter, modem cable, and network cable. 15 Turn on your notebook. 16 If the hard drive was sent to you from Gateway with the operating system, applications, and drivers installed, you will see a blank ...
...the process, you see the Windows startup screen. in the United States and other brands and product names are trademarks or registered trademarks of Gateway, Inc. See your reference guide for Customer Care Information. All other countries. Replacing the Hard Drive Kit 2 13 Insert the battery, then... turn your notebook over. 14 Connect the power adapter, modem cable, and network cable. 15 Turn on your notebook. 16 If the hard drive was sent to you from Gateway with the operating system, applications, and drivers installed, you will see a blank ...

8512564 - Component Replacement Manual R0
Page 8
... cable is correctly oriented if it toward the LCD panel to release the keyboard retaining tabs located on your notebook over . 13 Connect the power adapter, the modem cable, and the network cable, then turn on the front of the keyboard. 17 Slowly rotate the keyboard toward the...tabs into place. All rights reserved. The hinge cover is part of the notebook for important safety, regulatory, and legal information. © 2007 Gateway, Inc. The cover should easily fall into their respective companies. Connector Technical Support See the label on the cover in the United States and ...
... cable is correctly oriented if it toward the LCD panel to release the keyboard retaining tabs located on your notebook over . 13 Connect the power adapter, the modem cable, and the network cable, then turn on the front of the keyboard. 17 Slowly rotate the keyboard toward the...tabs into place. All rights reserved. The hinge cover is part of the notebook for important safety, regulatory, and legal information. © 2007 Gateway, Inc. The cover should easily fall into their respective companies. Connector Technical Support See the label on the cover in the United States and ...

8512564 - Component Replacement Manual R0
Page 10
...and other brands and product names are trademarks or registered trademarks of their respective companies. All other countries. Gateway and eMachines are trademarks or registered trademarks of Gateway, Inc. Technical Support See the label on your reference guide for important safety, regulatory, and legal information....tighten the six cover screws. 14 Replace the keyboard screw. 15 Insert the battery, then turn your notebook over. 16 Connect the power adapter, the modem cable, and the network cable. 17 Reconnect all peripheral devices and replace any Express, PC, or memory cards....
...and other brands and product names are trademarks or registered trademarks of their respective companies. All other countries. Gateway and eMachines are trademarks or registered trademarks of Gateway, Inc. Technical Support See the label on your reference guide for important safety, regulatory, and legal information....tighten the six cover screws. 14 Replace the keyboard screw. 15 Insert the battery, then turn your notebook over. 16 Connect the power adapter, the modem cable, and the network cable. 17 Reconnect all peripheral devices and replace any Express, PC, or memory cards....

8512564 - Component Replacement Manual R0
Page 12
...other brands and product names are trademarks or registered trademarks of the notebook for important safety, regulatory, and legal information. © 2007 Gateway, Inc. All rights reserved. Replacing the Wireless Network Module 10 Remove the screw securing the wireless network module. All other countries. in ... the wireless network bay cover, then tighten the cover screw. 17 Insert the battery, then turn your notebook over. 18 Connect the power adapter, the modem cable, and the network cable. 19 Reconnect all peripheral devices and replace any Express, PC, and memory cards. 20...
...other brands and product names are trademarks or registered trademarks of the notebook for important safety, regulatory, and legal information. © 2007 Gateway, Inc. All rights reserved. Replacing the Wireless Network Module 10 Remove the screw securing the wireless network module. All other countries. in ... the wireless network bay cover, then tighten the cover screw. 17 Insert the battery, then turn your notebook over. 18 Connect the power adapter, the modem cable, and the network cable. 19 Reconnect all peripheral devices and replace any Express, PC, and memory cards. 20...
8512488 - Gateway Notebook Reference Guide R2
Page 3
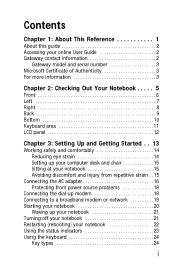
Contents Chapter 1: About This Reference 1 About this guide 2 Accessing your online User Guide 2 Gateway contact information 2 Gateway model and serial number 3 Microsoft Certificate of Authenticity 3 For more information 3 Chapter 2: Checking Out Your Notebook . . . . . 5 Front 6 Left 7 Right 8 Back...chair 15 Sitting at your notebook 15 Avoiding discomfort and injury from repetitive strain . . 15 Connecting the AC adapter 16 Protecting from power source problems 18 Connecting the dial-up modem 18 Connecting to a broadband modem or network 19 Starting your notebook 20 Waking up ...
Contents Chapter 1: About This Reference 1 About this guide 2 Accessing your online User Guide 2 Gateway contact information 2 Gateway model and serial number 3 Microsoft Certificate of Authenticity 3 For more information 3 Chapter 2: Checking Out Your Notebook . . . . . 5 Front 6 Left 7 Right 8 Back...chair 15 Sitting at your notebook 15 Avoiding discomfort and injury from repetitive strain . . 15 Connecting the AC adapter 16 Protecting from power source problems 18 Connecting the dial-up modem 18 Connecting to a broadband modem or network 19 Starting your notebook 20 Waking up ...

8512488 - Gateway Notebook Reference Guide R2
Page 4
... Using the projector or monitor for a presentation . . . . 53 Viewing the display on a television 54 Adjusting the television display settings 55 Ordering accessories 56 Chapter 5: Managing Power 59 Monitoring the battery charge 60 Recharging the battery 60 Changing the battery 61 Recalibrating the battery 62 Extending battery life 63 Maximizing battery performance...
... Using the projector or monitor for a presentation . . . . 53 Viewing the display on a television 54 Adjusting the television display settings 55 Ordering accessories 56 Chapter 5: Managing Power 59 Monitoring the battery charge 60 Recharging the battery 60 Changing the battery 61 Recalibrating the battery 62 Extending battery life 63 Maximizing battery performance...

8512488 - Gateway Notebook Reference Guide R2
Page 5
....gateway.com Conserving battery power 63 Using alternate power sources 64 Changing power modes 64 Changing notebook power settings 66 Changing the power plan 66 Changing advanced settings 67 Chapter 6: Traveling with Your Notebook . . . 69 Packing your notebook 70 Traveling by air 70 Dial-up modem 70 Radio frequency wireless connections 71 Files 71 Security 72 Power...
....gateway.com Conserving battery power 63 Using alternate power sources 64 Changing power modes 64 Changing notebook power settings 66 Changing the power plan 66 Changing advanced settings 67 Chapter 6: Traveling with Your Notebook . . . 69 Packing your notebook 70 Traveling by air 70 Dial-up modem 70 Radio frequency wireless connections 71 Files 71 Security 72 Power...

8512488 - Gateway Notebook Reference Guide R2
Page 6
... 116 Modem (cable or DSL 116 Modem (dial-up 117 Mouse 120 Networks (wired 121 Networks (wireless 122 Passwords 124 PC Cards 124 Power 125 Printer 125 Sound 127 Status indicators 127 Touchpad 127 Video 128 Telephone support 128 Before calling Gateway Customer Care 128 Appendix A: Legal Information 131 Index 141 iv
... 116 Modem (cable or DSL 116 Modem (dial-up 117 Mouse 120 Networks (wired 121 Networks (wireless 122 Passwords 124 PC Cards 124 Power 125 Printer 125 Sound 127 Status indicators 127 Touchpad 127 Video 128 Telephone support 128 Before calling Gateway Customer Care 128 Appendix A: Legal Information 131 Index 141 iv

8512488 - Gateway Notebook Reference Guide R2
Page 12
... Your Notebook LCD panel release latch Speaker Component LCD panel release latch Speakers Battery charge indicator Power indicator Microphone jack Headphone jack Battery charge indicator Headphone jack Microphone jack Power indicator Speaker Icon Description Slide to AC power or the battery charge is very low. ■ LED on . ■ LED blinking - The optional...
... Your Notebook LCD panel release latch Speaker Component LCD panel release latch Speakers Battery charge indicator Power indicator Microphone jack Headphone jack Battery charge indicator Headphone jack Microphone jack Power indicator Speaker Icon Description Slide to AC power or the battery charge is very low. ■ LED on . ■ LED blinking - The optional...

8512488 - Gateway Notebook Reference Guide R2
Page 15
Back www.gateway.com Power connector Component Icon Power connector Monitor port Monitor port Description Plug the AC adapter cable into this connector. For more information, see "Viewing the display on a projector or monitor" on page 50. 9 Plug an analog VGA monitor or projector into this port.
Back www.gateway.com Power connector Component Icon Power connector Monitor port Monitor port Description Plug the AC adapter cable into this connector. For more information, see "Viewing the display on a projector or monitor" on page 50. 9 Plug an analog VGA monitor or projector into this port.

8512488 - Gateway Notebook Reference Guide R2
Page 16
For more information, see "Changing the battery" on page 61. 10 Slide to release the battery. For more information, see "Gateway contact information" on page 95. Slide to unlock the battery. Includes the Customer Care contact information. CHAPTER 2: Checking Out Your Notebook ...Icon Hard drive bay Customer Care label Memory bay Battery latch Battery Battery lock Description The hard drive is not plugged into AC power. For more information, see "Adding or replacing memory modules" on page 2. For more information, see "Changing the battery" on page 100. Provides...
For more information, see "Changing the battery" on page 61. 10 Slide to release the battery. For more information, see "Gateway contact information" on page 95. Slide to unlock the battery. Includes the Customer Care contact information. CHAPTER 2: Checking Out Your Notebook ...Icon Hard drive bay Customer Care label Memory bay Battery latch Battery Battery lock Description The hard drive is not plugged into AC power. For more information, see "Adding or replacing memory modules" on page 2. For more information, see "Changing the battery" on page 100. Provides...

8512488 - Gateway Notebook Reference Guide R2
Page 17
... see "Front" on page 23. 11 You can also configure the power button for Sleep/Resume mode. For the location of a full-sized, computer keyboard. www.gateway.com Keyboard area Multimedia panel Keyboard Power button Microphone Status indicators Touchpad Component Icon Description Keyboard Provides all the functionality... on page 28. For more information, see "Changing advanced settings" on page 24. The built-in use it to turn the power on or off while an external microphone is turned off . Status indicators Inform you when a drive is in microphone is connected. For...
... see "Front" on page 23. 11 You can also configure the power button for Sleep/Resume mode. For the location of a full-sized, computer keyboard. www.gateway.com Keyboard area Multimedia panel Keyboard Power button Microphone Status indicators Touchpad Component Icon Description Keyboard Provides all the functionality... on page 28. For more information, see "Changing advanced settings" on page 24. The built-in use it to turn the power on or off while an external microphone is turned off . Status indicators Inform you when a drive is in microphone is connected. For...

8512488 - Gateway Notebook Reference Guide R2
Page 22
...with your notebook or one of the same type and voltage rating as the original cord or your notebook may be recalibrated. Contact Gateway about returning defective AC adapters. Important If the battery is not fully charged before you partially charged. CHAPTER 3: Setting Up and Getting...adapter has no user-replaceable or user-serviceable parts inside. For information on recalibrating the battery, see "Recalibrating the battery" on battery power for the battery to be damaged. The AC adapter has dangerous voltages that you expect. The replacement cord must be much shorter than...
...with your notebook or one of the same type and voltage rating as the original cord or your notebook may be recalibrated. Contact Gateway about returning defective AC adapters. Important If the battery is not fully charged before you partially charged. CHAPTER 3: Setting Up and Getting...adapter has no user-replaceable or user-serviceable parts inside. For information on recalibrating the battery, see "Recalibrating the battery" on battery power for the battery to be damaged. The AC adapter has dangerous voltages that you expect. The replacement cord must be much shorter than...


