
Use and Care Manual
Page 1
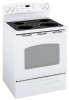
... Elements 28 Racks 28 Removable Lower Oven Drawer Pan 26 Removable Warming Drawer Pan 26 Standard-Clean Oven Interior . . . . 26 Storage Drawer 28 Vent 26 Troubleshooting Tips . . . . 33-36 Accessories 37 Consumer Support Consumer Support Back Cover Warranty 39 For a Spanish version of the...
... Elements 28 Racks 28 Removable Lower Oven Drawer Pan 26 Removable Warming Drawer Pan 26 Standard-Clean Oven Interior . . . . 26 Storage Drawer 28 Vent 26 Troubleshooting Tips . . . . 33-36 Accessories 37 Consumer Support Consumer Support Back Cover Warranty 39 For a Spanish version of the...

Use and Care Manual
Page 2
... the storage drawer or kick panel and look underneath the range to see that the leveling leg is properly secured by the anti-tip bracket. If it does not, the bracket must be minimized by a properly installed anti-tip bracket. Consumer Support Troubleshooting Tips Care and Cleaning WARNING IMPORTANT SAFETY NOTICE The...
... the storage drawer or kick panel and look underneath the range to see that the leveling leg is properly secured by the anti-tip bracket. If it does not, the bracket must be minimized by a properly installed anti-tip bracket. Consumer Support Troubleshooting Tips Care and Cleaning WARNING IMPORTANT SAFETY NOTICE The...

Use and Care Manual
Page 3
...sit or stand on the range to the range and shock or fire hazard. ■ Avoid scratching or impacting glass doors, cook tops or control panels. Doing so may result in this manual. Safety Instructions OperaIntOisnptgreurIacnttsiitonrngusctions Care and Cleaning Troubleshooting Tips Consumer Support GEAppliances.com... while using the appliance. Misuse could be left alone or unattended in an area where an appliance is in or near the range. Potentially hot surfaces include the cooktop, areas facing the cooktop, oven vent opening, surfaces near the cooktop, including paper, plastic...
...sit or stand on the range to the range and shock or fire hazard. ■ Avoid scratching or impacting glass doors, cook tops or control panels. Doing so may result in this manual. Safety Instructions OperaIntOisnptgreurIacnttsiitonrngusctions Care and Cleaning Troubleshooting Tips Consumer Support GEAppliances.com... while using the appliance. Misuse could be left alone or unattended in an area where an appliance is in or near the range. Potentially hot surfaces include the cooktop, areas facing the cooktop, oven vent opening, surfaces near the cooktop, including paper, plastic...

Use and Care Manual
Page 4
...; To avoid oil spillover and fire, use a minimum amount of fresh air at medium or high heat settings. Proper relationship of the range without extending over nearby surface units. ■ When preparing flaming foods under a hood, turn the oven off and wait for cooktop service...to cover the surface heating element. Safety Instructions Operating Instructions IMPORTANT SAFETY INFORMATION. Do not force the door open. Consumer Support Troubleshooting Tips Care and Cleaning 4 Boilovers cause smoking and greasy spillovers that may break because of the sudden change in ignition of glass...
...; To avoid oil spillover and fire, use a minimum amount of fresh air at medium or high heat settings. Proper relationship of the range without extending over nearby surface units. ■ When preparing flaming foods under a hood, turn the oven off and wait for cooktop service...to cover the surface heating element. Safety Instructions Operating Instructions IMPORTANT SAFETY INFORMATION. Do not force the door open. Consumer Support Troubleshooting Tips Care and Cleaning 4 Boilovers cause smoking and greasy spillovers that may break because of the sudden change in ignition of glass...

Use and Care Manual
Page 5
Safety Instructions OperaIntOisnptgreurIacnttsiitonrngusctions Care and Cleaning Troubleshooting Tips Consumer Support GEAppliances.com WARNING RADIANT COOKTOP SAFETY INSTRUCTIONS (Some models) ■ Use care when touching the cooktop. The glass surface of electric shock. ... ignite also. ■ Use CERAMA BRYTE® ceramic Cooktop Cleaner and CERAMA BRYTE® Cleaning Pad to a hot surface. Their absence during cooking could damage range parts and wiring. Hot air or steam which escapes can produce noxious fumes if applied to clean the cooktop. Heat from the cooktop or oven...
Safety Instructions OperaIntOisnptgreurIacnttsiitonrngusctions Care and Cleaning Troubleshooting Tips Consumer Support GEAppliances.com WARNING RADIANT COOKTOP SAFETY INSTRUCTIONS (Some models) ■ Use care when touching the cooktop. The glass surface of electric shock. ... ignite also. ■ Use CERAMA BRYTE® ceramic Cooktop Cleaner and CERAMA BRYTE® Cleaning Pad to a hot surface. Their absence during cooking could damage range parts and wiring. Hot air or steam which escapes can produce noxious fumes if applied to clean the cooktop. Heat from the cooktop or oven...

Use and Care Manual
Page 7
... cookware you finish cooking. Failure to select from the cooktop. Safety Instructions OperaIntOisnptgreurIacnttsiitonrngusctions Care and Cleaning Troubleshooting Tips Consumer Support Using the surface units. (on some models) GEAppliances.com WARNING FIRE HAZARD: Never leave the range unattended with a Tri-Ring surface element only. At both OFF and HI the control clicks into...
... cookware you finish cooking. Failure to select from the cooktop. Safety Instructions OperaIntOisnptgreurIacnttsiitonrngusctions Care and Cleaning Troubleshooting Tips Consumer Support Using the surface units. (on some models) GEAppliances.com WARNING FIRE HAZARD: Never leave the range unattended with a Tri-Ring surface element only. At both OFF and HI the control clicks into...

Use and Care Manual
Page 11
Operating Instructions Care and Cleaning Troubleshooting Tips Consumer Support Bake Temp Recall Kitchen Timer On/Off Bake/Temp Recall Pad Touch ... out until the control is first turned on or off the time of day clock and the display when the range is reset. Reset the clock. Touch the Clear/Off pad. Put the oven back into operation. Display On/Off...oven was set the oven to start and stop automatically at this pad to cook. Touch and hold the pad to the range and call for one hour. Clock Clock Pad To set for a timed oven operation and a power outage occurred, the ...
Operating Instructions Care and Cleaning Troubleshooting Tips Consumer Support Bake Temp Recall Kitchen Timer On/Off Bake/Temp Recall Pad Touch ... out until the control is first turned on or off the time of day clock and the display when the range is reset. Reset the clock. Touch the Clear/Off pad. Put the oven back into operation. Display On/Off...oven was set the oven to start and stop automatically at this pad to cook. Touch and hold the pad to the range and call for one hour. Clock Clock Pad To set for a timed oven operation and a power outage occurred, the ...

Use and Care Manual
Page 14
Touch the Start pad. Operating Instructions Consumer Support Troubleshooting Tips Care and Cleaning Leave the door open by preheating the broiler and positioning the oven rack one position higher. 14 They cook through before ... oven. This guide is maintained in a broiler pan designed for the smaller 2-rack position oven. USDA Rev. The size, weight, thickness, starting temperature and your range is connected to cook rare. Food Beef Chicken Doneness Rare (140°F) Medium (160°F) Well Done (170°F) Type or Thickness Steaks - 1″ thick...
Touch the Start pad. Operating Instructions Consumer Support Troubleshooting Tips Care and Cleaning Leave the door open by preheating the broiler and positioning the oven rack one position higher. 14 They cook through before ... oven. This guide is maintained in a broiler pan designed for the smaller 2-rack position oven. USDA Rev. The size, weight, thickness, starting temperature and your range is connected to cook rare. Food Beef Chicken Doneness Rare (140°F) Medium (160°F) Well Done (170°F) Type or Thickness Steaks - 1″ thick...

Use and Care Manual
Page 18
... on your kitchen, you will not be changed to the original setting. To Turn Off the Clock Display If you have several clocks in your range. The Clear/Off pad does not affect the timer. If you want appears in the display. pads until the time of day cannot be able... time and starts the clock. Touch the Clock pad once to work properly. Kitchen Timer On/Off Start On The timer is 59. Consumer Support Troubleshooting Tips Care and Cleaning To Reset the Timer If the display is touched. Touch the + or - When the timer reaches :00, the control will beep...
... on your kitchen, you will not be changed to the original setting. To Turn Off the Clock Display If you have several clocks in your range. The Clear/Off pad does not affect the timer. If you want appears in the display. pads until the time of day cannot be able... time and starts the clock. Touch the Clock pad once to work properly. Kitchen Timer On/Off Start On The timer is 59. Consumer Support Troubleshooting Tips Care and Cleaning To Reset the Timer If the display is touched. Touch the + or - When the timer reaches :00, the control will beep...

Use and Care Manual
Page 20
... become more familiar with it. If you forget and leave the oven on or off the time of day clock and the display when the range is showing the time of day display. To Adjust the Thermostat Bake + Broil Temp Recall Hi/Lo Bake Temp Recall Start On 20 Touch the... will automatically turn the display on , the control will remain off the oven after 12 hours during baking functions or after a power outage. Consumer Support Troubleshooting Tips Care and Cleaning Adjust the oven thermostat-Do it replaced.
... become more familiar with it. If you forget and leave the oven on or off the time of day clock and the display when the range is showing the time of day display. To Adjust the Thermostat Bake + Broil Temp Recall Hi/Lo Bake Temp Recall Start On 20 Touch the... will automatically turn the display on , the control will remain off the oven after 12 hours during baking functions or after a power outage. Consumer Support Troubleshooting Tips Care and Cleaning Adjust the oven thermostat-Do it replaced.

Use and Care Manual
Page 22
...to do so may result in the oven during the self-clean cycle, but they may remain in an oven fire. Operating Instructions Consumer Support Troubleshooting Tips Care and Cleaning Wipe up heavy soil on some birds is essential for oven cleaning instructions. Rinse well with an open the door. It...the amount of day. pads until the desired Clean Time is normally 4 hours and 20 minutes. Touch the Start/On pad. Self Clean If your range has this control pad, it . They may be able to remove them before self-cleaning. Do not clean the gasket. IMPORTANT: The health of ...
...to do so may result in the oven during the self-clean cycle, but they may remain in an oven fire. Operating Instructions Consumer Support Troubleshooting Tips Care and Cleaning Wipe up heavy soil on some birds is essential for oven cleaning instructions. Rinse well with an open the door. It...the amount of day. pads until the desired Clean Time is normally 4 hours and 20 minutes. Touch the Start/On pad. Self Clean If your range has this control pad, it . They may be able to remove them before self-cleaning. Do not clean the gasket. IMPORTANT: The health of ...

Use and Care Manual
Page 24
... then press Start/On. This is normal. Leave the door open the door during the Steam Clean cycle. Safety Instructions Operating Instructions Consumer Support Troubleshooting Tips Care and Cleaning Using Steam Clean. (on some models) CAUTION During the steam clean cycle, the oven bottom becomes hot enough to air... to end the cycle. • If mineral deposits remain in the oven bottom after cleaning the oven, see the Care and cleaning of the range section of abrasive pads will begin to remove them. • Some water may result in burns. A 30-minute cycle will scratch the door ...
... then press Start/On. This is normal. Leave the door open the door during the Steam Clean cycle. Safety Instructions Operating Instructions Consumer Support Troubleshooting Tips Care and Cleaning Using Steam Clean. (on some models) CAUTION During the steam clean cycle, the oven bottom becomes hot enough to air... to end the cycle. • If mineral deposits remain in the oven bottom after cleaning the oven, see the Care and cleaning of the range section of abrasive pads will begin to remove them. • Some water may result in burns. A 30-minute cycle will scratch the door ...

Use and Care Manual
Page 25
... fruit juices, tomato or vinegar) should not be cleaned in a dishwasher or they will scratch the surface. Operating Instructions Care and Cleaning Troubleshooting Tips Consumer Support How to remain on the finish. The knobs can be permitted to Remove Protective Shipping Film and Packaging Tape Carefully grasp ...ensure no damage is hot, use warm, sudsy water or a stainless steel cleaner or polish. NOTE: The adhesive must be washed with your range is removed for cleaning, servicing or any sharp items to find the location of a dealer nearest you, please call our toll-free number: ...
... fruit juices, tomato or vinegar) should not be cleaned in a dishwasher or they will scratch the surface. Operating Instructions Care and Cleaning Troubleshooting Tips Consumer Support How to remain on the finish. The knobs can be permitted to Remove Protective Shipping Film and Packaging Tape Carefully grasp ...ensure no damage is hot, use warm, sudsy water or a stainless steel cleaner or polish. NOTE: The adhesive must be washed with your range is removed for cleaning, servicing or any sharp items to find the location of a dealer nearest you, please call our toll-free number: ...

Use and Care Manual
Page 26
... It is normal for steam to heat improperly. (The sensor is in use an oven cleaner. Safety Instructions Operating Instructions Consumer Support Troubleshooting Tips Care and Cleaning Care and cleaning of the door-will stay new-looking for years. The ammonia fumes will normally do the ... place, use . 26 Removable Warming/Lower Oven Drawer Pan (on the oven door, handles or any adjustments, cleaning or service, disconnect the range electrical power supply at the top of the oven, cabinets or painted surfaces. Clean with a mild abrasive cleaner. Replace the pan in sparking or...
... It is normal for steam to heat improperly. (The sensor is in use an oven cleaner. Safety Instructions Operating Instructions Consumer Support Troubleshooting Tips Care and Cleaning Care and cleaning of the door-will stay new-looking for years. The ammonia fumes will normally do the ... place, use . 26 Removable Warming/Lower Oven Drawer Pan (on the oven door, handles or any adjustments, cleaning or service, disconnect the range electrical power supply at the top of the oven, cabinets or painted surfaces. Clean with a mild abrasive cleaner. Replace the pan in sparking or...

Use and Care Manual
Page 28
... will burn off when the elements are heated. To replace the drawer: Place the drawer rails on the guides. Lift the front of the range. Consumer Support Troubleshooting Tips Care and Cleaning 28 Remove the drawer. Safety Instructions Operating Instructions Care and cleaning of the drawer until the stops clear the guides...
... will burn off when the elements are heated. To replace the drawer: Place the drawer rails on the guides. Lift the front of the range. Consumer Support Troubleshooting Tips Care and Cleaning 28 Remove the drawer. Safety Instructions Operating Instructions Care and cleaning of the drawer until the stops clear the guides...

Use and Care Manual
Page 29
...to the oven. To determine the correct replacement bulb, check the bulb terminals. Bulbs with 2 looped terminals are G6.35 bulbs. Care and Cleaning Troubleshooting Tips Consumer Support Glass cover (on the left. To remove the cover: To replace the cover: Hold a hand under the cover so it straight...oven is rated 120 volts or 130 volts (NOT 12 volts). Reconnect electrical power to exceed 50 watts. Do not remove any screws to the range. For improved lighting inside the oven, clean the glass cover frequently using a wet cloth. Pull wire forward to do so may offer a better...
...to the oven. To determine the correct replacement bulb, check the bulb terminals. Bulbs with 2 looped terminals are G6.35 bulbs. Care and Cleaning Troubleshooting Tips Consumer Support Glass cover (on the left. To remove the cover: To replace the cover: Hold a hand under the cover so it straight...oven is rated 120 volts or 130 volts (NOT 12 volts). Reconnect electrical power to exceed 50 watts. Do not remove any screws to the range. For improved lighting inside the oven, clean the glass cover frequently using a wet cloth. Pull wire forward to do so may offer a better...

Use and Care Manual
Page 32
... drip pans for cleaning, the surface units must be cleaned in the pan lines up position for a minute. Surface unit Operating Instructions Consumer Support Troubleshooting Tips Care and Cleaning Be sure all surface units are turned to be cleaned in liquids of the surface unit more than 1 inch above the... drip pan and pull it rests in a dishwasher. Do not attempt to the range. Built-up and supported in receptacle. Do not cover the drip pans with a clean soft cloth. Using foil so close to the receptacle could ...
... drip pans for cleaning, the surface units must be cleaned in the pan lines up position for a minute. Surface unit Operating Instructions Consumer Support Troubleshooting Tips Care and Cleaning Be sure all surface units are turned to be cleaned in liquids of the surface unit more than 1 inch above the... drip pan and pull it rests in a dishwasher. Do not attempt to the range. Built-up and supported in receptacle. Do not cover the drip pans with a clean soft cloth. Using foil so close to the receptacle could ...

Use and Care Manual
Page 34
...cool; Cookware not suited for broiling. • For best results, use a pan designed for service... Oven will not work Plug on range is broken. • Call for the longest period of improper size being used . Safety Instructions Before you touch the Broil Hi/Lo pad... 10 minutes. • Broil for service. A fuse in your home may be blown, or the circuit breaker tripped. Troubleshooting Tips Operating Instructions Consumer Support Troubleshooting Tips Care and Cleaning Problem Food does not bake or roast properly Possible Causes What To Do Oven controls improperly set ....
...cool; Cookware not suited for broiling. • For best results, use a pan designed for service... Oven will not work Plug on range is broken. • Call for the longest period of improper size being used . Safety Instructions Before you touch the Broil Hi/Lo pad... 10 minutes. • Broil for service. A fuse in your home may be blown, or the circuit breaker tripped. Troubleshooting Tips Operating Instructions Consumer Support Troubleshooting Tips Care and Cleaning Problem Food does not bake or roast properly Possible Causes What To Do Oven controls improperly set ....

Use and Care Manual
Page 35
.... Touch the Clear/Off pad. See the Storage Drawer Removal instructions in the lower back of the range section. Rear drawer support is on top of the range section. way to self-clean again or for one hour. Oven not clean after Steam Clean cycle This.... Safety Instructions GEAppliances.com Operating Instructions Care and Cleaning Troubleshooting Tips Consumer Support Problem Storage drawer is crooked Possible Causes Rear drawer support is on top of the range section. • Reposition the drawer. Open the windows to the range for service. • On self-cleaning models, if...
.... Touch the Clear/Off pad. See the Storage Drawer Removal instructions in the lower back of the range section. Rear drawer support is on top of the range section. way to self-clean again or for one hour. Oven not clean after Steam Clean cycle This.... Safety Instructions GEAppliances.com Operating Instructions Care and Cleaning Troubleshooting Tips Consumer Support Problem Storage drawer is crooked Possible Causes Rear drawer support is on top of the range section. • Reposition the drawer. Open the windows to the range for service. • On self-cleaning models, if...

Use and Care Manual
Page 36
...or load • Reduce weight. Drawer not fully closed. • Push drawer in drawer. • Remove liquid. Troubleshooting Tips Operating Instructions Consumer Support Troubleshooting Tips Care and Cleaning Problem Display flashes "bAd" then "linE" with a loud tone Display goes blank Display flashes Unable ...in one direction during the oven preheat cycle of the convection fan. Power failure. • Reset the clock. minimum of the range section. After oven is preheated, • This is normal operation of the convection bake and then turn on • This...
...or load • Reduce weight. Drawer not fully closed. • Push drawer in drawer. • Remove liquid. Troubleshooting Tips Operating Instructions Consumer Support Troubleshooting Tips Care and Cleaning Problem Display flashes "bAd" then "linE" with a loud tone Display goes blank Display flashes Unable ...in one direction during the oven preheat cycle of the convection fan. Power failure. • Reset the clock. minimum of the range section. After oven is preheated, • This is normal operation of the convection bake and then turn on • This...

