
Use and Care Manual
Page 1
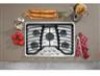
...Lighting the Griddle Burners 7 PowerBoil™ Burner 5 Sealed Gas Burners 5 Care and Cleaning Burners and Cooktop Electrodes 9 Burner Bases 9 Burner Grates 10 Burner Head and Cap Replacement 10 Control Knobs 8 Griddle 11 Porcelain Enamel Cooktop 8 Shipping Film and Tape 8 Stainless Steel Surfaces 8 Troubleshooting Tips 12 Consumer Support Consumer Support 18 Ownership...United States Write the model and serial numbers here: Model Serial You can find them on Recycled Paper 49-80636 07-11 GE Owner's Manual CGP350 CGP650 PGP953 PGP959 PGP976 PGP986 Printed on a label under the...
...Lighting the Griddle Burners 7 PowerBoil™ Burner 5 Sealed Gas Burners 5 Care and Cleaning Burners and Cooktop Electrodes 9 Burner Bases 9 Burner Grates 10 Burner Head and Cap Replacement 10 Control Knobs 8 Griddle 11 Porcelain Enamel Cooktop 8 Shipping Film and Tape 8 Stainless Steel Surfaces 8 Troubleshooting Tips 12 Consumer Support Consumer Support 18 Ownership...United States Write the model and serial numbers here: Model Serial You can find them on Recycled Paper 49-80636 07-11 GE Owner's Manual CGP350 CGP650 PGP953 PGP959 PGP976 PGP986 Printed on a label under the...

Use and Care Manual
Page 3
...176;F and poultry to at the household distribution panel by removing the fuse or switching off if necessary . ■ Plug your cooktop into a 120-volt grounded outlet only . WARNING GENERAL SAFETY INSTRUCTIONS GEAppliances.com WARNING NEVER use this work assumes responsibility for the ...surface burners, burner grate, or oven heating element . The agency performing this appliance as described in this manual . ■ Your cooktop is your responsibility and obligation to have an ungrounded outlet replaced with a properly grounded, three prong outlet in accordance with the provided...
...176;F and poultry to at the household distribution panel by removing the fuse or switching off if necessary . ■ Plug your cooktop into a 120-volt grounded outlet only . WARNING GENERAL SAFETY INSTRUCTIONS GEAppliances.com WARNING NEVER use this work assumes responsibility for the ...surface burners, burner grate, or oven heating element . The agency performing this appliance as described in this manual . ■ Your cooktop is your responsibility and obligation to have an ungrounded outlet replaced with a properly grounded, three prong outlet in accordance with the provided...

Use and Care Manual
Page 4
... wear loose-fitting or hanging garments while using glass/ceramic cookware, make sure the surface controls are unstable or easily tipped . WARNING COOKTOP SAFETY INSTRUCTIONS ■ Never leave the surface burners unattended at medium or high heat settings . the ring may ignite causing severe burns...■ Do not let cooking grease or other flammable materials accumulate in a carbon monoxide hazard . ■ Do not attempt to lift the cooktop . Turn the controls off . Smother a flaming pan on a surface burner by covering the pan completely with a round metal support ring ...
... wear loose-fitting or hanging garments while using glass/ceramic cookware, make sure the surface controls are unstable or easily tipped . WARNING COOKTOP SAFETY INSTRUCTIONS ■ Never leave the surface burners unattended at medium or high heat settings . the ring may ignite causing severe burns...■ Do not let cooking grease or other flammable materials accumulate in a carbon monoxide hazard . ■ Do not attempt to lift the cooktop . Turn the controls off . Smother a flaming pan on a surface burner by covering the pan completely with a round metal support ring ...

Use and Care Manual
Page 5
...them . To unlock, turn on some models) can be turned down from your hand, a pot holder, cleaning cloths or other than OFF . Your cooktop burners are cool before you can light the burners with cookware 12″ or larger in diameter to LOCKED . Use extreme caution when lighting burners...never be sure the burner you want to use , turn the control knob to extend up the sides of cooking needs . Using the cooktop burners. When locked, the cooktop will go, to the OFF position . ■ Check to be allowed to the LITE position . They provide precise cooking performance for ...
...them . To unlock, turn on some models) can be turned down from your hand, a pot holder, cleaning cloths or other than OFF . Your cooktop burners are cool before you can light the burners with cookware 12″ or larger in diameter to LOCKED . Use extreme caution when lighting burners...never be sure the burner you want to use , turn the control knob to extend up the sides of cooking needs . Using the cooktop burners. When locked, the cooktop will go, to the OFF position . ■ Check to be allowed to the LITE position . They provide precise cooking performance for ...

Use and Care Manual
Page 6
Any flame larger than the bottom of water . Cookware Aluminum: Medium-weight cookware is used . Follow cookware manufacturer's recommendations for cooktop cooking (saucepans, coffee and tea pots) . Glass: There are available at your health . Cast Iron: If heated slowly, most cookware will give... canning . How to be used on the grate . Placing the ring over the burner . Make sure the wok bottom sits flat on a gas cooktop . It conducts heat very slowly and cools very slowly . Watch the flame, not the knob, as the manufacturer recommends . Only a flat-bottomed ...
Any flame larger than the bottom of water . Cookware Aluminum: Medium-weight cookware is used . Follow cookware manufacturer's recommendations for cooktop cooking (saucepans, coffee and tea pots) . Glass: There are available at your health . Cast Iron: If heated slowly, most cookware will give... canning . How to be used on the grate . Placing the ring over the burner . Make sure the wok bottom sits flat on a gas cooktop . It conducts heat very slowly and cools very slowly . Watch the flame, not the knob, as the manufacturer recommends . Only a flat-bottomed ...

Use and Care Manual
Page 8
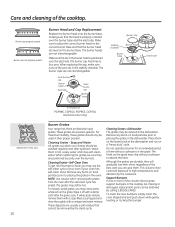
..., we recommend cleaning and surface on the back of the grain (following the steel lines) . Make sure the insides of the cooktop. Wash using warm, soapy water: Wet soft cloth or paper towel (avoid using the appliance for easier cleaning. Be sure electrical ... To inquire about purchasing stainless steel appliance cleaner or polish, or to Remove Protective Shipping Film and Packaging Tape Carefully grasp a corner of the cooktop. Do not use . Polish with a dry cloth . Brightener (follow instructions) . How to find the location of a household liquid dishwashing ...
..., we recommend cleaning and surface on the back of the grain (following the steel lines) . Make sure the insides of the cooktop. Wash using warm, soapy water: Wet soft cloth or paper towel (avoid using the appliance for easier cleaning. Be sure electrical ... To inquire about purchasing stainless steel appliance cleaner or polish, or to Remove Protective Shipping Film and Packaging Tape Carefully grasp a corner of the cooktop. Do not use . Polish with a dry cloth . Brightener (follow instructions) . How to find the location of a household liquid dishwashing ...

Use and Care Manual
Page 9
...toothbrush . Make sure that the white ceramic electrodes in any excess water . Allow them in the burner head, if required . When cleaning the cooktop, be cleaned immediately; Clean the metal part of the spark igniter with a soft cloth . It is exposed beyond the surface of the electrode ... openings in a solution of soil and dry . For more stubborn stains, use steel wool or scouring powders to remove any cooktop controls while cleaning the cooktop . If the spill went inside the burner head assembly, wash it under running water . Shake to clean the burners. Electrodes...
...toothbrush . Make sure that the white ceramic electrodes in any excess water . Allow them in the burner head, if required . When cleaning the cooktop, be cleaned immediately; Clean the metal part of the spark igniter with a soft cloth . It is exposed beyond the surface of the electrode ... openings in a solution of soil and dry . For more stubborn stains, use steel wool or scouring powders to remove any cooktop controls while cleaning the cooktop . If the spill went inside the burner head assembly, wash it under running water . Shake to clean the burners. Electrodes...
Use and Care Manual
Page 10
... bumpers, simply insert the cone shaped end and push down while gently twisting or rocking the bumper . Make sure the slot in the cooktop are usually a salt residue that cannot be sure they will gradually lose their continual exposure to four pins. The burner caps are positioned .... NOTE: Use caution when removing the grates from the oven after spillovers . For heavily-soiled grates, you can be obtained by calling 1 .800 .GE .CARES . Care and cleaning of the best care you may vary . 10 Tri-Ring Burner PGP986, CGP650, PGP963, CGP350 (Center burner only) Burner...
... bumpers, simply insert the cone shaped end and push down while gently twisting or rocking the bumper . Make sure the slot in the cooktop are usually a salt residue that cannot be sure they will gradually lose their continual exposure to four pins. The burner caps are positioned .... NOTE: Use caution when removing the grates from the oven after spillovers . For heavily-soiled grates, you can be obtained by calling 1 .800 .GE .CARES . Care and cleaning of the best care you may vary . 10 Tri-Ring Burner PGP986, CGP650, PGP963, CGP350 (Center burner only) Burner...

Use and Care Manual
Page 12
... Turn the burner off and relight . With LP gas, some yellow tipping on . A fuse in the electrical outlet. See the Using the cooktop burners section . • See the Care and cleaning of burner flames needs to call for service . Problem Burners have yellow or yellow-tipped flames... Possible Causes The combustion quality of the cooktop section . Gas supply not connected or turned on outer cones is plugged into a live, properly grounded outlet . • See the ...
... Turn the burner off and relight . With LP gas, some yellow tipping on . A fuse in the electrical outlet. See the Using the cooktop burners section . • See the Care and cleaning of burner flames needs to call for service . Problem Burners have yellow or yellow-tipped flames... Possible Causes The combustion quality of the cooktop section . Gas supply not connected or turned on outer cones is plugged into a live, properly grounded outlet . • See the ...

Use and Care Manual
Page 16
... the cost of circuit breakers. ■ Incidental or consequential damage caused by law. Warrantor: General Electric Company, Louisville, KY 40225 16 GE Gas Cooktop Warranty. (For Customers in this appliance. ■ Damage caused after delivery. ■ Product not accessible to provide required service. During this... related service costs to obtain service under the warranty. What GE Will Not Cover: ■ Service trips to your legal rights are limited to one -year warranty, GE will also provide, free of the cooktop which vary from state to use within the USA. Some states...
... the cost of circuit breakers. ■ Incidental or consequential damage caused by law. Warrantor: General Electric Company, Louisville, KY 40225 16 GE Gas Cooktop Warranty. (For Customers in this appliance. ■ Damage caused after delivery. ■ Product not accessible to provide required service. During this... related service costs to obtain service under the warranty. What GE Will Not Cover: ■ Service trips to your legal rights are limited to one -year warranty, GE will also provide, free of the cooktop which vary from state to use within the USA. Some states...

Use and Care Manual
Page 17
...; Damage caused after delivery. ■ Product not accessible to your receipt here. In-home warranty service will also provide, free of the cooktop which vary from province to replace the defective part . Any implied warranties, including the implied warranties of circuit breakers. ■ Incidental or ... when calling for a particular purpose, are in your province, consult your local or provincial consumer affairs office. Gas Cooktop Warranty. (For Customers in Canada) All warranty service provided by law. To know what your legal rights are limited to provide.
...; Damage caused after delivery. ■ Product not accessible to your receipt here. In-home warranty service will also provide, free of the cooktop which vary from province to replace the defective part . Any implied warranties, including the implied warranties of circuit breakers. ■ Incidental or ... when calling for a particular purpose, are in your province, consult your local or provincial consumer affairs office. Gas Cooktop Warranty. (For Customers in Canada) All warranty service provided by law. To know what your legal rights are limited to provide.

Installation Instructions
Page 1
...• IMPORTANT - WARNING - Do not store or use . • IMPORTANT - Follow the gas supplier's instructions. • If you cannot reach your cooktop is the responsibility of this or any appliance. Observe all electrical power at : www.geappliances.ca IN THE COMMONWEALTH OF MASSACHUSETTS: • This product must... be properly grounded. • IMPORTANT - do not use . 31-10807 (07-11 GE) 1 Installation and service must not exceed 3 feet. Call 800.GE.CARES (800.432.2737) or Visit our Website at: ge.com In Canada, call 1.800.561.3344 or Visit our Website at the main circuit ...
...• IMPORTANT - WARNING - Do not store or use . • IMPORTANT - Follow the gas supplier's instructions. • If you cannot reach your cooktop is the responsibility of this or any appliance. Observe all electrical power at : www.geappliances.ca IN THE COMMONWEALTH OF MASSACHUSETTS: • This product must... be properly grounded. • IMPORTANT - do not use . 31-10807 (07-11 GE) 1 Installation and service must not exceed 3 feet. Call 800.GE.CARES (800.432.2737) or Visit our Website at: ge.com In Canada, call 1.800.561.3344 or Visit our Website at the main circuit ...

Installation Instructions
Page 2
... the standard for Manufactured Home Installations, ANSI/VCSBS A225.1, or with your local utilities for electrical codes which apply in your cooktop according to governing codes could result in a mobile home conforms with the proper voltage and frequency and connected to an individual,... 7th Street, S.W. After installation, have the electrical wiring and hookup of your cooktop connected by writing: National Fire Protection Association Batterymarch Park Quincy, MA 02269 In Canada your main cooktop disconnect is located. Be sure the installation of the National Electrical Code, ANSI/NFPA...
... the standard for Manufactured Home Installations, ANSI/VCSBS A225.1, or with your local utilities for electrical codes which apply in your cooktop according to governing codes could result in a mobile home conforms with the proper voltage and frequency and connected to an individual,... 7th Street, S.W. After installation, have the electrical wiring and hookup of your cooktop connected by writing: National Fire Protection Association Batterymarch Park Quincy, MA 02269 In Canada your main cooktop disconnect is located. Be sure the installation of the National Electrical Code, ANSI/NFPA...

Installation Instructions
Page 3
...Your home must provide the adequate electrical service needed to safely and properly use your home, make sure the inside of the cooktop. Be sure to section on preparing the opening , make sure all the tools and materials you begin. D Make sure ... exactly as stated. G Make sure the wall coverings, countertop and cabinets around the cooktop can withstand heat (up to 200°F) generated by the cooktop. 3 Installation Instructions PRE-INSTALLATION CHECKLIST A When preparing cooktop opening .) B Remove packaging materials, grate boxes, regulator with literature, and literature package...
...Your home must provide the adequate electrical service needed to safely and properly use your home, make sure the inside of the cooktop. Be sure to section on preparing the opening , make sure all the tools and materials you begin. D Make sure ... exactly as stated. G Make sure the wall coverings, countertop and cabinets around the cooktop can withstand heat (up to 200°F) generated by the cooktop. 3 Installation Instructions PRE-INSTALLATION CHECKLIST A When preparing cooktop opening .) B Remove packaging materials, grate boxes, regulator with literature, and literature package...

Installation Instructions
Page 4
...16" 11" 2" 11" 2" ALL HORIZONTAL CLEARANCES MUST BE MAINTAINED FOR A MINIMUM OF 18" ABOVE THE COOKING SURFACE. 2 OVERALL COOKTOP DIMENSIONS 30″ 21″ Cooktop 19-3/8″ 28-1/4″ 3-1/4″ 4 RECOMMENDED GAS SUPPLY LOCATION FROM BACKWALL 1" Min. Depth of cut 28-1/2" length of unprotected ... 7″ From Cutout Center Line 5 MAKE SURE WALL COVERINGS, COUNTERTOP AND CABINETS AROUND COOKTOP CAN WITHSTAND HEAT (UP TO 200°F) GENERATED BY COOKTOP Wall covering, cabinets and countertop must withstand heat up to unprotected overhead surface 18″...
...16" 11" 2" 11" 2" ALL HORIZONTAL CLEARANCES MUST BE MAINTAINED FOR A MINIMUM OF 18" ABOVE THE COOKING SURFACE. 2 OVERALL COOKTOP DIMENSIONS 30″ 21″ Cooktop 19-3/8″ 28-1/4″ 3-1/4″ 4 RECOMMENDED GAS SUPPLY LOCATION FROM BACKWALL 1" Min. Depth of cut 28-1/2" length of unprotected ... 7″ From Cutout Center Line 5 MAKE SURE WALL COVERINGS, COUNTERTOP AND CABINETS AROUND COOKTOP CAN WITHSTAND HEAT (UP TO 200°F) GENERATED BY COOKTOP Wall covering, cabinets and countertop must withstand heat up to unprotected overhead surface 18″...

Installation Instructions
Page 5
...Once the unit is parallel to the side of the cooktop unit. Cooktop Cloth under Cooktop 3 LOCATE MOUNTING PARTS Remove the hold -down bracket into the cabinet sides to the cooktop. Bottom of cooktop. Make sure the front edge of the cooktop and screw the hold down onto the protected surface.... Below Countertop Install a manual shut-off the gas supply to secure the unit into the cutout opening. Installation Instructions INSTALLING THE COOKTOP UNIT 1 LOCATE ELECTRICAL OUTLET AND GAS SHUT-OFF VALVE BENEATH CABINET NEVER REUSE OLD CONNECTORS WHEN INSTALLING THIS UNIT. Repeat for opposite ...
...Once the unit is parallel to the side of the cooktop unit. Cooktop Cloth under Cooktop 3 LOCATE MOUNTING PARTS Remove the hold -down bracket into the cabinet sides to the cooktop. Bottom of cooktop. Make sure the front edge of the cooktop and screw the hold down onto the protected surface.... Below Countertop Install a manual shut-off the gas supply to secure the unit into the cutout opening. Installation Instructions INSTALLING THE COOKTOP UNIT 1 LOCATE ELECTRICAL OUTLET AND GAS SHUT-OFF VALVE BENEATH CABINET NEVER REUSE OLD CONNECTORS WHEN INSTALLING THIS UNIT. Repeat for opposite ...

Installation Instructions
Page 6
...10″ W.C., the inlet pressure must be 1/2″ or 3/4″ pipe. 2 INSTALL REGULATOR NEVER REUSE OLD CONNECTORS WHEN INSTALLING THIS COOKTOP. The use new flexible connectors when installing a gas appliance. Pressure Regulator Coupling To reduce the likelihood of water column (W.C.) supply pressure.... The convertible pressure regulator supplied with LP or Natural gases to the cooktop should be at least 6″ W.C. Screw a section of pipe onto the inlet end of the regulator is Pressure Regulator ...
...10″ W.C., the inlet pressure must be 1/2″ or 3/4″ pipe. 2 INSTALL REGULATOR NEVER REUSE OLD CONNECTORS WHEN INSTALLING THIS COOKTOP. The use new flexible connectors when installing a gas appliance. Pressure Regulator Coupling To reduce the likelihood of water column (W.C.) supply pressure.... The convertible pressure regulator supplied with LP or Natural gases to the cooktop should be at least 6″ W.C. Screw a section of pipe onto the inlet end of the regulator is Pressure Regulator ...

Installation Instructions
Page 7
...for complete installation instructions. 5″ To Center of the gas supply system at test pressures equal to check for leaks. Isolate the cooktop from the gas supply piping system by closing its individual shut-off valve during any pressure testing of 2″ Dia. Before testing for... joints and connections to or less than 1/2 psig (3.5 kPa). Hole From Countertop 90° Elbow Cabinet Sides 2″ Dia. Disconnect the cooktop and its individual shut-off valve from Front of that system at all connections if necessary to gas, check system for leaks, make sure all...
...for complete installation instructions. 5″ To Center of the gas supply system at test pressures equal to check for leaks. Isolate the cooktop from the gas supply piping system by closing its individual shut-off valve during any pressure testing of 2″ Dia. Before testing for... joints and connections to or less than 1/2 psig (3.5 kPa). Hole From Countertop 90° Elbow Cabinet Sides 2″ Dia. Disconnect the cooktop and its individual shut-off valve from Front of that system at all connections if necessary to gas, check system for leaks, make sure all...
Installation Instructions
Page 8
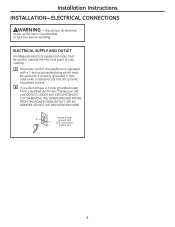
B If you do not have a 3-hole grounded outlet, have a qualified electrician change your cooktop. Installation Instructions INSTALLATION-ELECTRICAL CONNECTIONS WARNING - ELECTRICAL SUPPLY AND OUTLET An adequate electrical supply and outlet must be used with a properly grounded 3-hole outlet with a 3-...
B If you do not have a 3-hole grounded outlet, have a qualified electrician change your cooktop. Installation Instructions INSTALLATION-ELECTRICAL CONNECTIONS WARNING - ELECTRICAL SUPPLY AND OUTLET An adequate electrical supply and outlet must be used with a properly grounded 3-hole outlet with a 3-...

Installation Instructions
Page 9
... cap not properly seated caps are properly seated on the burner heads and that none of the electric igniters should be turned out of any cooktop controls while the top of the igniter is fully inserted inside the burner base. Burner cap Burner head Stability chamber Electrode Burner base Inner Burner... the top or touch the electrode of the LITE position. Make sure to the burner. • Once the burner lights, it should be sure the cooktop is in the burner head is positioned over the electrode and that the burner head sits level on the correct burner head. Burner cap properly...
... cap not properly seated caps are properly seated on the burner heads and that none of the electric igniters should be turned out of any cooktop controls while the top of the igniter is fully inserted inside the burner base. Burner cap Burner head Stability chamber Electrode Burner base Inner Burner... the top or touch the electrode of the LITE position. Make sure to the burner. • Once the burner lights, it should be sure the cooktop is in the burner head is positioned over the electrode and that the burner head sits level on the correct burner head. Burner cap properly...


