
Use and Care Manual
Page 1
... 5 Sealed Gas Burners 5 Care and Cleaning Burners and Cooktop Electrodes 9 Burner Bases 9 Burner Grates 10 Burner Head and Cap Replacement 10 Control Knobs 8 Griddle 11 Porcelain Enamel Cooktop 8 Shipping Film and Tape 8 Stainless Steel Surfaces 8 Troubleshooting Tips 12 Consumer Support Consumer Support 18 Ownership Registration for Customers in Canada...the United States Write the model and serial numbers here: Model Serial You can find them on Recycled Paper 49-80636 07-11 GE Owner's Manual CGP350 CGP650 PGP953 PGP959 PGP976 PGP986 Printed on a label under the cooktop.
... 5 Sealed Gas Burners 5 Care and Cleaning Burners and Cooktop Electrodes 9 Burner Bases 9 Burner Grates 10 Burner Head and Cap Replacement 10 Control Knobs 8 Griddle 11 Porcelain Enamel Cooktop 8 Shipping Film and Tape 8 Stainless Steel Surfaces 8 Troubleshooting Tips 12 Consumer Support Consumer Support 18 Ownership Registration for Customers in Canada...the United States Write the model and serial numbers here: Model Serial You can find them on Recycled Paper 49-80636 07-11 GE Owner's Manual CGP350 CGP650 PGP953 PGP959 PGP976 PGP986 Printed on a label under the cooktop.

Use and Care Manual
Page 7
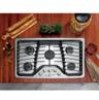
...How to the first LITE position . After the left rear burner down and turn the control knob to Insert the Griddle This griddle can only be used for an extended time. 7 Preseasoned Griddle for Models PGP959, PGP986, CGP350, CGP650 Type of the black rubber bumpers . Med Hot Sandwiches (such as ... Warming Tortillas none Med-Low Pancakes Hi - 6 min . Spilled grease may result in fire. Place and remove the griddle only when all grates and griddle are cool and all surface units are turned OFF. Med-Hi Breakfast Sausage Links Med - 5 min . Once the left grate ...
...How to the first LITE position . After the left rear burner down and turn the control knob to Insert the Griddle This griddle can only be used for an extended time. 7 Preseasoned Griddle for Models PGP959, PGP986, CGP350, CGP650 Type of the black rubber bumpers . Med Hot Sandwiches (such as ... Warming Tortillas none Med-Low Pancakes Hi - 6 min . Spilled grease may result in fire. Place and remove the griddle only when all grates and griddle are cool and all surface units are turned OFF. Med-Hi Breakfast Sausage Links Med - 5 min . Once the left grate ...
Use and Care Manual
Page 11
...of cooking spray or vegetable oil while the griddle is cool . NOTE: Do not clean the griddle in the dishwasher . GEAppliances.com Cast-Iron Griddle (on " food soil . ■ After cooking, clean the griddle with a stiff brush and hot water . Clean under the griddle as soon as it can be a ...), and dry thoroughly . ■ Before cooking, prepare the surface with cooking spray or vegetable oil . Griddle Precautions ■ If something has spilled under the griddle as possible to accumulate under the griddle, it should be cleaned up as soon as it is hot . ■ Store in a cool, dry...
...of cooking spray or vegetable oil while the griddle is cool . NOTE: Do not clean the griddle in the dishwasher . GEAppliances.com Cast-Iron Griddle (on " food soil . ■ After cooking, clean the griddle with a stiff brush and hot water . Clean under the griddle as soon as it can be a ...), and dry thoroughly . ■ Before cooking, prepare the surface with cooking spray or vegetable oil . Griddle Precautions ■ If something has spilled under the griddle as possible to accumulate under the griddle, it should be cleaned up as soon as it is hot . ■ Store in a cool, dry...

Installation Instructions
Page 14
...BURNER ORIFICES (CONT.) LEFT FRONT BURNER (PGP986 and CGP650 Models) Orifice spuds located through these openings. E Return the natural gas orifices and griddle screw to the bracket and attach the bracket and the instruction sheet to the right of the center of the burner, while the...precise locations as noted in the center of the burner. Main Orifice Tall V Main Orifice V Tall V Simmer Orifice V Tall Main Orifice Griddle Screw The griddle screw is located to the pressure regulator using the screw removed previously. F Replace the burner bases, heads, caps and top grates. 14
...BURNER ORIFICES (CONT.) LEFT FRONT BURNER (PGP986 and CGP650 Models) Orifice spuds located through these openings. E Return the natural gas orifices and griddle screw to the bracket and attach the bracket and the instruction sheet to the right of the center of the burner, while the...precise locations as noted in the center of the burner. Main Orifice Tall V Main Orifice V Tall V Simmer Orifice V Tall Main Orifice Griddle Screw The griddle screw is located to the pressure regulator using the screw removed previously. F Replace the burner bases, heads, caps and top grates. 14

Installation Instructions
Page 15
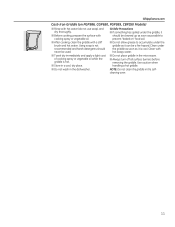
... adjustment screw burner and one for your name, organization and date conversion was made. The griddle burner (PGP986 and CGP650) has 2 adjustment screws, one for the left rear For left front burner during griddle control. If the flame goes out at the "HI" position. If the flame is ... valve more than the original setting. • If the flames blew away from "HI" to the lowest setting while observing the flame. Griddle Inside stem control must be turned to alert others know the appliance is rotated counterclockwise. Turn the knob from the burner, close the cabinet ...
... adjustment screw burner and one for your name, organization and date conversion was made. The griddle burner (PGP986 and CGP650) has 2 adjustment screws, one for the left rear For left front burner during griddle control. If the flame goes out at the "HI" position. If the flame is ... valve more than the original setting. • If the flames blew away from "HI" to the lowest setting while observing the flame. Griddle Inside stem control must be turned to alert others know the appliance is rotated counterclockwise. Turn the knob from the burner, close the cabinet ...