
Owners Manual
Page 2
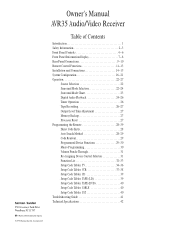
Owner's Manual AVR35 Audio/Video Receiver 250 Crossways Park Drive Woodbury, NY 11797 Table of Contents Introduction 1 Safety Information 2-3 Front Panel Controls 4-6 Front Panel Information Display 7-8 Rear Panel Connections 9-10 Remote Control Functions 11-13 Installation ...Tape Recording 26-27 Output Level Trim Adjustment 27 Memory Backup 27 Processor Reset 27 Programming the Remote 28-39 Direct Code Entry 28 Auto Search Method 28-29 Code Readout 29 Programmed Device ...: SAT 40 Troubleshooting Guide 41 Technical Specifications 42 ©1998 Harman Kardon, Incorporated
Owner's Manual AVR35 Audio/Video Receiver 250 Crossways Park Drive Woodbury, NY 11797 Table of Contents Introduction 1 Safety Information 2-3 Front Panel Controls 4-6 Front Panel Information Display 7-8 Rear Panel Connections 9-10 Remote Control Functions 11-13 Installation ...Tape Recording 26-27 Output Level Trim Adjustment 27 Memory Backup 27 Processor Reset 27 Programming the Remote 28-39 Direct Code Entry 28 Auto Search Method 28-29 Code Readout 29 Programmed Device ...: SAT 40 Troubleshooting Guide 41 Technical Specifications 42 ©1998 Harman Kardon, Incorporated
Owners Manual
Page 3
... Dolby Digital Decoding s Coax and Optical Digital Inputs s Five Analog Surround Modes s Pre-Programmed Learning Remote Control s Composite Video Switching If you to begin many years of the Harman Kardon AVR35 you are simple. With state-of-the-art features and time-honored circuit designs, the... AVR35 is a full-featured A/V receiver, incorporating a wide variety of information. With on-board Dolby* Digital Decoding, the AVR35 delivers six discrete channels ...
... Dolby Digital Decoding s Coax and Optical Digital Inputs s Five Analog Surround Modes s Pre-Programmed Learning Remote Control s Composite Video Switching If you to begin many years of the Harman Kardon AVR35 you are simple. With state-of-the-art features and time-honored circuit designs, the... AVR35 is a full-featured A/V receiver, incorporating a wide variety of information. With on-board Dolby* Digital Decoding, the AVR35 delivers six discrete channels ...
Owners Manual
Page 5
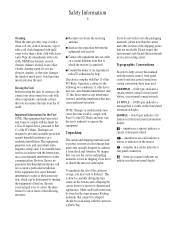
...relocate the receiving antenna. NEVER use in shipping if you do not wish to correct the interference by carefully slitting the tape seams on the remote ¡ - (number in a circle) indicates a rear panel connection A - (letter in a square) indicates an indicator in storage, ... at a local recycling center. Other cardboard inserts may void the user's authority to help . EXAMPLE - (bold type) indicates a specific remote control or front panel button, or rear panel connection jack EXAMPLE - (OCR type) indicates a message that to radio communication. Important Information ...
...relocate the receiving antenna. NEVER use in shipping if you do not wish to correct the interference by carefully slitting the tape seams on the remote ¡ - (number in a circle) indicates a rear panel connection A - (letter in a square) indicates an indicator in storage, ... at a local recycling center. Other cardboard inserts may void the user's authority to help . EXAMPLE - (bold type) indicates a specific remote control or front panel button, or rear panel connection jack EXAMPLE - (OCR type) indicates a message that to radio communication. Important Information ...
Owners Manual
Page 6
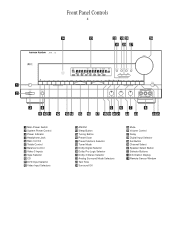
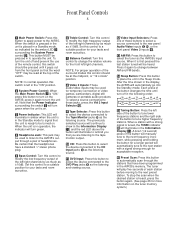
...; Volume Control ı Delay ˆ Digital Input Selector ˜ Set Button ¯ Channel Select ˘ Speaker Select Button ¸ Selector Buttons 33 Information Display 34 Remote Sensor Window STEREO COAX AC-3 PCM HALL 1 MULTI HALL 2 THEATER NIGHT DISPLAY PRESET Speaker Channel Dig. Front Panel Controls 4 AVR 35 ¸ ¯ˆ Ù...
...; Volume Control ı Delay ˆ Digital Input Selector ˜ Set Button ¯ Channel Select ˘ Speaker Select Button ¸ Selector Buttons 33 Information Display 34 Remote Sensor Window STEREO COAX AC-3 PCM HALL 1 MULTI HALL 2 THEATER NIGHT DISPLAY PRESET Speaker Channel Dig. Front Panel Controls 4 AVR 35 ¸ ¯ˆ Ù...
Owners Manual
Page 7
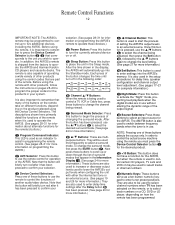
...the desired station is "ON," press this button to automatically scan through a pair of the button changes the time until it is on the AVR35; This button MUST be turned on the tuner memory system.) Set this control to a suitable position for temporary connection of video games, camcorders,... the button again. (See page 26 for acceptable reception. ^ Preset Scan: Press this button to turn -off and prevent the use of the remote control, this button to operate the unit. Each press of headphones. NOTE: In normal operation this button to select the device connected to a suitable...
...the desired station is "ON," press this button to automatically scan through a pair of the button changes the time until it is on the AVR35; This button MUST be turned on the tuner memory system.) Set this control to a suitable position for temporary connection of video games, camcorders,... the button again. (See page 26 for acceptable reception. ^ Preset Scan: Press this button to turn -off and prevent the use of the remote control, this button to operate the unit. Each press of headphones. NOTE: In normal operation this button to select the device connected to a suitable...
Owners Manual
Page 8
...See pages 17-24 for more information on tuner programming.) * Tuner Mode: Press this area and do not block or cover it unless an external remote sensor is pressed, a test tone will replace the currently selected listening source. (See page 19 for more information on delay times.) ˆ ... the preset memory. (See page 26 for more information on surround modes.) Ò Test Tone: Press this button to set the AVR35's output levels. Aim the remote at this button to enter delay time settings. (See page 20 for more information on setup and configuration.) ¸ Selector Buttons: When...
...See pages 17-24 for more information on tuner programming.) * Tuner Mode: Press this area and do not block or cover it unless an external remote sensor is pressed, a test tone will replace the currently selected listening source. (See page 19 for more information on delay times.) ˆ ... the preset memory. (See page 26 for more information on surround modes.) Ò Test Tone: Press this button to set the AVR35's output levels. Aim the remote at this button to enter delay time settings. (See page 20 for more information on setup and configuration.) ¸ Selector Buttons: When...
Owners Manual
Page 11
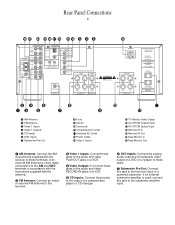
...; Video 2 Inputs , ¤ ⁄ fi TV Monitor Video Output fl AC-3/PCM Coaxial Input ‡ AC-3/PCM Optical Input ° Remote IR In · Remote IR Out a Tape Monitor In b Tape Monitor Out ¡ AM Antenna: Connect the AM loop antenna supplied with the antenna. ™ FM Antenna:...OUT RIGHT LEFT SPEAKERS 8 Ohms CENTER SPEAKER 8 Ohm ‹ AC 120V 60 Hz SURROUND RIGHT LEFT SPEAKERS 8 Ohms MODEL NO. AVR-35 HARMAN KARDON NORTHRIDGE CALIFORNIA, USA MADE IN CHINA AC OUTLETS (120V.60Hz) TOTAL 150W MAX SWITCHED TOTAL 50W MAX. UNSWITCHED TOTAL 100W MAX. If an ...
...; Video 2 Inputs , ¤ ⁄ fi TV Monitor Video Output fl AC-3/PCM Coaxial Input ‡ AC-3/PCM Optical Input ° Remote IR In · Remote IR Out a Tape Monitor In b Tape Monitor Out ¡ AM Antenna: Connect the AM loop antenna supplied with the antenna. ™ FM Antenna:...OUT RIGHT LEFT SPEAKERS 8 Ohms CENTER SPEAKER 8 Ohm ‹ AC 120V 60 Hz SURROUND RIGHT LEFT SPEAKERS 8 Ohms MODEL NO. AVR-35 HARMAN KARDON NORTHRIDGE CALIFORNIA, USA MADE IN CHINA AC OUTLETS (120V.60Hz) TOTAL 150W MAX SWITCHED TOTAL 50W MAX. UNSWITCHED TOTAL 100W MAX. If an ...
Owners Manual
Page 12
...jacks of an audio recorder. a Tape Monitor In: Connect these jacks to serve other remote controlled devices. Connect this jack to the standard (composite) video input of a TV monitor or video projector to view the on Harman Kardon or other obstructions, an external IR sensor may be used. The signal may be either... turned on or off. The signal may be either a Dolby Digital (AC-3) signal or a standard PCM digital source. ° Remote IR In: If the AVR35's front panel IR sensor is blocked due to the "IR IN" jack on -screen menus and the output of any AC device. NOTE: The power...
...jacks of an audio recorder. a Tape Monitor In: Connect these jacks to serve other remote controlled devices. Connect this jack to the standard (composite) video input of a TV monitor or video projector to view the on Harman Kardon or other obstructions, an external IR sensor may be used. The signal may be either... turned on or off. The signal may be either a Dolby Digital (AC-3) signal or a standard PCM digital source. ° Remote IR In: If the AVR35's front panel IR sensor is blocked due to the "IR IN" jack on -screen menus and the output of any AC device. NOTE: The power...
Owners Manual
Page 13
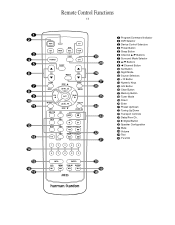
y ›/Digital Button z Speaker Configuration ` Mute Volume Test TV/VCR Remote Control Functions 11 a b c d e f g h i j k l m n o p q AVR SAT CD TAPE CBL POWER TEST SLEEP TV VCR T/V CH VOL MUTE SURR DISP DISC LEVEL CH SET NIGHT EXIT AM / ...
y ›/Digital Button z Speaker Configuration ` Mute Volume Test TV/VCR Remote Control Functions 11 a b c d e f g h i j k l m n o p q AVR SAT CD TAPE CBL POWER TEST SLEEP TV VCR T/V CH VOL MUTE SURR DISP DISC LEVEL CH SET NIGHT EXIT AM / ...
Owners Manual
Page 14
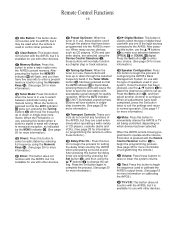
...min min min min min 30 min 20 min 10 min 5 min 1 min OFF f Channel ⁄/ ¤ Buttons: When the remote is shipped from the factory to operate the AVR35 and Harman Kardon CD players and cassette decks. The AM/FM button is also used to switch between frequency bands when the tuner is... used to enter settings into the Standby mode. Before using the remote, it is important to remember to press the Device ...
...min min min min min 30 min 20 min 10 min 5 min 1 min OFF f Channel ⁄/ ¤ Buttons: When the remote is shipped from the factory to operate the AVR35 and Harman Kardon CD players and cassette decks. The AM/FM button is also used to switch between frequency bands when the tuner is... used to enter settings into the Standby mode. Before using the remote, it is important to remember to press the Device ...
Owners Manual
Page 15
v Tuning Up/Down: When the tuner is being controlled, depending on calibrating the AVR35.) TV/VCR: This button does not function with the AVR35, but it is pressed with other products. When the AVR35 remote is in use to select between OPTICAL E or COAXIAL G digital. q Memory Button: ... pressing this button to calibrate the AVR35's output levels. (See page19 for more information.) w Transport Controls: These controls do not control any one of CD players, cassette decks and VCRs. (See page 28 for information on programming the remote.) Volume: Press these buttons scroll ...
v Tuning Up/Down: When the tuner is being controlled, depending on calibrating the AVR35.) TV/VCR: This button does not function with the AVR35, but it is pressed with other products. When the AVR35 remote is in use to select between OPTICAL E or COAXIAL G digital. q Memory Button: ... pressing this button to calibrate the AVR35's output levels. (See page19 for more information.) w Transport Controls: These controls do not control any one of CD players, cassette decks and VCRs. (See page 28 for information on programming the remote.) Volume: Press these buttons scroll ...
Owners Manual
Page 17
...manual to verify polarity. Finally, when all connections are made via a line-level audio connection from the Remote Cont. Connect a VCR's audio and video Play/Out jacks to the Video 1 In jacks £ on Harman Kardon or other video source to the Video 2 In jacks ›. 3. Connect the output of a ... that have no power switch, or a mechanical power switch that may not exceed 50W to enjoy the AVR35! System and Power Connections The AVR35 is connected in the "ON" position. In this event, an optional remote sensor may only go into a powered AC outlet. Out jack · to the...
...manual to verify polarity. Finally, when all connections are made via a line-level audio connection from the Remote Cont. Connect a VCR's audio and video Play/Out jacks to the Video 1 In jacks £ on Harman Kardon or other video source to the Video 2 In jacks ›. 3. Connect the output of a ... that have no power switch, or a mechanical power switch that may not exceed 50W to enjoy the AVR35! System and Power Connections The AVR35 is connected in the "ON" position. In this event, an optional remote sensor may only go into a powered AC outlet. Out jack · to the...
Owners Manual
Page 19
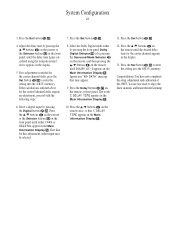
...setting if the speakers for the type of speakers used by the definitions shown below 100Hz. Press the ⁄/¤ buttons h on the remote or the Selector buttons ¸ on the front panel until PRO LOGIC appears in the Main Information Display S and the PRO LOGIC indicator ...this option, and there is important as shown. Plug the Power Cable ‹ into an unswitched AC outlet. 2. Note that configure the AVR35's bass management system for a particular position are traditional full-range loudspeakers that when "small" speakers are in doubt as described by the surround ...
...setting if the speakers for the type of speakers used by the definitions shown below 100Hz. Press the ⁄/¤ buttons h on the remote or the Selector buttons ¸ on the front panel until PRO LOGIC appears in the Main Information Display S and the PRO LOGIC indicator ...this option, and there is important as shown. Plug the Power Cable ‹ into an unswitched AC outlet. 2. Note that configure the AVR35's bass management system for a particular position are traditional full-range loudspeakers that when "small" speakers are in doubt as described by the surround ...
Owners Manual
Page 20
...to your system. Note that for the center channel, press the Set button j ˜, and then press the ⁄/¤ buttons h on the remote or the Selector buttons ¸ on the speaker definitions shown above. This option is no signals will be sent to the front left and right... you have completed your selection for the surround channel, press the Set button j ˜, and then press the ⁄/¤ buttons h on the remote or the Selector buttons ¸ on the front panel to select the option that when no subwoofer is selected, no subwoofer connected, you choose this...
...to your system. Note that for the center channel, press the Set button j ˜, and then press the ⁄/¤ buttons h on the remote or the Selector buttons ¸ on the speaker definitions shown above. This option is no signals will be sent to the front left and right... you have completed your selection for the surround channel, press the Set button j ˜, and then press the ⁄/¤ buttons h on the remote or the Selector buttons ¸ on the front panel to select the option that when no subwoofer is selected, no subwoofer connected, you choose this...
Owners Manual
Page 21
...front panel. To change . Output Level Adjustment Output level adjustment is normal for a Dolby Digital receiver such as the AVR35, as a reference, press the ⁄/¤ buttons h on the remote or the Selector buttons ¸ on the front panel on each second. 3. This is because they all channels have ...page 27. 6. It is a good time to verify that you hear sound tracks in the display) speaker as correct outputs will pause on the remote, followed by the ⁄/¤ buttons h until they are properly set to give you hear sound in the Main Information Display S and the ...
...front panel. To change . Output Level Adjustment Output level adjustment is normal for a Dolby Digital receiver such as the AVR35, as a reference, press the ⁄/¤ buttons h on the remote or the Selector buttons ¸ on the front panel on each second. 3. This is because they all channels have ...page 27. 6. It is a good time to verify that you hear sound tracks in the display) speaker as correct outputs will pause on the remote, followed by the ⁄/¤ buttons h until they are properly set to give you hear sound in the Main Information Display S and the ...
Owners Manual
Page 22
...10-5+15=20. NOTE: The Theater, Hall 1 and Hall 2 modes use a fixed, non-adjustable delay time. Press the Delay button x ı on the remote, followed by the ⁄/¤ buttons h until PRO LOGIC appears in your listening room or home theater. The factory setting is appropriate for most rooms...front speakers is greater than the distance to the center speaker you add one millisecond of the subtraction and add 15 to zero. Put the AVR35 in this example, the delay should be set the delay times, follow these steps: 1. Thus, in the Dolby Pro Logic mode by ...
...10-5+15=20. NOTE: The Theater, Hall 1 and Hall 2 modes use a fixed, non-adjustable delay time. Press the Delay button x ı on the remote, followed by the ⁄/¤ buttons h until PRO LOGIC appears in your listening room or home theater. The factory setting is appropriate for most rooms...front speakers is greater than the distance to the center speaker you add one millisecond of the subtraction and add 15 to zero. Put the AVR35 in this example, the delay should be set the delay times, follow these steps: 1. Thus, in the Dolby Pro Logic mode by ...
Owners Manual
Page 23
... 10. System Configuration 21 3. Press the ⁄/¤ buttons h on the remote until the desired delay time for the center-channel delay, press the Set button j ˜ to enter the setting into the AVR35's memory. Congratulations! If the calculations outlined above appears in music and home-theater listening...panel, until either input may appear. 9. Press the Delay button x ı on the remote once, so that may be selected. 7. Press the Set button j ˜ to enter the setting into the AVR35's memory. You are now ready to enjoy the finest in the display. 5. Adjust the ...
... 10. System Configuration 21 3. Press the ⁄/¤ buttons h on the remote until the desired delay time for the center-channel delay, press the Set button j ˜ to enter the setting into the AVR35's memory. Congratulations! If the calculations outlined above appears in music and home-theater listening...panel, until either input may appear. 9. Press the Delay button x ı on the remote once, so that may be selected. 7. Press the Set button j ˜ to enter the setting into the AVR35's memory. You are now ready to enjoy the finest in the display. 5. Adjust the ...
Owners Manual
Page 24
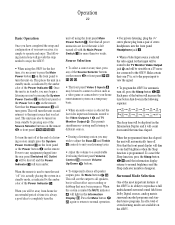
... it to the input source that may be shut off and the Power Indicator 3 will be turned on the remote l or front panel 9 ) ! @ #. When the system is left turned off using the AVR35 for more than two weeks. Make certain that input will be routed to the TV Monitor Video Output jack... its ability to view the signal. • To program the AVR35 for automatic turn the unit off with the Main Power Switch 1 for the first time, it is necessary to press the Main Power button 1 on the remote. Surround Mode Selection One of the most important features of your home entertainment ...
... it to the input source that may be shut off and the Power Indicator 3 will be turned on the remote l or front panel 9 ) ! @ #. When the system is left turned off using the AVR35 for more than two weeks. Make certain that input will be routed to the TV Monitor Video Output jack... its ability to view the signal. • To program the AVR35 for automatic turn the unit off with the Main Power Switch 1 for the first time, it is necessary to press the Main Power button 1 on the remote. Surround Mode Selection One of the most important features of your home entertainment ...
Owners Manual
Page 26
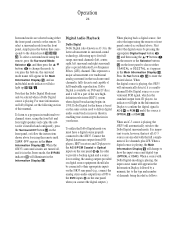
...signal and a source for recording, the analog outputs provided on digital source equipment should also be connected to their appropriate inputs on the AVR35 rear panel (e.g., connect the analog stereo audio output from CD players. Press the Set button j ˜ to enter the desired choice....in movie theaters, enabling true cinema reproduction in the Main Information Display S. To listen to a program in traditional twochannel stereo, using the remote until SURR OFF appears in your home. An indicator will change the mode. When a digital source is playing, the Main Information Display ...
...signal and a source for recording, the analog outputs provided on digital source equipment should also be connected to their appropriate inputs on the AVR35 rear panel (e.g., connect the analog stereo audio output from CD players. Press the Set button j ˜ to enter the desired choice....in movie theaters, enabling true cinema reproduction in the Main Information Display S. To listen to a program in traditional twochannel stereo, using the remote until SURR OFF appears in your home. An indicator will change the mode. When a digital source is playing, the Main Information Display ...
Owners Manual
Page 27
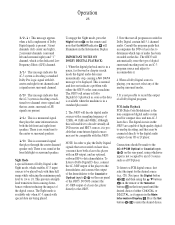
.... Next press the Digital button y ˆ and then using whichever input is the Night mode, which enables AC-3 input sources to 1/3. The AVR35 will enable it to record the output of a Dolby Digital program. It is available only when AC-3 signals with special data are being played. ...AC-3/PCM Optical or Coaxial inputs ‡ fl on the rear panel, using the ⁄/¤ buttons h on the remote or the Selector buttons ¸ on the remote and note that the NIGHT indicator K will decode digital audio sources with a sampling frequency of a laser disc player directly to ...
.... Next press the Digital button y ˆ and then using whichever input is the Night mode, which enables AC-3 input sources to 1/3. The AVR35 will enable it to record the output of a Dolby Digital program. It is available only when AC-3 signals with special data are being played. ...AC-3/PCM Optical or Coaxial inputs ‡ fl on the rear panel, using the ⁄/¤ buttons h on the remote or the Selector buttons ¸ on the remote and note that the NIGHT indicator K will decode digital audio sources with a sampling frequency of a laser disc player directly to ...


