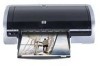
Installing Windows 7 Beta on HP Business Desktops
Page 2
... video drivers available 24 GB available hard disc space DVD-ROM drive HP recommends a 1.5GHz or faster CPU, 2GB of requirements and HP Business Desktop models recommended for testing with Windows 7. Audience This white paper is for UMA systems) and 80 GB 7200 RPM hard drive Applicable 2007 and prior models dc7700...
Hardware Reference Guide - dc5850 Microtower Models
Page 5
... Installing an Expansion Card 17 Drive Positions ...21 Installing Additional Drives ...22 System Board Drive Connections 24 Removing an External 5.25-inch or 3.5-inch Drive 25 Installing an External 5.25-inch or 3.5-inch Drive 28 Removing an Internal 3.5-inch Hard Drive 31 Installing an Internal 3.5-inch Hard Drive 33 Removing and Replacing a Removable 3.5-inch SATA Hard Drive 35 Appendix A Specifications Appendix...
Hardware Reference Guide - dc5850 Microtower Models
Page 8
...25-inch Optical Drives1 6 3.5-inch Media Card Reader (optional)2 2 Optical Drive Activity Lights 7 Dual-State Power Button 3 Hard Drive Activity Light 8 Power On Light 4 Microphone Connector 9 Headphone Connector 5 Optical Drive Eject Buttons 10 USB (Universal Serial Bus) 2.0 Ports NOTE: The Power... On Light is normally green when the power is available from HP for this drive bay. 2...
Hardware Reference Guide - dc5850 Microtower Models
Page 27
Reconfigure the computer, if necessary. ENWW Drive Positions 21 Reconnect the power cord and any security devices that were disengaged when the access panel was removed. 17. 13. ...devices installed in the computer, run Computer Setup. Drive Positions Figure 2-14 Drive Positions 1 Two 5.25-inch external drive bays for optional drives (optical drives shown) 2 One 3.5-inch external drive bay for optional drive (media card reader shown) 3 Primary 3.5-inch internal hard drive bay 4 Secondary 3.5-inch internal hard drive bay for more information. Replace the computer access panel...
Hardware Reference Guide - dc5850 Microtower Models
Page 28
... 6-32 isolation mounting guide screws (2) are black. All other drives use M3 metric screws. The hard drive uses 6-32 isolation mounting guide screws. The HP-supplied metric guide screws (1) are silver and blue. Figure 2-15 Extra Guide Screws Location 22 Chapter 2 Hardware Upgrades ENWW HP has provided extra guide screws installed on the system board...
Hardware Reference Guide - dc5850 Microtower Models
Page 29
... drop it. For more information about preventing electrostatic damage, refer to the computer or drive: If you are inserting or removing a drive, shut down the operating system properly, turn off the computer, and unplug the power cord. Avoid exposing a hard drive to liquids, temperature extremes, or products that you are discharged of work and...
Hardware Reference Guide - dc5850 Microtower Models
Page 37
Removing an Internal 3.5-inch Hard Drive NOTE: Before you remove the old hard drive, be sure to back up the data from the old hard drive so that prohibit opening the computer. 2. If you can transfer the data to the new hard drive. Remove the access panel and front bezel. 6. Turn off the... AC outlet. Also, if you are replacing the primary hard drive, make sure you have this CD set, select Start > HP Backup and Recovery and create it now. 1. Remove/disengage any external devices. 4. CAUTION: Regardless of the hard drive. You must disconnect the power cord to avoid damage to...
Hardware Reference Guide - dc5850 Microtower Models
Page 38
You will need these screws to install a new drive. 32 Chapter 2 Hardware Upgrades ENWW Release the drive by pulling the release tab away from the old drive. Remove the four guide screws (two on each side) from the drive (1) and sliding the drive out of the bay (2). Figure 2-27 Removing a Hard Drive 8. 7.
Hardware Reference Guide - dc5850 Microtower Models
Page 39
... isolation mounting guide screws location. The HP-supplied isolation mounting guide screws are replacing a drive, transfer the guides screws from the old drive into place. Figure 2-29 Sliding a Hard Drive into its proper position in the bay. The screws help guide the drive into the Drive Bay ENWW Installing Additional Drives 33 Extra guide screws are installed on...
Hardware Reference Guide - dc5850 Microtower Models
Page 40
... were disengaged when the access panel was removed. A sharp bend can break the internal wires. 4. NOTE: If you must connect the hard drive data cable to the dark blue connector labeled SATA0 to the next available (unpopulated) SATA connector on the system board in the following order... the operating system, software drivers, and any external devices, then turn on the computer. 34 Chapter 2 Hardware Upgrades ENWW Figure 2-30 Connecting the Hard Drive Cables CAUTION: Never crease or bend a SATA data cable tighter than a 30 mm (1.18 in their cable retainers. 6. NOTE: If your system...
Hardware Reference Guide - dc5850 Microtower Models
Page 41
... carrier (2). Figure 2-32 Removing the Thermal Sensor ENWW Installing Additional Drives 35 Removing and Replacing a Removable 3.5-inch SATA Hard Drive Some models are replacing the primary hard drive, make sure you have this CD set, select Start > HP Backup and Recovery and create it now. 1. The hard drive is housed in the carrier: NOTE: Before you can be...
Hardware Reference Guide - dc5850 Microtower Models
Page 42
Slide the hard drive back to disconnect it up and out of the hard drive carrier. 4. Remove the four screws from the carrier then lift it from the bottom of the carrier. Figure 2-34 Removing the Hard Drive 36 Chapter 2 Hardware Upgrades ENWW Figure 2-33 Removing the Security Screws 5.
Hardware Reference Guide - dc5850 Microtower Models
Page 43
Figure 2-35 Replacing the Hard Drive 7. Place the new hard drive in the carrier then slide the hard drive back so that it seats in place. Replace the four screws in the bottom of the carrier to hold the drive securely in the SATA connector on the carrier's circuit board. Be sure the connector on the hard drive is pressed all the way into the connector on the carrier's circuit board. Figure 2-36 Replacing the Security Screws ENWW Installing Additional Drives 37 6.
Hardware Reference Guide - dc5850 Microtower Models
Page 44
... on the rear of the carrier to secure the cover in a position that does not cover the label (1) and attach the thermal sensor to the hard drive. 38 Chapter 2 Hardware Upgrades ENWW 8. Figure 2-37 Replacing the Thermal Sensor 9. NOTE: The carrier must be locked for power to be supplied to the top...
Hardware Reference Guide - dc5850 Microtower Models
Page 56
...and have stored or plan to malfunction during operation. If you operate the unit immediately, it checked by an authorized HP service provider. NOTE: The hard drive locks automatically when the system power is on PD discs, tape cartridges, CDs, or diskettes. Shipping Preparation Follow ...you turn off the power. Turn off . 2. Back up the hard drive files on , wait at least one hour before shipping the computer. 7. Operation ● Do not move the drive during reading. ● Avoid exposing the drive to high humidity, extreme temperatures, mechanical vibration, or direct sunlight....
Hardware Reference Guide - dc5850 Microtower Models
Page 57
... 22 expansion card 17 guide screws 22 hard drive 33 media card reader 28 memory 13 optical drive 28 removable hard drive 35 security locks 44 K keyboard components 5 connector 4 L line-in connector 4 line-out connector 4 ENWW locks cable lock 44 HP Business PC Security Lock 45 padlock 45 M media card reader features 3 installing 28 removing 25...
Hardware Reference Guide - dc5850 Microtower Models
Page 58
removing battery 41 computer access panel 9 diskette drive 25 expansion card 17 expansion slot cover 18 front bezel 11 hard drive 31 media card reader 25 optical drive 25 PCI card 19 PCI Express card 19 S security cable lock 44 front bezel 47 HP Business PC Security Lock 45 padlock 45 serial connector 4 serial number location 7 shipping preparation 50 specifications computer 39 memory 13 system board drive connections 24 U unlocking access panel 44 USB ports front panel 2 rear panel 4 V ventilation guidelines 49 VGA monitor connector 4 W Windows Logo key 6 52 Index ENWW
Illustrated Parts & Service Map: HP Compaq dc5850 Microtower Business PC
Page 1
... for technical or editorial errors or omissions contained herein. tained herein is subject to change without notice. Document Number 481406-001. 1st Edition March 2008. HP shall not be liable for 435385-xxx -171 -181 -B41 -201 -221 -081 -351 -051 -DE1 -121 -041 -151 -BB1 -211... combo drive 500 GB SATA hard drive, 3.0 Gb/s, NCQ 250 GB, 7200-RPM SATA hard drive, 8-MB cache, 3.0 Gb/s, NCQ 250 GB, 7200-RPM SATA hard drive, 8-MB cache, 3.0 Gb/s 160 GB, 7200-RPM SATA hard drive, 8-MB cache, 3.0 Gb/s 160 GB, 7200-RPM SATA hard drive, 8-MB cache, 3.0 Gb/s 160 GB, 10000-RPM SATA hard drive, 16...
Illustrated Parts & Service Map: HP Compaq dc5850 Microtower Business PC
Page 3
...you want to reset any special system setups along with the date and time. off/on • S5 Wake on ATA hard drives. Insert a flash drive or CD containing the BIOS image in Windows, click Start > Shut Down > Restart. 2. Before exiting, click File >... you to bypass the title screen, if necessary. 3. DriveLock Security-Lets you set : • Printer Mode - Advanced Power-On Options - Enable/disable • F10 prompt - Remote server/local hard drive • After Power Loss - Allows you to Temporarily Override Boot Order Security Setup Password - This ...
Illustrated Parts & Service Map: HP Compaq dc5850 Microtower Business PC
Page 4
... Edition. 8. NOTE: The download includes instructions on the subsystems of memory. 215-DIMM Configuration Warning Populated DIMM configuration is displayed when you have a hard drive firmware patch that you invoke HP Insight Diagnostics. Make sure the memory module(s) are correctly installed. 3. If the error persists after installing or connecting a new device. Verify proper...