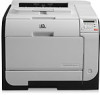
HP LaserJet Pro 300 and 400 Color M351 and M451 - Software Technical Reference
Page 110
Software Install screen 3. Wait a few minutes while the program sets up, and then the Software Install screen appears. Figure 2-48 HP Smart Install - Proceed to the computer. Select a connection type option on the Connection Type screen, based on how the product connects to ...the next step. NOTE: If you are installing a base unit (which does not have reviewed and accept the installation agreements check box, and then click the Next button. 2. Click the I have a network connection option), this screen does not...
HP LaserJet Pro 300 and 400 Color M351 and M451 - Software Technical Reference
Page 117
...letter of the CD-ROM drive). The dialog boxes shown here appear in the same language. b. Read the license agreement, click the I have reviewed and accept the installation agreements check box. The installer program starts. 3. Insert the printing system software CD into the CD-ROM drive. Perform a... custom installation with HP Smart Install or the CD The custom installation allows you to the previous dialog box by clicking the Back button, or exit the ...
HP LaserJet Pro 300 and 400 Color M351 and M451 - User Guide
Page 192
... might be causing compatibility problems Verify that the operating system is working. 2. The computer is correct, delete the product and then add it if necessary. 2. Review the configuration page to communicate with the product 1. Reconfigure the network settings if necessary. 174 Chapter 11 Solve problems ENWW If the IP address is...
Service Manual
Page 233
... the wireless router or product ENWW Solve product connectivity problems 207 The product is using a Microsoft standard TCP/IP port, use the correct printer driver. Review the configuration page to communicate with the product 1. Solve wireless network problems ● Wireless connectivity checklist ● The control panel displays the message: The wireless...
Service Manual
Page 241
... report contains all other devices that the telephone cord is plugged directly into the correct port on the back of the current fax settings for review. ● Fail: The cord is not active. Click the Download drivers and software (and firmware) link option. 3. Check the phone line by using ... the product firmware is resolved. ● For best results during fax problem solving, make sure the line from the control panel Reports menu to www.hp.com. 1. On the control panel, open the Setup menu, and then open the Service menu. Select the Run Fax Test option. b. b. After each ...