User Manual
Page 9
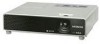
... laptop PC to CRT display or to simultaneous LCD and CRT display.) For details on how this projector is VESA DDC 2B compatible. It might be recommended to use other type of connection is attempted. • Please use the standard drivers in your devices (continued) Setting up to... UXGA (1600X1200), the signal will be converted to the projector's panel resolution before connecting them to the projector, and make sure that is VESA DDC (display data channel) compatible...
... laptop PC to CRT display or to simultaneous LCD and CRT display.) For details on how this projector is VESA DDC 2B compatible. It might be recommended to use other type of connection is attempted. • Please use the standard drivers in your devices (continued) Setting up to... UXGA (1600X1200), the signal will be converted to the projector's panel resolution before connecting them to the projector, and make sure that is VESA DDC (display data channel) compatible...

User Manual
Page 12
... AUDIO IN NOTE • When the simple mouse & keyboard function of this product does not work depending on the PC's configurations and mouse drivers. - And also this function may have priority to this function. - This function is not available while the lamp is working properly. If... could damage your equipment. While using the BLANK function, or displaying the menu screen. 12 This function is activated only when the projector is warming up (the POWER indicator flashes green), and while adjusting the volume and display, correcting for this product to change the ...
... AUDIO IN NOTE • When the simple mouse & keyboard function of this product does not work depending on the PC's configurations and mouse drivers. - And also this function may have priority to this function. - This function is not available while the lamp is working properly. If... could damage your equipment. While using the BLANK function, or displaying the menu screen. 12 This function is activated only when the projector is warming up (the POWER indicator flashes green), and while adjusting the volume and display, correcting for this product to change the ...

Network Guide
Page 5
... Connection to the network NOTE • Referring to the latest. 5 1.1 System requirements (continued) 1. It is selected, the projector will be updated to the manual of your computer or Windows, select the following or a smaller display resolution for Network Adapter on ... resolution that is the largest among the resolutions that OS and the driver should be selected. • Images might not been transmitted, caused by OS version or the driver software for the computer. CP-X4021N, CP-X5021N: 1024 x 768 (XGA) CP-WX4021N: 1280 x 800 When a resolution larger than the specifi...
... Connection to the network NOTE • Referring to the latest. 5 1.1 System requirements (continued) 1. It is selected, the projector will be updated to the manual of your computer or Windows, select the following or a smaller display resolution for Network Adapter on ... resolution that is the largest among the resolutions that OS and the driver should be selected. • Images might not been transmitted, caused by OS version or the driver software for the computer. CP-X4021N, CP-X5021N: 1024 x 768 (XGA) CP-WX4021N: 1280 x 800 When a resolution larger than the specifi...

Network Guide
Page 7
...[Next]. 9) The Hardware Installation dialog appears. Click the [Finish]. http://www.hitachi-america.us/digitalmedia or http://www.hitachidigitalmedia.com Some functions explained in that the software...Confirm the program folder name. Press Continue Anyway. Please click the [Install this driver software anyway] and continue installation. 10) After a moment, installation will complete and the...Complete dialog will appear as shown on the toolbar, select All Programs and then select the Projector Tools folder. (2) The "LiveViewer" will appear in this manual require the "LiveViewer" ...
...[Next]. 9) The Hardware Installation dialog appears. Click the [Finish]. http://www.hitachi-america.us/digitalmedia or http://www.hitachidigitalmedia.com Some functions explained in that the software...Confirm the program folder name. Press Continue Anyway. Please click the [Install this driver software anyway] and continue installation. 10) After a moment, installation will complete and the...Complete dialog will appear as shown on the toolbar, select All Programs and then select the Projector Tools folder. (2) The "LiveViewer" will appear in this manual require the "LiveViewer" ...
