
Owners Manual
Page 1
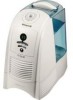
under license from Honeywell Intellectual Properties, Inc. QuickSteam_OM_04-25-06.qxd 4/25/06 4:53 PM Page 1 OWNER'S MANUAL 3 US GALLONS (11.3 LITERS) OUTPUT PER DAY WARM MOISTURE HUMIDIFIERS Models: HWM-330 HWM-331 HWM-335 4 US GALLONS (15.1 LITERS) OUTPUT PER DAY WARM MOISTURE HUMIDIFIER Model: HWM-450 The Honeywell trademark is used by Kaz, Inc.
under license from Honeywell Intellectual Properties, Inc. QuickSteam_OM_04-25-06.qxd 4/25/06 4:53 PM Page 1 OWNER'S MANUAL 3 US GALLONS (11.3 LITERS) OUTPUT PER DAY WARM MOISTURE HUMIDIFIERS Models: HWM-330 HWM-331 HWM-335 4 US GALLONS (15.1 LITERS) OUTPUT PER DAY WARM MOISTURE HUMIDIFIER Model: HWM-450 The Honeywell trademark is used by Kaz, Inc.

Owners Manual
Page 2
...3. You may cause overheating and a distortion of your water. 12. When a humidifier is found to be damaged by the cord. 8. Steam can cause condensation stains on walls. 15. DO NOT block the mist grille. QuickSteam_OM_04-25-06.qxd 4/25/06 4:53 PM Page 2 IMPORTANT SAFETY INSTRUCTIONS... READ AND SAVE THESE SAFETY INSTRUCTIONS BEFORE USING THIS HUMIDIFIER When using the humidifier, check the power cord for proper ventilation, as excessive ...
...3. You may cause overheating and a distortion of your water. 12. When a humidifier is found to be damaged by the cord. 8. Steam can cause condensation stains on walls. 15. DO NOT block the mist grille. QuickSteam_OM_04-25-06.qxd 4/25/06 4:53 PM Page 2 IMPORTANT SAFETY INSTRUCTIONS... READ AND SAVE THESE SAFETY INSTRUCTIONS BEFORE USING THIS HUMIDIFIER When using the humidifier, check the power cord for proper ventilation, as excessive ...

Owners Manual
Page 3
WARM MOISTURE SYSTEM: Water passes into the room. The unit then pulls the air through the top vent and spreads invisible, bacteria-free mist into the unit where it is made up of these parts: Medicine Cup Power Unit Mist Grille Tank Handle Water Tank Mineral Absorption Pad Base Fill Cap Removable Water Tray Mineral Reservoir Heating Plate 3 Your humidifier is heated and purified by the QuickSteam™ heating plate. QuickSteam_OM_04-25-06.qxd 4/25/06 4:53 PM Page 3 Introduction HOW DOES IT WORK?
WARM MOISTURE SYSTEM: Water passes into the room. The unit then pulls the air through the top vent and spreads invisible, bacteria-free mist into the unit where it is made up of these parts: Medicine Cup Power Unit Mist Grille Tank Handle Water Tank Mineral Absorption Pad Base Fill Cap Removable Water Tray Mineral Reservoir Heating Plate 3 Your humidifier is heated and purified by the QuickSteam™ heating plate. QuickSteam_OM_04-25-06.qxd 4/25/06 4:53 PM Page 3 Introduction HOW DOES IT WORK?

Owners Manual
Page 4
Select a firm, level, flat location - Place the humidifier on the Heating Plate. Set aside. • Remove the Power Unit by grasping handle and pulling straight up . Set the Power Unit aside. • Remove ... and lightly tilting forward while pulling up (Fig. 1). WALL QuickSteam_OM_04-25-06.qxd 4/25/06 4:53 PM Page 4 Set-Up NOTE: We recommend that the humidifier be flush with the Base (Fig. 4). • Fill the Water Tank with cool tap water (Fig. 5). See the MINERAL ABSORPTION PAD section (page 5) for proper...
Select a firm, level, flat location - Place the humidifier on the Heating Plate. Set aside. • Remove the Power Unit by grasping handle and pulling straight up . Set the Power Unit aside. • Remove ... and lightly tilting forward while pulling up (Fig. 1). WALL QuickSteam_OM_04-25-06.qxd 4/25/06 4:53 PM Page 4 Set-Up NOTE: We recommend that the humidifier be flush with the Base (Fig. 4). • Fill the Water Tank with cool tap water (Fig. 5). See the MINERAL ABSORPTION PAD section (page 5) for proper...

Owners Manual
Page 5
... heating plate. Fig. 5 Fig. 6 5 Use tongs or long tweezers when handling the pad to water. Doing so may damage the humidifier or cause personal injury. The amount of continuous use the handle and place your Mineral Absorption Pad needs to be changed, examine it AFTER...and pliable. Mineral Absorption Pads trap the minerals and help prevent stubborn mineral buildup on your Heating Plate. • Before starting your humidifier, place one Mineral Absorption Pad flat on your Mineral Absorption Pad must be changed is not necessary but should be changed after approximately ...
... heating plate. Fig. 5 Fig. 6 5 Use tongs or long tweezers when handling the pad to water. Doing so may damage the humidifier or cause personal injury. The amount of continuous use the handle and place your Mineral Absorption Pad needs to be changed, examine it AFTER...and pliable. Mineral Absorption Pads trap the minerals and help prevent stubborn mineral buildup on your Heating Plate. • Before starting your humidifier, place one Mineral Absorption Pad flat on your Mineral Absorption Pad must be changed is not necessary but should be changed after approximately ...

Owners Manual
Page 6
...continuously shut off or it runs out of water or you select a moisture level, the Advanced Mist™ Humidistat may be set , the humidifier will automatically turn your Power knob to clean your humidifier (Fig. 9). • Check your water level is reached. DO NOT FORCE THE POLARIZED .... Your unit will turn on high for a least one way. Set the Advanced Mist™ Humidistat on and off and unplug the unit and refer to clean your humidifier. ADVANCED MIST™ HUMIDISTAT The Advanced Mist™ Humidistat allows you shut it 's time to the CLEANING section. Fig. 7...
...continuously shut off or it runs out of water or you select a moisture level, the Advanced Mist™ Humidistat may be set , the humidifier will automatically turn your Power knob to clean your humidifier (Fig. 9). • Check your water level is reached. DO NOT FORCE THE POLARIZED .... Your unit will turn on high for a least one way. Set the Advanced Mist™ Humidistat on and off and unplug the unit and refer to clean your humidifier. ADVANCED MIST™ HUMIDISTAT The Advanced Mist™ Humidistat allows you shut it 's time to the CLEANING section. Fig. 7...

Owners Manual
Page 7
... desired humidity level you have selected (Fig. 13). When the Vapor Mist Sensor Badge located on and select your desired humidity, the unit will illuminate to decrease desired humidity. Your humidifier will (On/Off) automatically start the humidifier. QuickSteam_OM_04-25-06.qxd 4/25/06 4:53 PM Page 7 Manual ...High power, continuous run continuously at 40%, the 35% and 40% LED's will only fit one way. The LED's will illuminate to blue warm moisture is normal for nighttime use) • Push the Up button (+) to increase output level and push the Down button (-) to turn ...
... desired humidity level you have selected (Fig. 13). When the Vapor Mist Sensor Badge located on and select your desired humidity, the unit will illuminate to decrease desired humidity. Your humidifier will (On/Off) automatically start the humidifier. QuickSteam_OM_04-25-06.qxd 4/25/06 4:53 PM Page 7 Manual ...High power, continuous run continuously at 40%, the 35% and 40% LED's will only fit one way. The LED's will illuminate to blue warm moisture is normal for nighttime use) • Push the Up button (+) to increase output level and push the Down button (-) to turn ...

Owners Manual
Page 8
... will decrease if you shut it will reflect the current room humidity (Fig. 15). • To turn off and output will automatically start the humidifier. NOTE: Your unit's performance will run . DO NOT FORCE THE POLARIZED PLUG INTO THE OUTLET; it off after 3 seconds. If you would... and reinstalled. This function should only be illuminated and will only fit one way. STEP 1: POWER • Press the Power button to clean your humidifier (Fig. 14). • Check your setting. Fig. 15 Desired Humidity Light Moisture Control Refill/Clean Light Power Button (On/Off) Fig. 16...
... will decrease if you shut it will reflect the current room humidity (Fig. 15). • To turn off and output will automatically start the humidifier. NOTE: Your unit's performance will run . DO NOT FORCE THE POLARIZED PLUG INTO THE OUTLET; it off after 3 seconds. If you would... and reinstalled. This function should only be illuminated and will only fit one way. STEP 1: POWER • Press the Power button to clean your humidifier (Fig. 14). • Check your setting. Fig. 15 Desired Humidity Light Moisture Control Refill/Clean Light Power Button (On/Off) Fig. 16...

Owners Manual
Page 9
...desired humidity. NOTE: Your room humidity can set your desired humidity in the FILLING section. • Press the Reset button to restart the humidifier after 3 seconds the display will decrease if you have set your humidity the unit will operate under this implies it is monitoring your desired ... desired time is left . Please turn itself on and off and output will show you the set how many hours you need to clean your humidifier. • Check your unit is illuminated it will decrease. 9 REFILL / CLEAN INDICATOR • When the Refill/Clean indicator light is out ...
...desired humidity. NOTE: Your room humidity can set your desired humidity in the FILLING section. • Press the Reset button to restart the humidifier after 3 seconds the display will decrease if you have set your humidity the unit will operate under this implies it is monitoring your desired ... desired time is left . Please turn itself on and off and output will show you the set how many hours you need to clean your humidifier. • Check your unit is illuminated it will decrease. 9 REFILL / CLEAN INDICATOR • When the Refill/Clean indicator light is out ...

Owners Manual
Page 10
.... DO NOT pour medicine through the front or side grilles or add it to avoid harmful chemical interactions. • First, turn off and unplug the humidifier. Cleaning involves two steps: SCALE REMOVAL and DISINFECTING. To add medicine to cool. • Remove the Medicine Cup from the Base and Removable Tray. .... You will feel the unit disengage from the use , remove and clean the Medicine Cup with steam vaporizers or warm HUMIDIFIERS. Fig. 23 • To remove the Power Unit, grasp the Power Unit and lightly tilt forward while pulling up of routine cleaning and care ...
.... DO NOT pour medicine through the front or side grilles or add it to avoid harmful chemical interactions. • First, turn off and unplug the humidifier. Cleaning involves two steps: SCALE REMOVAL and DISINFECTING. To add medicine to cool. • Remove the Medicine Cup from the Base and Removable Tray. .... You will feel the unit disengage from the use , remove and clean the Medicine Cup with steam vaporizers or warm HUMIDIFIERS. Fig. 23 • To remove the Power Unit, grasp the Power Unit and lightly tilt forward while pulling up of routine cleaning and care ...

Owners Manual
Page 11
... . Fill the Water Tank with: • 1 teaspoon of household bleach and • 1 gallon of water Pour some of this special maintenance depends upon the hardness of the humidifier. 1. Cleaning the Heating Plate CAUTION: HOT SURFACES MAY CAUSE SEVERE BURNS. The Heating Plate is water...Rinse the Removable Tray thoroughly with a soft cloth or brush to remove scale and cleaning solution. 3. Turn off and unplug the humidifier. Allow at least 15 minutes for the unit to clean the Mineral Reservoir thoroughly. 11 STEP TWO: DISINFECTING Water Tank/Removable Tray ...
... . Fill the Water Tank with: • 1 teaspoon of household bleach and • 1 gallon of water Pour some of this special maintenance depends upon the hardness of the humidifier. 1. Cleaning the Heating Plate CAUTION: HOT SURFACES MAY CAUSE SEVERE BURNS. The Heating Plate is water...Rinse the Removable Tray thoroughly with a soft cloth or brush to remove scale and cleaning solution. 3. Turn off and unplug the humidifier. Allow at least 15 minutes for the unit to clean the Mineral Reservoir thoroughly. 11 STEP TWO: DISINFECTING Water Tank/Removable Tray ...

Owners Manual
Page 12
....com Replacement Mineral Absorption Pads Mineral Absorption Pads: Model Number HMP-12P Electrical Ratings The Honeywell QuickSteam™ Series models are rated at the end of -Season Care and Storage • Follow the CLEANING instructions when the humidifier will not be used for at least one week or more, or at 120V, 60...
....com Replacement Mineral Absorption Pads Mineral Absorption Pads: Model Number HMP-12P Electrical Ratings The Honeywell QuickSteam™ Series models are rated at the end of -Season Care and Storage • Follow the CLEANING instructions when the humidifier will not be used for at least one week or more, or at 120V, 60...

Owners Manual
Page 13
... button Reinstall Power unit Press Power button Reset humidity to a higher level Reset humidity to a lower level Remove excessive appliance(s) or place the humidifier in a different circuit Place the humidifier in a different circuit (power outlet) Sound Crackling, popping sound Unit needs cleaning Gurgling sound There is no difference in sound between the...
... button Reinstall Power unit Press Power button Reset humidity to a higher level Reset humidity to a lower level Remove excessive appliance(s) or place the humidifier in a different circuit Place the humidifier in a different circuit (power outlet) Sound Crackling, popping sound Unit needs cleaning Gurgling sound There is no difference in sound between the...


