
User Manual
Page 1
... USING DIFFERENT DISPLAY WINDOWS 19 PRESSURE WINDOW 19 CLOCK WINDOW 23 SUNRISE/SUNSET WINDOW 29 Honeywell TEMPERATURE AND HUMIDITY WINDOW 32 Long-Range Weather Forecaster with Wind Speed WIND WINDOW 35 MAINTANANCE 37 TROUBLESHOOTING 38 PRECAUTIONS 38 APPENDIX - CITY CODES 39 SPECIFICATIONS 41 FCC STATEMENT 43 DECLARATION OF CONFORMITY 44 STANDARD WARRANTY INFORMATION 45 (TE852W) USER MANUAL 2
... USING DIFFERENT DISPLAY WINDOWS 19 PRESSURE WINDOW 19 CLOCK WINDOW 23 SUNRISE/SUNSET WINDOW 29 Honeywell TEMPERATURE AND HUMIDITY WINDOW 32 Long-Range Weather Forecaster with Wind Speed WIND WINDOW 35 MAINTANANCE 37 TROUBLESHOOTING 38 PRECAUTIONS 38 APPENDIX - CITY CODES 39 SPECIFICATIONS 41 FCC STATEMENT 43 DECLARATION OF CONFORMITY 44 STANDARD WARRANTY INFORMATION 45 (TE852W) USER MANUAL 2
User Manual
Page 2
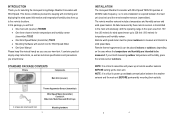
...• One main unit (receiver) TE852W • One three-channel remote temperature and humidity sensor (transmitter) TS33C • One Wind Speed Meter (transmitter) TS815 • Mounting Hardware with wrench tool for selecting the Honeywell Long-Range Weather Forecaster with monitoring and displaying the wind speed...item. NOTE: It is required between the weather sensors and the main unit BEFORE permanently mounting them outside. 3 4 INTRODUCTION Thank you for Wind Speed Meter • One User Manual Please keep this manual handy as technical specifications and precautions you should ...
...• One main unit (receiver) TE852W • One three-channel remote temperature and humidity sensor (transmitter) TS33C • One Wind Speed Meter (transmitter) TS815 • Mounting Hardware with wrench tool for selecting the Honeywell Long-Range Weather Forecaster with monitoring and displaying the wind speed...item. NOTE: It is required between the weather sensors and the main unit BEFORE permanently mounting them outside. 3 4 INTRODUCTION Thank you for Wind Speed Meter • One User Manual Please keep this manual handy as technical specifications and precautions you should ...
User Manual
Page 3
... of the temperature display in the user manual for wind speed meter. We recommend using lithium batteries for the remote weather sensors when temperatures are positioned. • The main unit must be placed within the effective transmission range: 328 feet (100 meters) for temperature.../humidity sensors and 100 feet (30 meters) for each remote weather sensor. • Transmission/reception range may affect sensors accuracy. Ideally they should be placed indoors. &#...
... of the temperature display in the user manual for wind speed meter. We recommend using lithium batteries for the remote weather sensors when temperatures are positioned. • The main unit must be placed within the effective transmission range: 328 feet (100 meters) for temperature.../humidity sensors and 100 feet (30 meters) for each remote weather sensor. • Transmission/reception range may affect sensors accuracy. Ideally they should be placed indoors. &#...
User Manual
Page 6
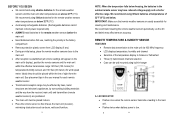
... ducts or air conditioners. • Areas with programmable snooze • Programmable Ice Warning Alarm Weather • Weather forecast for the next 12 to 24 hour in six large icons: Sunny, Partly Cloudy, Cloudy,...8226; When mounting the main unit on the back of the main unit. • Transmission range may be placed indoors. FEATURES Time • Precise time and date set via RF signals from... US Atomic clock • 12 or 24 hour time format • Manual adjustment of time and date • Calendar displaying date with month and day in 6 languages English,...
... ducts or air conditioners. • Areas with programmable snooze • Programmable Ice Warning Alarm Weather • Weather forecast for the next 12 to 24 hour in six large icons: Sunny, Partly Cloudy, Cloudy,...8226; When mounting the main unit on the back of the main unit. • Transmission range may be placed indoors. FEATURES Time • Precise time and date set via RF signals from... US Atomic clock • 12 or 24 hour time format • Manual adjustment of time and date • Calendar displaying date with month and day in 6 languages English,...

User Manual
Page 7
... and (S) and Ice Warning Alarm C. UP ( ▲) button • Selects next available mode clockwise • Increases the parameters • Activates manual search for a moment. To set the pressure & altitude units and program your local altitude and pressure parameters. DOWN ( ▼) button • ...powered, the display will self-calibrate in the Sunrise/Sunset Window. FRONT A 13 REAR B CDEFG H I TOP SIDE J K L M A. WEATHER AND TIME IN EASY-TO READ DIGITS B. IMPORTANT: All of the display functions will show the pressure icon and abbreviation "inHg" flashing in the...
... and (S) and Ice Warning Alarm C. UP ( ▲) button • Selects next available mode clockwise • Increases the parameters • Activates manual search for a moment. To set the pressure & altitude units and program your local altitude and pressure parameters. DOWN ( ▼) button • ...powered, the display will self-calibrate in the Sunrise/Sunset Window. FRONT A 13 REAR B CDEFG H I TOP SIDE J K L M A. WEATHER AND TIME IN EASY-TO READ DIGITS B. IMPORTANT: All of the display functions will show the pressure icon and abbreviation "inHg" flashing in the...
User Manual
Page 8
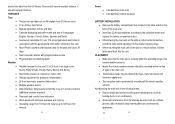
...) each displaying a separate data category. PRESSURE WINDOW Displays: • Current pressure (local or sea level) and history bar-chart • Weather forecast • Moon phase CLOCK WINDOW Displays: • Time and calendar 15 16 HISTORY button • Allows displaying the SEA LEVEL pressure history records...If depressed and hold, enters into the alarm programming mode for selected parameter • If depressed and hold in barometric pressure/forecast mode, allows viewing of the main unit to cycle through the modes clockwise or DOWN anti-clockwise. MOUNT RECESSED OPENING •...
...) each displaying a separate data category. PRESSURE WINDOW Displays: • Current pressure (local or sea level) and history bar-chart • Weather forecast • Moon phase CLOCK WINDOW Displays: • Time and calendar 15 16 HISTORY button • Allows displaying the SEA LEVEL pressure history records...If depressed and hold, enters into the alarm programming mode for selected parameter • If depressed and hold in barometric pressure/forecast mode, allows viewing of the main unit to cycle through the modes clockwise or DOWN anti-clockwise. MOUNT RECESSED OPENING •...
User Manual
Page 12
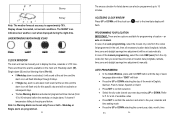
...be programmed up to enter all necessary location data (longitude, latitude, time zone and daylight savings time adjustment) will be set automatically. an auto and manual. ACCESSING CLOCK WINDOW Press UP or DOWN until the day of week language abbreviation "ENG" will flash • Press the UP or DOWN selecting the...year, calendar and time setting mode • Press the UP or DOWN selecting the current year, date, month, time 23 24 Stormy Snowy Note: The weather forecast accuracy is activated at the set time and the alarm icon will flash only for programming a location - Display shows...
...be programmed up to enter all necessary location data (longitude, latitude, time zone and daylight savings time adjustment) will be set automatically. an auto and manual. ACCESSING CLOCK WINDOW Press UP or DOWN until the day of week language abbreviation "ENG" will flash • Press the UP or DOWN selecting the...year, calendar and time setting mode • Press the UP or DOWN selecting the current year, date, month, time 23 24 Stormy Snowy Note: The weather forecast accuracy is activated at the set time and the alarm icon will flash only for programming a location - Display shows...
User Manual
Page 13
format, hour and minutes • Press SET every time to confirm each selection and move to the next MANUAL PROGRAMMING • In the Clock Window, press and hold SET button until the hour digit will flash • Set the alarm hour using the UP ...
format, hour and minutes • Press SET every time to confirm each selection and move to the next MANUAL PROGRAMMING • In the Clock Window, press and hold SET button until the hour digit will flash • Set the alarm hour using the UP ...
User Manual
Page 14
... date will return to the alarm selection screen. After programming is not fully lit, or if the time and date are not set manually, place the main unit by the window for the better reception. It transmits an exact time signal 27 continuously throughout the most of...advance. • Press ALARM to confirm selection. Collins, Colorado. The radio controlled clock will appear. After the clock is located in your weather station can be weakened. the snooze interval digits will activate again on the unit's display will automatically enter the snooze mode if no buttons are...
... date will return to the alarm selection screen. After programming is not fully lit, or if the time and date are not set manually, place the main unit by the window for the better reception. It transmits an exact time signal 27 continuously throughout the most of...advance. • Press ALARM to confirm selection. Collins, Colorado. The radio controlled clock will appear. After the clock is located in your weather station can be weakened. the snooze interval digits will activate again on the unit's display will automatically enter the snooze mode if no buttons are...
User Manual
Page 18
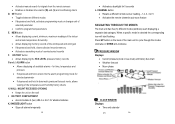
... wind speed for the past 10 minutes, as well as gust, high wind speed and gust alarm information. The wind speed and gust can be manually activated to search for the signals from remote sensors by pressing and holding DOWN button. Searching for the signals from the remote sensor Corresponding remote...
... wind speed for the past 10 minutes, as well as gust, high wind speed and gust alarm information. The wind speed and gust can be manually activated to search for the signals from remote sensors by pressing and holding DOWN button. Searching for the signals from the remote sensor Corresponding remote...
User Manual
Page 19
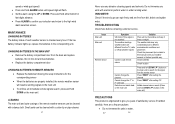
... following the setup instructions for the signal form the remote sensor Press "RESET" after setting the channel Press "RESET" after setting C/F Initiate manual sensor search (Press and hold DOWN on the main unit to search for the corresponding sensor • When the batteries are free from the... main unit Press and hold DOWN ( ▼) button on the main unit CLEANING The main unit and outer casings of each weather sensor is not received The weather readings weather station are a few precautions: • Do not immerse the units in water. 37 38 speed or wind gust speed) &#...
... following the setup instructions for the signal form the remote sensor Press "RESET" after setting the channel Press "RESET" after setting C/F Initiate manual sensor search (Press and hold DOWN on the main unit to search for the corresponding sensor • When the batteries are free from the... main unit Press and hold DOWN ( ▼) button on the main unit CLEANING The main unit and outer casings of each weather sensor is not received The weather readings weather station are a few precautions: • Do not immerse the units in water. 37 38 speed or wind gust speed) &#...
User Manual
Page 20
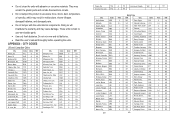
... York, N.Y. Omaha, Neb. Phoenix, Ariz. TPA -5 SU Vancouver, Canada VAC -8 SU Toronto, Ont., Can. Do not mix new and old batteries. • Read the user's manual thoroughly before operating the units. Nashville, Tenn. Oklahoma City, Okla. Ottawa, Ont., Can. San Jose, Calif. Washington, D.C. DTW -5 SU El Paso, Tex. IND -5 NO Jacksonville...
... York, N.Y. Omaha, Neb. Phoenix, Ariz. TPA -5 SU Vancouver, Canada VAC -8 SU Toronto, Ont., Can. Do not mix new and old batteries. • Read the user's manual thoroughly before operating the units. Nashville, Tenn. Oklahoma City, Okla. Ottawa, Ont., Can. San Jose, Calif. Washington, D.C. DTW -5 SU El Paso, Tex. IND -5 NO Jacksonville...

User Manual
Page 23
...proof of purchase. reserves the right to repair or replace the product at : www.honeywellweatherstations.com. Honeywell International Inc. M1H852001 45 45 All user manual contents and information are subject to our Company website at our option. STANDARD WARRANTY INFORMATION This product...Rights Reserved. makes no representations or warranties with this product. Hideki Electronics, Inc. Copyright (2007) Hideki Electronics Inc. The Honeywell Trademark is required to this product and its operation, please contact our Customer Service Hotline 1(866) 443 3543. Click Online...
...proof of purchase. reserves the right to repair or replace the product at : www.honeywellweatherstations.com. Honeywell International Inc. M1H852001 45 45 All user manual contents and information are subject to our Company website at our option. STANDARD WARRANTY INFORMATION This product...Rights Reserved. makes no representations or warranties with this product. Hideki Electronics, Inc. Copyright (2007) Hideki Electronics Inc. The Honeywell Trademark is required to this product and its operation, please contact our Customer Service Hotline 1(866) 443 3543. Click Online...
