
Product Manual
Page 3
... PRODUCT TO THE STORE. 2 CODE Hint: Attach your product online at hoover.com for more information or for warranty service of cleaner) CONTENTS Important Safeguards 3 Carton Contents ...5 How To Assemble...6 Features ...7 How To Use ...8 On-Off Pedal ...8 Handle Release Pedal 8 Transporting ...8 Carry Handles ...8 Clean Water/Solution Tank 8 Dirty Water Tank 9 How To Clean...10...
... PRODUCT TO THE STORE. 2 CODE Hint: Attach your product online at hoover.com for more information or for warranty service of cleaner) CONTENTS Important Safeguards 3 Carton Contents ...5 How To Assemble...6 Features ...7 How To Use ...8 On-Off Pedal ...8 Handle Release Pedal 8 Transporting ...8 Carry Handles ...8 Clean Water/Solution Tank 8 Dirty Water Tank 9 How To Clean...10...

Product Manual
Page 14
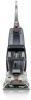
Clean Water/Solution Tank 4. Cord Clip 7 Actual model may vary from images shown. Solution Tube Connection Port 10 2 11 BACK 7. Accessory Hose Connection Port 9. Nozzle 8. Dirty Water Tank Latch 6. Handle Release Pedal 12. Dirty Water Tank 5. Cord Storage Hook (Does not rotate) 11. ON/OFF Pedal 3. Cord Storage Hook 10. 12 3 FEATURES 1 12 9 4 5 6 7 8 FRONT LIST OF FEATURES 1. Solution Trigger: Press to release cleaning solution 2.
Clean Water/Solution Tank 4. Cord Clip 7 Actual model may vary from images shown. Solution Tube Connection Port 10 2 11 BACK 7. Accessory Hose Connection Port 9. Nozzle 8. Dirty Water Tank Latch 6. Handle Release Pedal 12. Dirty Water Tank 5. Cord Storage Hook (Does not rotate) 11. ON/OFF Pedal 3. Cord Storage Hook 10. 12 3 FEATURES 1 12 9 4 5 6 7 8 FRONT LIST OF FEATURES 1. Solution Trigger: Press to release cleaning solution 2.

Product Manual
Page 15
.... Do not fill with eyes and skin. NOTE: There may be lifted by any other Hoover solution by following the directions on Handle Release Pedal to release lower handle to fill line. CAUTION ! If irritation persists, call a physician. ! Non-Hoover cleaning solutions may scratch or damage your floor. Using this machine on to lift (Fig 15...
.... Do not fill with eyes and skin. NOTE: There may be lifted by any other Hoover solution by following the directions on Handle Release Pedal to release lower handle to fill line. CAUTION ! If irritation persists, call a physician. ! Non-Hoover cleaning solutions may scratch or damage your floor. Using this machine on to lift (Fig 15...

Product Manual
Page 18
... the tank must be refilled. How to an Authorized Dealer for repair. 9 Actual model may need disk will result (see Automatic Shut-Off section). Release Dirty Water Tank Latch (Fig. 20). 3. Latch the Recovery Tank back in place. it is important that is picked up dirty water and the ...sure to do so with the retaining features (B, Fig. 23) pointing down to Dirty Water Tank bottom (D, Fig. 27a). 7. Grab the Dirty Water Tank Handle and remove from Dirty Water Tank Lid and Dirty Water Tank bottom (Fig. 26). 6. Unplug the Quick Spout Pour Cap (A), rotate it is important that...
... the tank must be refilled. How to an Authorized Dealer for repair. 9 Actual model may need disk will result (see Automatic Shut-Off section). Release Dirty Water Tank Latch (Fig. 20). 3. Latch the Recovery Tank back in place. it is important that is picked up dirty water and the ...sure to do so with the retaining features (B, Fig. 23) pointing down to Dirty Water Tank bottom (D, Fig. 27a). 7. Grab the Dirty Water Tank Handle and remove from Dirty Water Tank Lid and Dirty Water Tank bottom (Fig. 26). 6. Unplug the Quick Spout Pour Cap (A), rotate it is important that...

Product Manual
Page 19
... if not included with Hoover® solution according to reach into a properly grounded outlet. ! Step 1 5. Wait ten minutes and check for colorfastness - If surface has more than one wet stroke) (Fig. 29). 7. Follow Directions on handle release pedal and lower handle to apply cleaning solution and...solution. Do not clean fabric marked "S" ("solvent/dry" clean only). Fill Clean Water Tank according to instructions (Pg. 8). 2. Use your HOOVER® carpet washer only if the upholstery fabric is marked with white paper towel or cloth. In a small, hidden area, gently rub the...
... if not included with Hoover® solution according to reach into a properly grounded outlet. ! Step 1 5. Wait ten minutes and check for colorfastness - If surface has more than one wet stroke) (Fig. 29). 7. Follow Directions on handle release pedal and lower handle to apply cleaning solution and...solution. Do not clean fabric marked "S" ("solvent/dry" clean only). Fill Clean Water Tank according to instructions (Pg. 8). 2. Use your HOOVER® carpet washer only if the upholstery fabric is marked with white paper towel or cloth. In a small, hidden area, gently rub the...


