
Owners Manual
Page 1
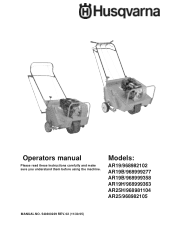
Models: AR19/968982102 AR19B/968999277 AR19B/968999358 AR19H/968999363 AR25H/968981104 AR25/968982105 MANUAL NO. 540200239 REV. 02 (11/30/05) Operators manual Please read these instructions carefully and make sure you understand them before using the machine.
Models: AR19/968982102 AR19B/968999277 AR19B/968999358 AR19H/968999363 AR25H/968981104 AR25/968982105 MANUAL NO. 540200239 REV. 02 (11/30/05) Operators manual Please read these instructions carefully and make sure you understand them before using the machine.
Owners Manual
Page 6
... indicates immediate hazards that may result in the safe operation and proper maintenance of your dealer or Husqvarna if additional information is required. Read it thoroughly before commencing service. • Inspect lawn to .../or major equipment or property damage. Operator's Guide GENERAL INFORMATION This manual will be modified without the manufacturer's prior written authorization. Call your Husqvarna equipment. CAUTION indicates unsafe actions or situations that might present hazard before... lift Model AR19. • Do not lift Model AR25. • Do not run engine in place.
... indicates immediate hazards that may result in the safe operation and proper maintenance of your dealer or Husqvarna if additional information is required. Read it thoroughly before commencing service. • Inspect lawn to .../or major equipment or property damage. Operator's Guide GENERAL INFORMATION This manual will be modified without the manufacturer's prior written authorization. Call your Husqvarna equipment. CAUTION indicates unsafe actions or situations that might present hazard before... lift Model AR19. • Do not lift Model AR25. • Do not run engine in place.

Owners Manual
Page 9
.... Carefully cut open side of lever on handle mounting brackets (see parts manual. 5. Wear eye protection. Carefully cut open side of control rod to rear wheel control handle with handle folded. Mount the handle using the cam lock lever. Model AR25 1. Connect bottom of carton. 3. For further detail on the belt idler...
.... Carefully cut open side of lever on handle mounting brackets (see parts manual. 5. Wear eye protection. Carefully cut open side of control rod to rear wheel control handle with handle folded. Mount the handle using the cam lock lever. Model AR25 1. Connect bottom of carton. 3. For further detail on the belt idler...
Owners Manual
Page 10
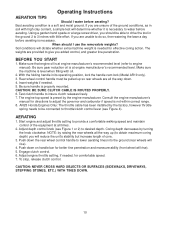
...use the removalole weights? Soil conditions will dictate whether extra machine weight is not within correct range. 8. Consult the engine manufacturer's manual for comfortable speed. 7. If you added control, and greater tine penetration. Make sure the machine is at engine manufacturer's recommended ...refer to insure clutch releases freely. 7. Adjust depth control knob (see Figure 4). Push down on handle bar for effective coring action. AR25 Honda Engines Only: The throttle cable has been installed by raising the rear wheels all times. 2. Adjust engine throttle setting, if ...
...use the removalole weights? Soil conditions will dictate whether extra machine weight is not within correct range. 8. Consult the engine manufacturer's manual for comfortable speed. 7. If you added control, and greater tine penetration. Make sure the machine is at engine manufacturer's recommended ...refer to insure clutch releases freely. 7. Adjust depth control knob (see Figure 4). Push down on handle bar for effective coring action. AR25 Honda Engines Only: The throttle cable has been installed by raising the rear wheels all times. 2. Adjust engine throttle setting, if ...
Owners Manual
Page 14
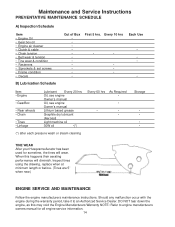
Should any malfunction occur with the engine during the warranty period, take it to engine manufacturers owners manual for sometime, the tines will diminish. Inspect tines using the drawing, replace when at minimum length or before. (Tines are 5" when ... • Engine • GearBox • Rear wheels • Chain • Tines • Linkage Lubricant Every 20 hrs Oil, see engine Owner's manual Oil, see engine Owner's manual Lithium based grease Graphite dry lubricant (Aerosol) Light machine oil 30W oil •(*) Every 60 hrs As Required • • • • ...
Should any malfunction occur with the engine during the warranty period, take it to engine manufacturers owners manual for sometime, the tines will diminish. Inspect tines using the drawing, replace when at minimum length or before. (Tines are 5" when ... • Engine • GearBox • Rear wheels • Chain • Tines • Linkage Lubricant Every 20 hrs Oil, see engine Owner's manual Oil, see engine Owner's manual Lithium based grease Graphite dry lubricant (Aerosol) Light machine oil 30W oil •(*) Every 60 hrs As Required • • • • ...
Owners Manual
Page 18
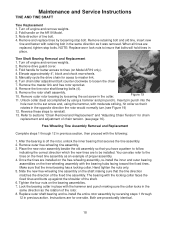
...). Maintenance and Service Instructions TINE AND TINE SHAFT Tine Replacement 1. Remove and replace tines by loosening the set screw and, using a hammer and pin punch). Manually cycle the drive chain for better access to the set screw in previous action. Reverse these steps to master link. 6. Free-Wheeling Tine Assembly Removal...
...). Maintenance and Service Instructions TINE AND TINE SHAFT Tine Replacement 1. Remove and replace tines by loosening the set screw and, using a hammer and pin punch). Manually cycle the drive chain for better access to the set screw in previous action. Reverse these steps to master link. 6. Free-Wheeling Tine Assembly Removal...

