

Owners Manual
Page 2
...Assembly Instructions ...9 Section 2 · Operating Instructions Page Aeration Tips...10 Before You Start...10 Aerating ...10 Throttle Adjustment (Model AR25 Honda engine only 11 Rear Wheel Adjustment ...12 Turning and Maneuvering...12 Operating on Hills ...12 Section 3 · Maintenance ...and Service Instructions Page Transporting the Husqvarna Aerator 13 Cleaning and Washing ...13 Two-Minute Warning ...13 Storage ...13 Preventative Maintenance Schedule Inspection Schedule ...14 Lubrication...
...Assembly Instructions ...9 Section 2 · Operating Instructions Page Aeration Tips...10 Before You Start...10 Aerating ...10 Throttle Adjustment (Model AR25 Honda engine only 11 Rear Wheel Adjustment ...12 Turning and Maneuvering...12 Operating on Hills ...12 Section 3 · Maintenance ...and Service Instructions Page Transporting the Husqvarna Aerator 13 Cleaning and Washing ...13 Two-Minute Warning ...13 Storage ...13 Preventative Maintenance Schedule Inspection Schedule ...14 Lubrication...
Owners Manual
Page 6
... and moving techniques when loading/unloading and moving or rotating parts. • Do not lift Model AR19. • Do not lift Model AR25. • Do not run engine in an unventilated space. • Do not smoke or allow open flames or sparks near unit, and... any surface other than lawn aeration. 6 Operator's Guide GENERAL INFORMATION This manual will be void if changes are in place. Call your Husqvarna equipment. This equipment should not be modified without the manufacturer's prior written authorization. Read it thoroughly before commencing service. • Inspect lawn...
... and moving techniques when loading/unloading and moving or rotating parts. • Do not lift Model AR19. • Do not lift Model AR25. • Do not run engine in an unventilated space. • Do not smoke or allow open flames or sparks near unit, and... any surface other than lawn aeration. 6 Operator's Guide GENERAL INFORMATION This manual will be void if changes are in place. Call your Husqvarna equipment. This equipment should not be modified without the manufacturer's prior written authorization. Read it thoroughly before commencing service. • Inspect lawn...
Owners Manual
Page 13
TRANSPORTING THE HUSQVARNA AERATOR MODEL AR19 and AR25 The removable weights are designed for no more than across a hill. Use engine power to Lubrication Schedule. 5. Maintenance and Service Instructions CLEANING AND WASHING Regular ...
TRANSPORTING THE HUSQVARNA AERATOR MODEL AR19 and AR25 The removable weights are designed for no more than across a hill. Use engine power to Lubrication Schedule. 5. Maintenance and Service Instructions CLEANING AND WASHING Regular ...
Owners Manual
Page 15
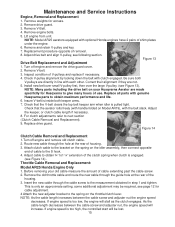
... 6. Lift engine from unit. Remove and retain V-pulley and key. 7. Check V-pulley alignment by looking down the belt with genuine Husqvarna parts to the measurement obtained in line with each other. Install new belt over small V-pulley first, then over the large V-pulley. ... Adjust the keeper, or clutch cable length if necessary. 8. Attach clutch cable to the S hook. 4. Throttle Cable Removal and Replacement: Model AR25 Honda Engine Only 1. Inspect condition of housing. 3. For clutch adjustments refer to give many hours of cable extending past the cable screw. 2. Check...
... 6. Lift engine from unit. Remove and retain V-pulley and key. 7. Check V-pulley alignment by looking down the belt with genuine Husqvarna parts to the measurement obtained in line with each other. Install new belt over small V-pulley first, then over the large V-pulley. ... Adjust the keeper, or clutch cable length if necessary. 8. Attach clutch cable to the S hook. 4. Throttle Cable Removal and Replacement: Model AR25 Honda Engine Only 1. Inspect condition of housing. 3. For clutch adjustments refer to give many hours of cable extending past the cable screw. 2. Check...
Owners Manual
Page 16
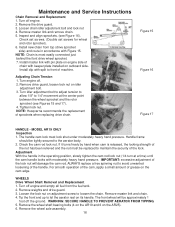
... set screws. (Double set screws for wheel and rotor sprocket). 6. Turn engine off the ground. NOTE: Husqvarna recommends the replacement of the handle. Remove master link and chain. 4. Remove drive guard, loosen lock nut on the AR25). 6. Remove the wheel shaft bearing bolts (4 on the AR19 and 6 on idler adjustment bolt. 3. Maintenance...
... set screws. (Double set screws for wheel and rotor sprocket). 6. Turn engine off the ground. NOTE: Husqvarna recommends the replacement of the handle. Remove master link and chain. 4. Remove drive guard, loosen lock nut on the AR25). 6. Remove the wheel shaft bearing bolts (4 on the AR19 and 6 on idler adjustment bolt. 3. Maintenance...


